Workstation Agent installation with Microsoft System Center Configuration Manager (SCCM)
Scope
OpenLM Supports the installation of the Workstation Agent with SCCM. Note that SCCM installation is presented in that document as an example and requires additional fine-tuning on the part of your local expert/system administrator.
The following steps describe the installation of the Workstation Agent. Instructions assume that there is already a working SCCM installation in your environment as well as on the workstations where Workstation Agent will be deployed. It is advisable to seek IT department assistance with SCCM-related tasks. For additional information about SCCM and support of its installation and use beyond the instructions here, please consult with Microsoft Support (System Center Configuration Manager).
Installation
Installation requires two stages:
●Creating an installation package for the application
●Deploying application on target workstations
Creating installation package
- Locate the Workstation Agent installer (OpenLM_Agent_Installer_###.msi) on the SCCM server or on a network share to be sure it is accessible by that server.
- Open the SCCM Configuration Management Console on the SCCM server.
- Navigate to the Applications tab in the Software Library menu to the left of the screen (Software Library > Overview > Application Management > Applications).
- [Optional] A folder can be created under Applications to help manage the applications of the organization. This may be helpful in cases where it is an advantage to create applications for a variety of situations.
To create a folder, simply right-click on Applications and choose "Folder" from the popup list. Enter the Folder Name in the Configurations Manager screen and click [OK]. - Right-click on Applications and choose "Create Application" from the pop-up menu.
An "Application Wizard" dialog will open, displaying general information (see Figure 20). [NOTE: If an application needs to be added to a folder, which was created by Step #4, You'll simply need to right-click on the folder name in the menu, instead of clicking on Applications.]
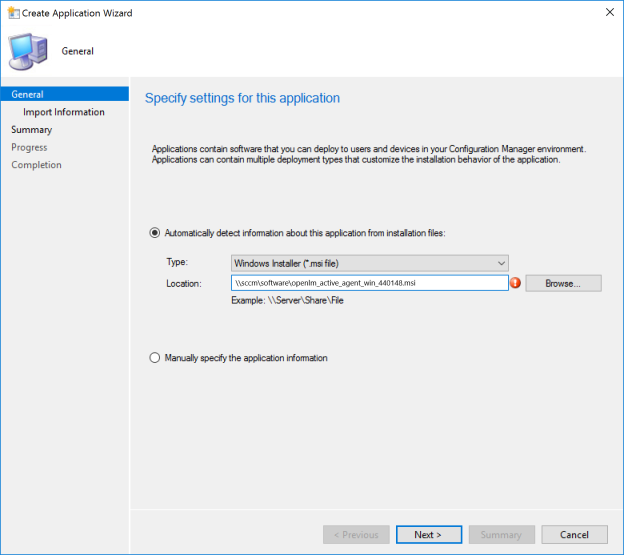
Figure 20: Create an Application Wizard displaying the General panel. - Select "Automatically detect information about this application from the installation files" by clicking the radio button. This will use information from the installation files to automate the installation process as much as possible.
- Choose an installation file type, then click the 'down' arrow on the Type drop-down list and choose "Window Installer (*.msi)" by clicking on it.
- Click on the [Browse] button to locate the MSI installation file, which was identified on Step #1.
- Click [Next] to advance to the 'View Imported Information' panel, which displays information automatically captured from the installer package.
- Click [Next] to advance to the 'Specify information about this application' panel (see Figure 21).
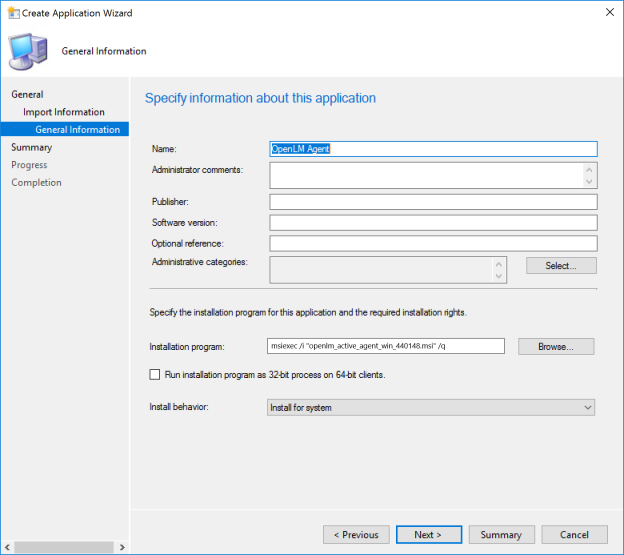
Figure 21: "Specify information about this application" screen. - Input all relevant and desired details into the upper portion of the screen.
These fields are free text which can help identify and sort applications during searches. The fields include Name, Administrative Comments, Manufacturer, Version, Optional Reference and Administrative Categories. - Modify the Installation program field as required and use the [Browse] button to locate the installation file in question. This field can include options you would normally use in silent installation from the command line. See the "Installation Parameters, Options, and Descriptions." section in this document.
- In the lower half of the panel, select the desired installation behavior from the "install behavior" drop-down menu.
●Install per user — Installs using rights taken from the current user.●Install per system — Installs using SMS Agent Host service rights (Local System account).●Install per system if the resource is a device; otherwise, install per user — If the application is targeted for a collection of devices, use install per system.If the application is targeted as a collection of users or user groups, use install per user. - Click the [Next] button to advance to the Summary screen.
- Review information compiled for application. If anything needs to be changed use the [Previous] button to navigate back through wizard screens; return to the Summary screen after completing changes.
- When compiled information has been reviewed, click the [Next] button on the Summary screen. It will save the changes and invoke the progress screen (see Figure 22) while the application is created. When the process is completed, the completion screen will appear along with a review of the process (see Figure 23).
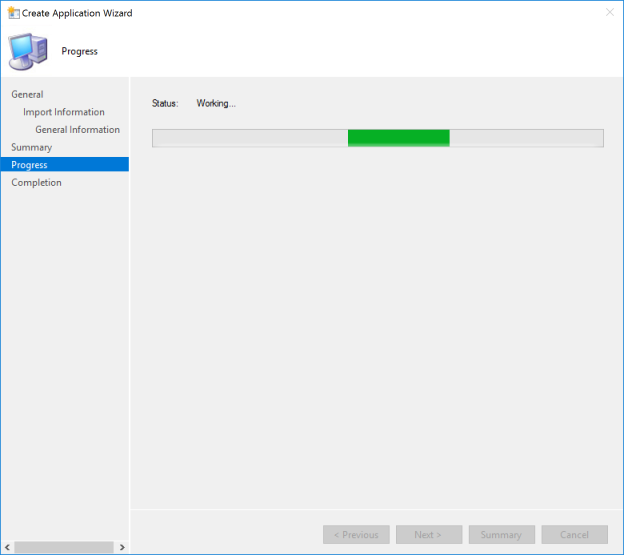
Figure 22: "Create Application Wizard" progress screen.
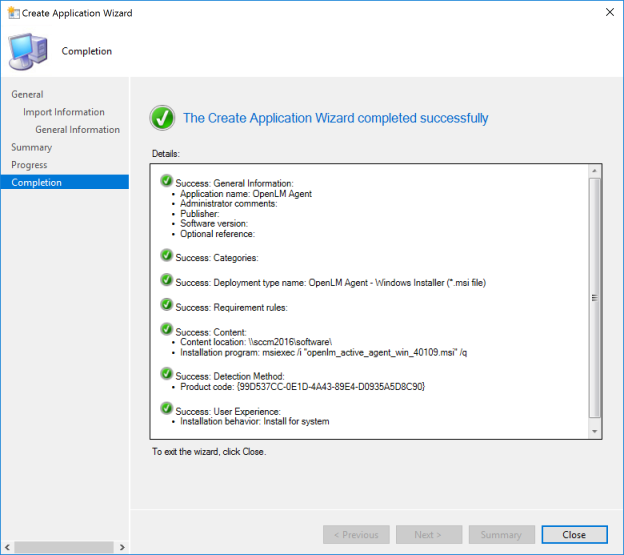
Figure 23: "Create Application Wizard" success screen. - Click on [Close] to close the Completion screen and exit the wizard.
At this point, the creation of the installation package is complete. It will be available in the SCCM console listing under Software Library > Overview > Application Management > Applications.
Additional applications may be created to handle different installation criteria by repeating Step #4 to Step #17. Additional parameters and details may be added by right-clicking the application in the console and choosing "Properties."
Deploying Applications to target workstations
- Open the SCCM console and locate the application in the listing under Software Library > Overview > Application Management > Applications.
- Right-click on the Workstation Agent application and select "Deploy" from the popup menu that appears. The "Deploy Software" Wizard will open along with a General screen (panel titled "Specify General Information for this Deployment"). The 'Software' field will be pre-populated with the application name (see Figure 24).
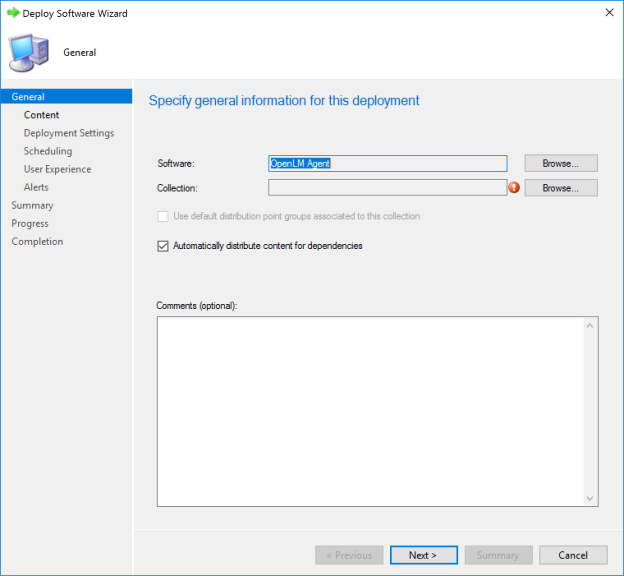
Figure 24: "Deploy Software Wizard" - specify general information for this deployment screen. - Click the [Browse] button to the right of the 'Collection' field - the "Select Collections" screen will appear. By default User collections screen is opened (Figure 25).
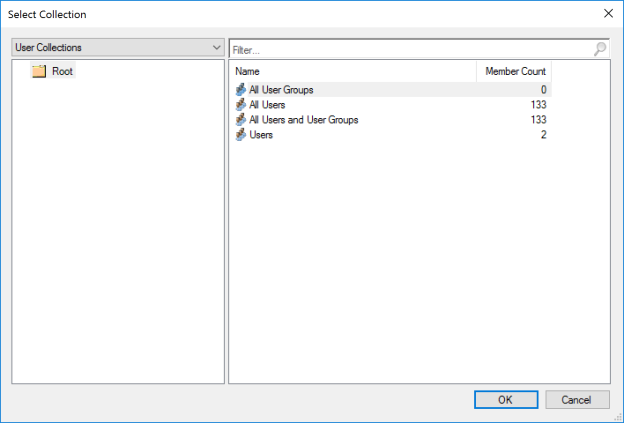
Figure 25: "Users Collections" panel on Select Collection screen. - Use drop-down list in the upper left part of the Select Collections screen to navigate to the desired User Collections, then choose from any available options which appear in the right part of the screen.
- [Optional] Use the drop-down list in the upper left part of the "Select Collections" screen. Then navigate to "Device Collections" and choose from the available options that appear in the right part of the screen.
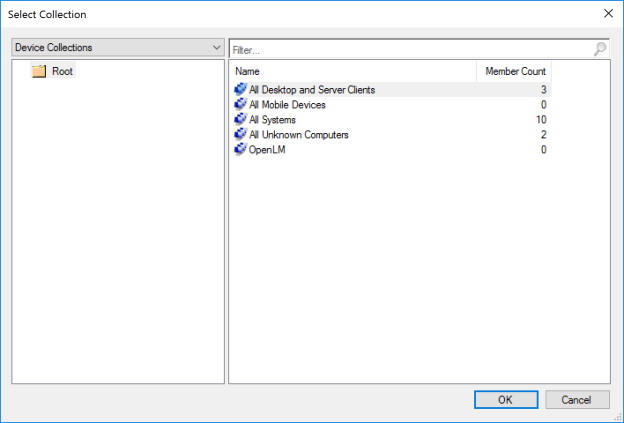
Figure 25: "Device Collections" panel on the Select Collection screen. - Click [OK] to accept changes and return to the General screen.
- Click [Next] to advance to the "Content" screen (panel titled "Specify Content Destination").
- Click [ADD] to open a popup menu and choose "Distribution Points".
Add distribution points by marking the checkboxes on the Add Distribution Points screen. - Click [OK] to return to the Content screen.
- Click [Next] to advance to the "Deployment Settings" screen (panel titled "Specify Settings to Control How this Software is Deployed").
- Default values for "Action and Purpose" are "Install" and "Available," respectively. The "Available" value needs to be changed to "Required", as these options are the suggested ones for installing the Workstation Agent.
Click [Next] to advance to the "Scheduling" screen (panel title "Specify Schedule for this Deployment). - [Optional] Use the options on the "Scheduling" screen to specify the time of installation. The default value of "As soon as possible after the available time" will launch installation as soon as possible following completion of the deployment setup.
- Click [Next] to advance to the "User Experience" screen (panel titled "Specify the user experience for the installation of the software on the selected devices").
- [Optional] Adjust the options as desired. The default for "User Notification" is "Display in Software Center and show all notifications." "Commit changes at the deadline or during the maintenance window (requires restart)" is also checked by default.
- Click [Next] to advance to the "Alert" screen (panel title "Specify Configuration Manager and Operation Manager alert options").
- [Optional] Adjust the options as desired. None of the options are enabled by default.
- Click [Next] to advance to the "Summary" screen (panel title "Confirm settings for the new deployment").
- Review the information compiled for deployment. If anything needs to be changed, use the [Previous] button to navigate back through wizard screens. Return to the Summary screen after completing any changes.
- Click the [Next] button on the "Summary" screen to accept changes and initiate the creation of deployment, which will make a progress screen appear.
When the process is complete, a Completion screen will be displayed along with a review of the completed process. - Click [Close] to exit the wizard to return to the console screen.
- [Optional] Locate deployment by clicking the Deployments tab at the bottom of the SCCM console screen with the selected application.
Upon successful deployment, Workstation Agent appears in the "Software Center" on the client and is installed automatically.