OpenLM ServiceNOW Adapter installation and configuration
The following document describes the process for installing the OpenLM ServiceNow Adapter. The External Platform Service configuration is also covered in order to make the Adapter establish a successful connection between OpenLM SLM and ServiceNow.
Requirements
The following components are required for the OpenLM ServiceNow Adapter to work:
-
The OpenLM ServiceNow application in your ServiceNow instance
-
A working installation of OpenLM SLM v21 or higher or an OpenLM SLMC account (for SLMC account scroll to section #4)
-
An OpenLM SLM license that has support for External Platforms. To verify, go to EasyAdmin Start → Administration → OpenLM License. Look for the External_Platforms flag:
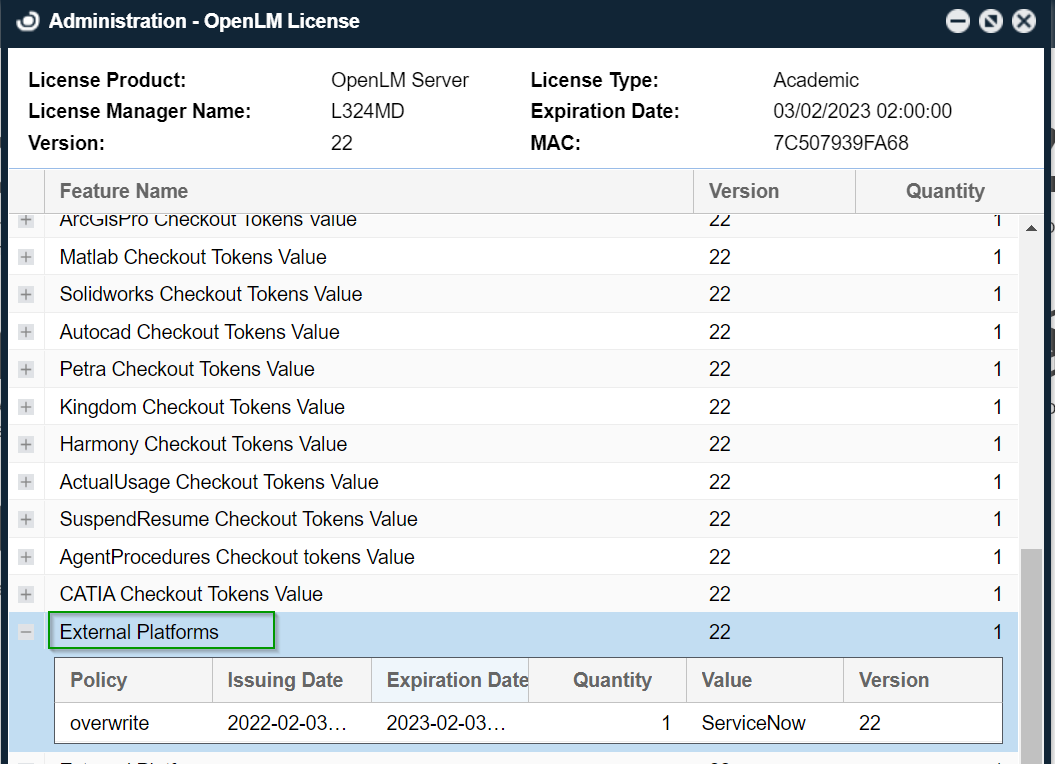
In case your license is missing support for External Platforms, please contact sales@openlm.com for assistance.
Installing the OpenLM ServiceNow Adapter
The steps for installing the ServiceNow Adapter are as follows:
-
Obtain the latest External Platforms Service & ServiceNow Adapter installer file (OpenLM_ServiceNow_Adapter_Installer_#.#.###.msi) from our Downloads page
-
Double-click the installer file to run it.
-
Check the "I agree to the license terms and conditions" box.
-
Click Next.
-
If you want to install the External Platforms & ServiceNow Adapter to a different location, click Browse and navigate to the destination folder of your choosing.
-
Click Next to begin the installation. Please note that this step may take up to several minutes depending on your hardware specifications.
-
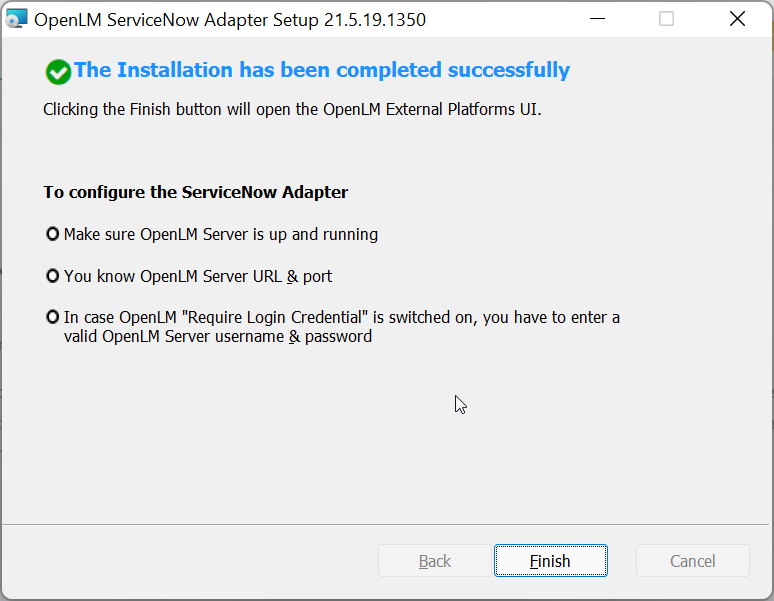
Once the installer has finished, click Finish to close the window. This will open the External Platforms UI configuration screen which is described in the section below.
Configuring the External Platforms Service with ServiceNow
With Identity Service
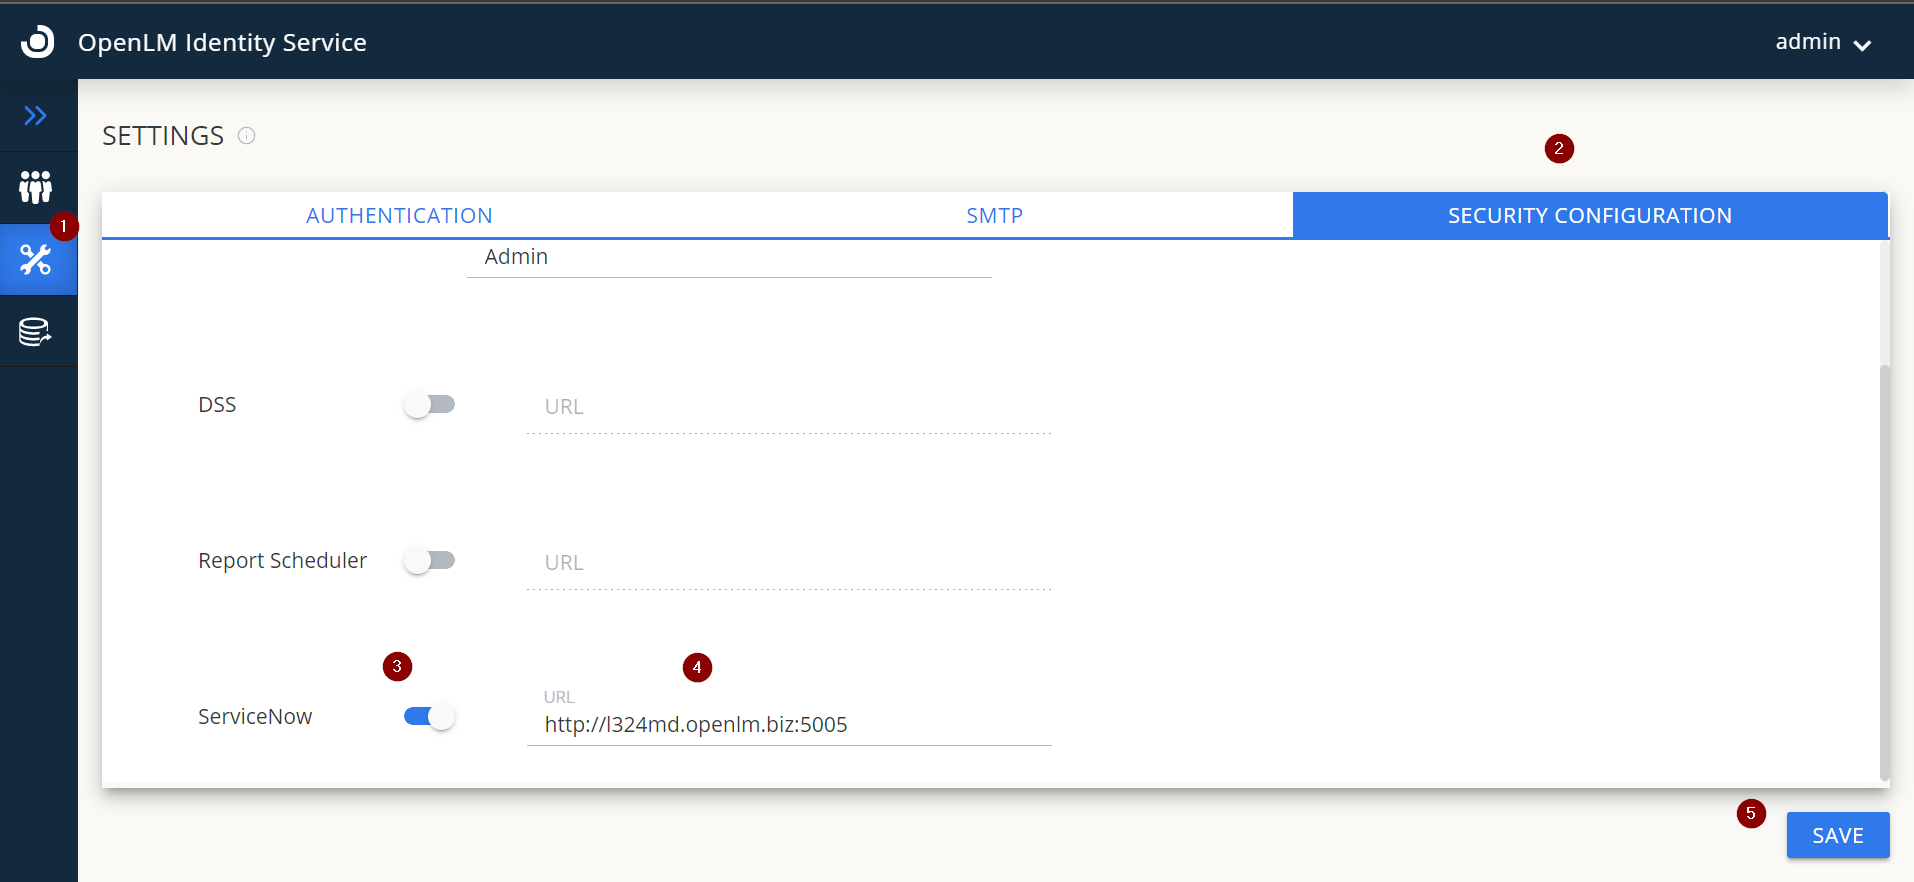
First, the External Platforms Service must be connected to the Identity Service in order for the ServiceNow integration to work. To do so, login to the Identity Service, go to the Settings tab→Security Configuration→ toggle on the ServiceNow button and provide its URL. Click Save. Restart the ServiceNow Service.
Without Identity Service
The next step is to open the External Platform configuration screen.
The External Platforms configuration screen can be opened in a number of ways:
- Automatically, at the successful conclusion of the ServiceNow Adapter installation after the user has clicked the "Finish" button.
- Through the shortcut found in Start Menu → OpenLM → OpenLM External Platform Configuration
- By accessing the OpenLM SLM address dedicated to the External Platforms Service in your browser (by default: http://fqdn:5005/)
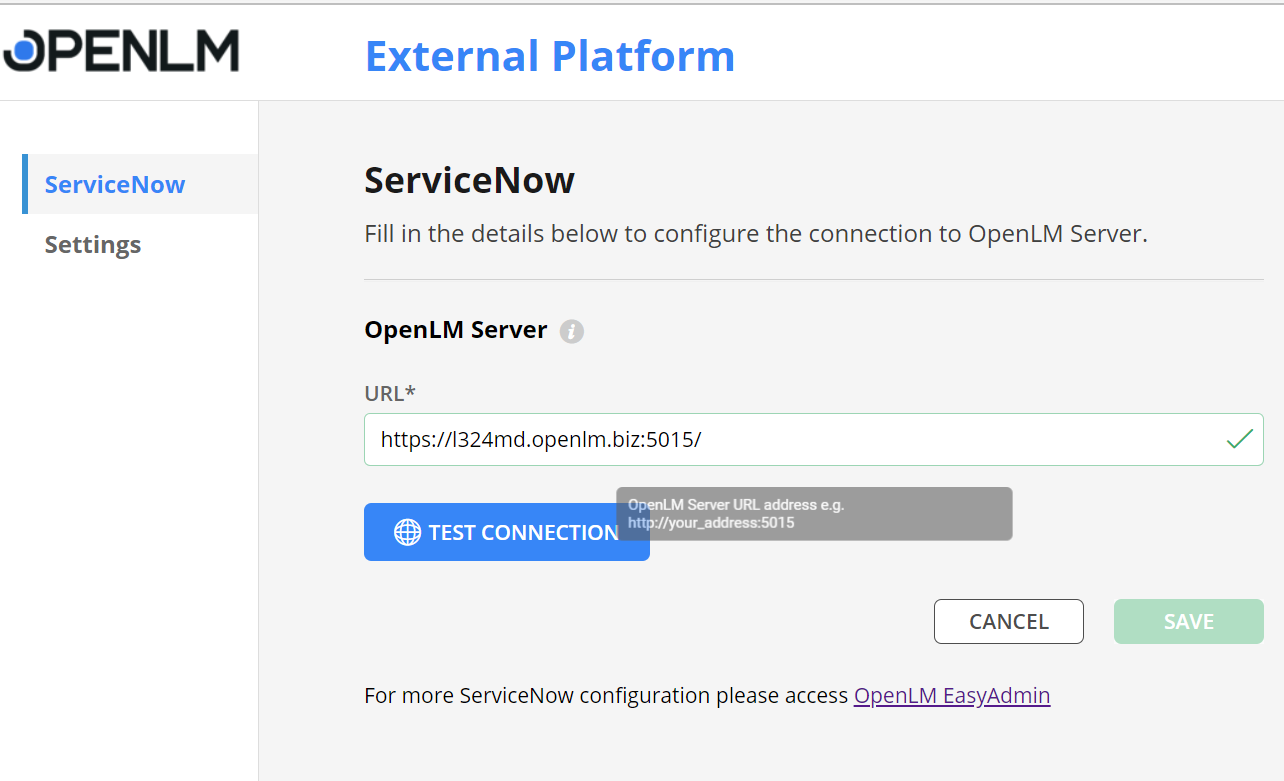
The purpose of this screen is to configure and test the connection between the External Platform Service and your installation of OpenLM SLM. The fields are as follows:
- URL - Enter the path to your OpenLM SLM with either http:// or https:// and the listening port (default 5015). E.g. `http://localhost:5015 Once you have filled in the required field, click on Test Connection to verify that a connection can be established. If successful, click Save. Please note that you will be able to advance the wizard only if a successful connection can be established. In case of success, you should see the following message:
- The correct port has been specified
- The SLM URL is spelled correctly
- The OpenLM SLM is up and running
- All database requirements from section 1 ("Requirements") of this document have been met
- There are no firewall roles, security policies or other applications preventing communication on that port or between your machine and the OpenLM SLM
Using the External Platform Setup Wizard
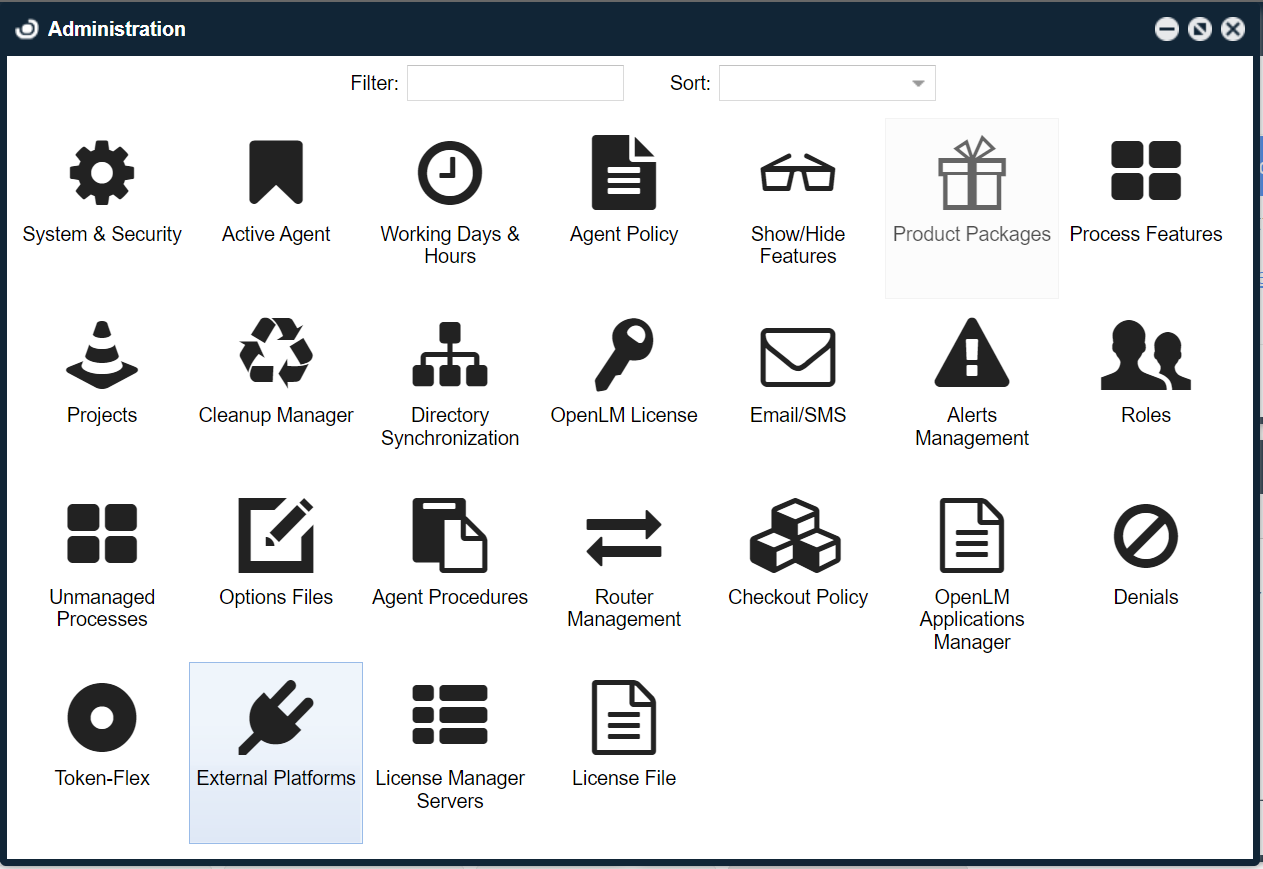
To finalize the ServiceNow integration with OpenLM, you must launch the External Platforms Setup Wizard from the EasyAdmin interface.
To do so:
-
Go to EasyAdmin Start → Administration → click on External Platforms → ServiceNow.
-
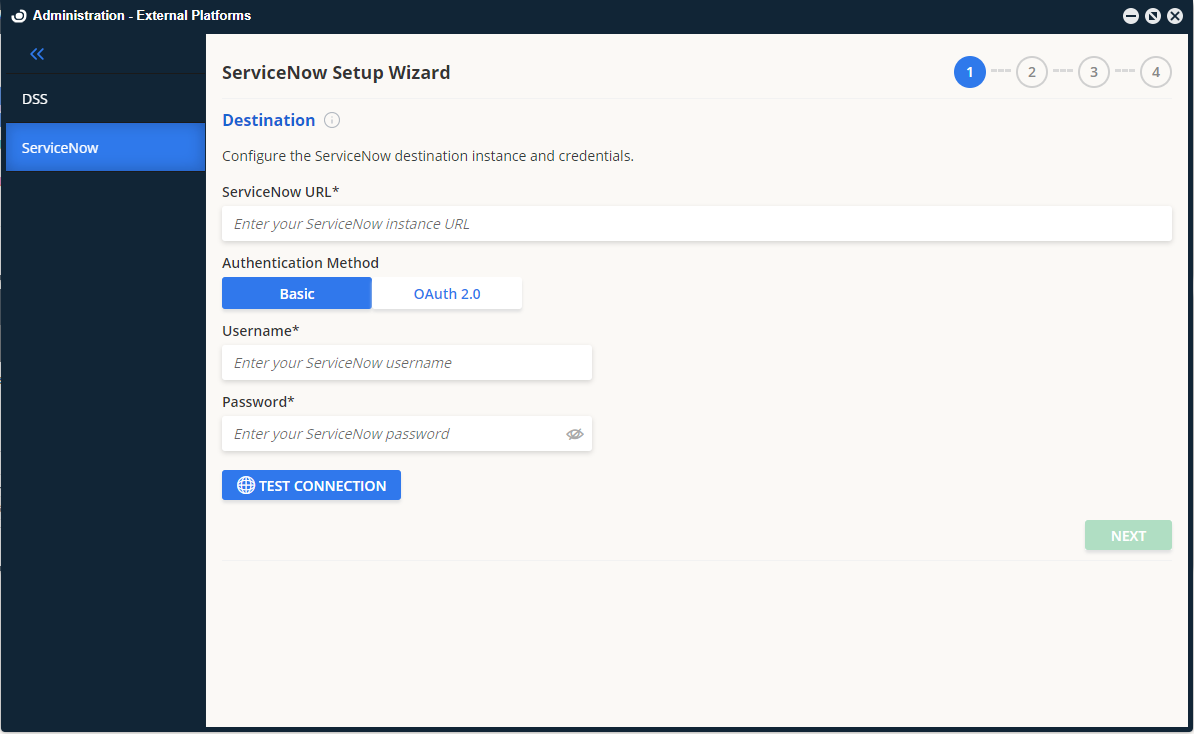
The ServiceNow Setup Wizard will open.
-
Fill in the required fields as follows:
Basic Authentication****ServiceNow URL - The path to your ServiceNow instance. For example, https://abc123.service-now.com**Username** - Your ServiceNow account username.Password - Your ServiceNow account password.OAuth 2.0ServiceNow URL - The path to your ServiceNow instance. For example, https://abc123.service-now.com
Username - Your ServiceNow account username.
Password - Your ServiceNow account password.
Client ID
Client Secret
-
Click Test Connection. Please note that you will be able to advance to the next screen only if the test is successful, as indicated by this notice in the UI:
-
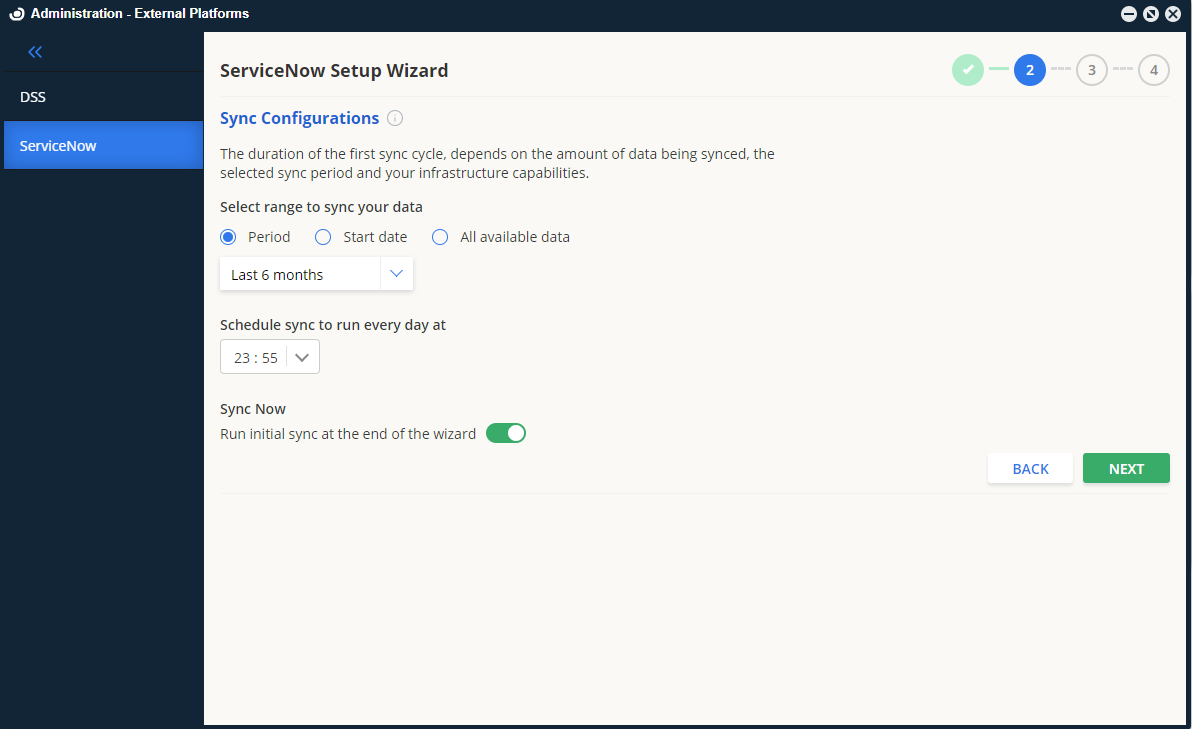
Click Next to advance to the Sync Configurations screen.
This screen holds the options for configuring the synchronization of OpenLM with ServiceNow.Select range to sync your data - You can pick the time range for the sync. Three options are available:- Period - this will synchronize all the data within the selected time period
- Start date - this will synchronize all the data beginning with the selected start date up until today
- All available data - this will synchronize all data available from the OpenLM database
Schedule sync to run every day at - Specify the time you would like the synchronization of OpenLM with ServiceNow to start at.
Sync Now (Run initial sync at the end of this wizard) - turning this toggle on will start the initial synchronization as soon as you have completed all the steps and finished the Wizard configuration. Leaving it off means that the sync will begin at the scheduled sync time above.
-
Click Next.
-
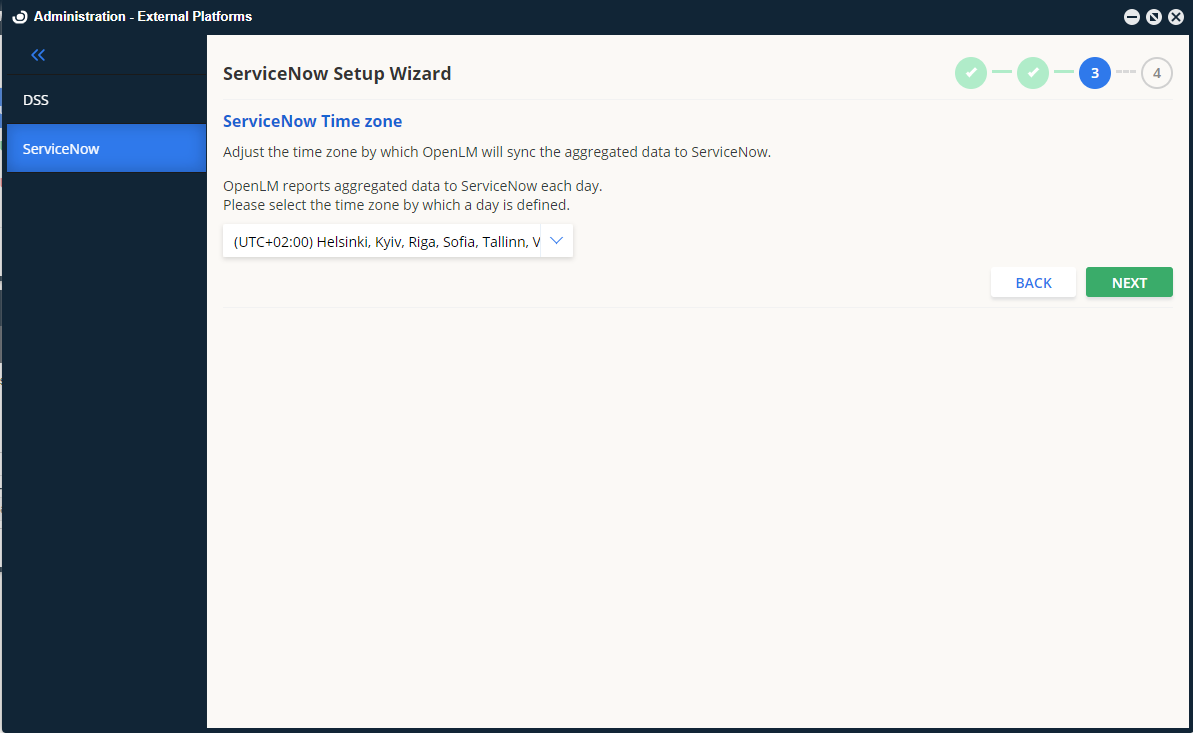
On the ServiceNow Time Zone screen, select the time zone by which OpenLM will synchronize the aggregated data it sends to ServiceNow. Since synchronization once per day, you must specify the time zone by which OpenLM will adjust the time calculations.
-
Click Next to advance to the Notifications configuration part of the Wizard.
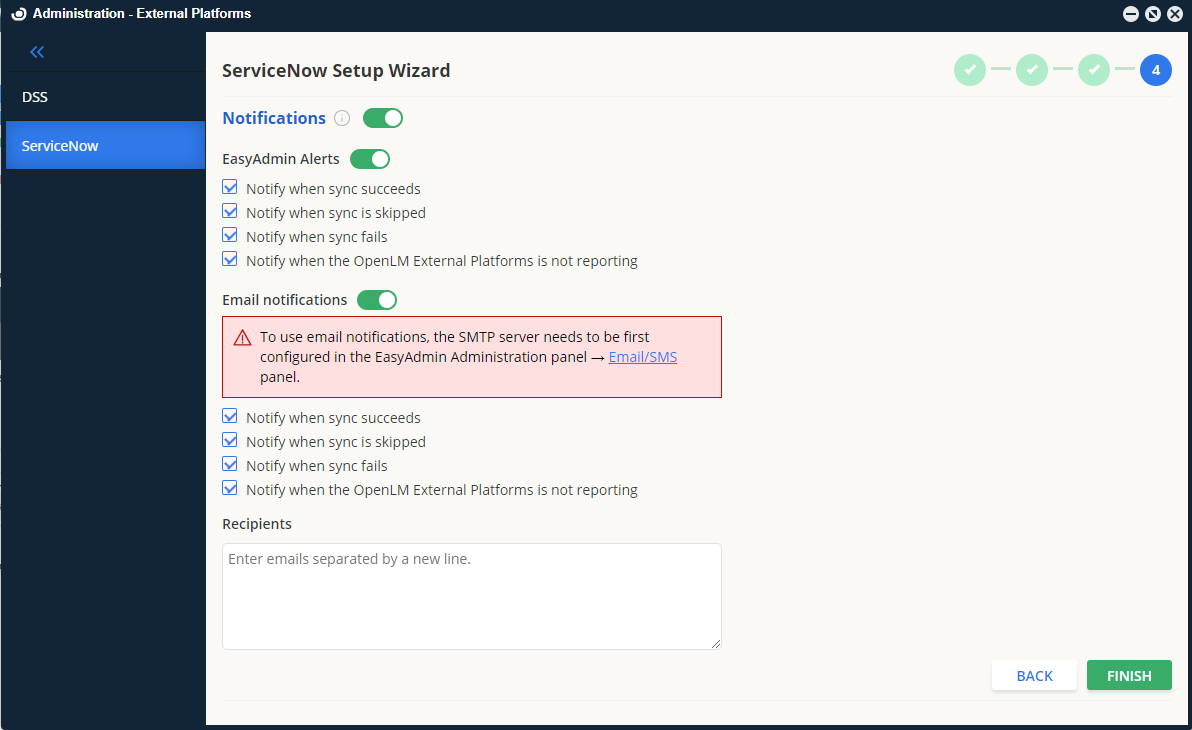
-
Configure the options on this screen as follows:
Notifications (on/off) - this is a global switch that enables or disables all sync notifications.EasyAdmin Alerts (on/off) - this switch enables or disables notifications in the EasyAdmin user interface.Email (on/off) - this switch enables or disables email notifications.Notifications to both EasyAdmin and email can be sent whenever a sync has either:- Succeeded
- Skipped
- Failed
- When the External Platform service is not reporting back to the OpenLM SLM
Recipients - if the email switch has been turned on, enter the email(s) from which you want to receive the notifications. For multiple emails, each email must be placed on its line. Note: The SMTP server must be configured for this setting.
-
Click Finish to commit the new ServiceNow configuration and close the Wizard.
-
In the ServiceNow interface, simply add a scoped application user that requires the following roles:
X_oplm_openlm_data.integration_user
sam_eng_app_integrator -
In the ServiceNow interface, go to your "Plugins" section and search for "OpenLM". After finding it click on Install to install the OpenLM API on the ServiceNow side.
At this point configuration on the External Platforms side is complete. To finish the configuration, follow the steps in section 5 below.
Post-installation steps for the App Store application
Only for customers who have Domain Separation activated on their instances
In the ServiceNow navigation panel, navigate to Scripts - Background module and open this in a new tab. Copy the script from OpenLM Integration: Domain Field Fix Script and paste it in the Run Script field in Scripts - Background tab
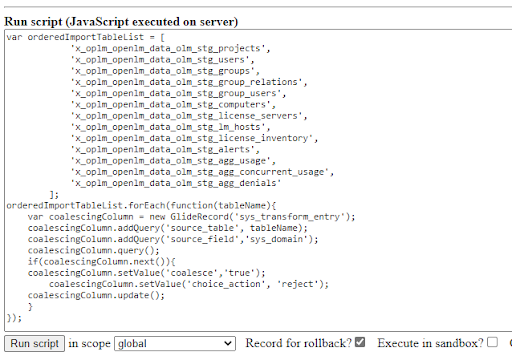
Set the scope to global and click on Run script to execute.
For the customers which do not want to execute this script, they can go the Transform Map corresponding to each of the staging table and activate coalesce value and set choice action to reject on sys_domain field by following these steps:
-
Navigate to the Transform Maps module which is present under the Administration subsection of System Import Sets
-
Click on the Filter icon and add Application is OpenLM Data Integration. Click on the Run button
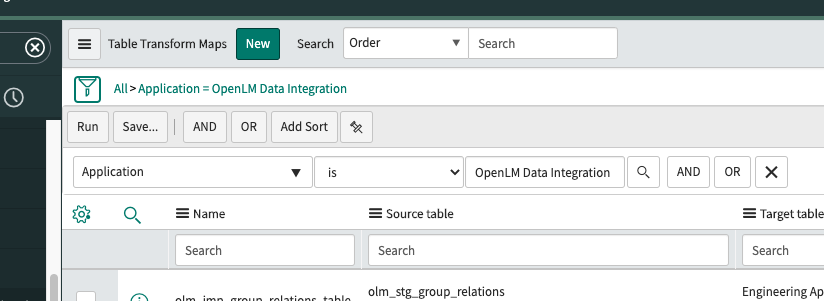
- Open each of the record and update the sys_domain mapping under Field Maps section to true and choice action to reject and click on the Update button when done.
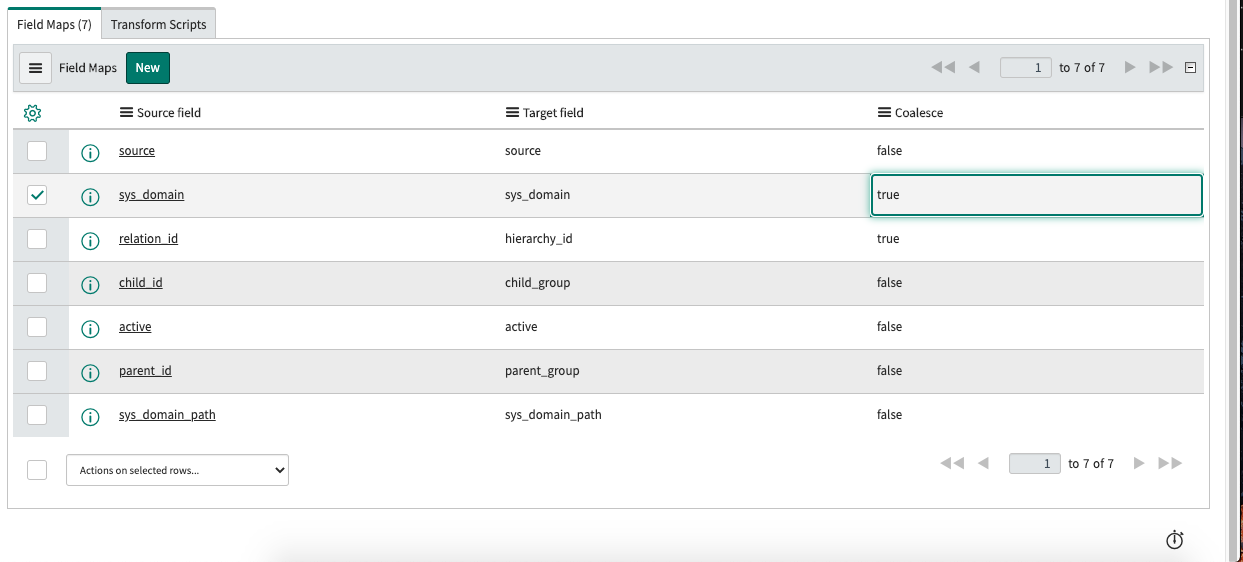
The following records must be updated:
- olm_imp_group_relations_table
- olm_imp_agg_usage
- olm_imp_users_table
- olm_imp_lm_hosts
- olm_imp_groups_table
- olm_imp_computers
- olm_imp_license_servers
- olm_imp_projects_table
- olm_imp_agg_concurrent_usage
- olm_imp_license_inventory
- olm_imp_group_users_table
- olm_imp_agg_denials
- olm_imp_alerts
Information note: When creating an integration user in a domain-separated environment, the integration user should be assigned to the appropriate domain and should not be part of a global domain as the data gets inserted into the domain the integration user is part of. Assigning a wrong/global domain to a user leads to the data being inserted in the wrong domain and can be visible to all users.