OpenLM Project usage
OpenLM has a feature to record license usage information and group it by different projects. This allows the allocation of licenses as needed by different organizational projects and it can also serve as a means to effectively monitor license usage costs by project.
Project usage reporting
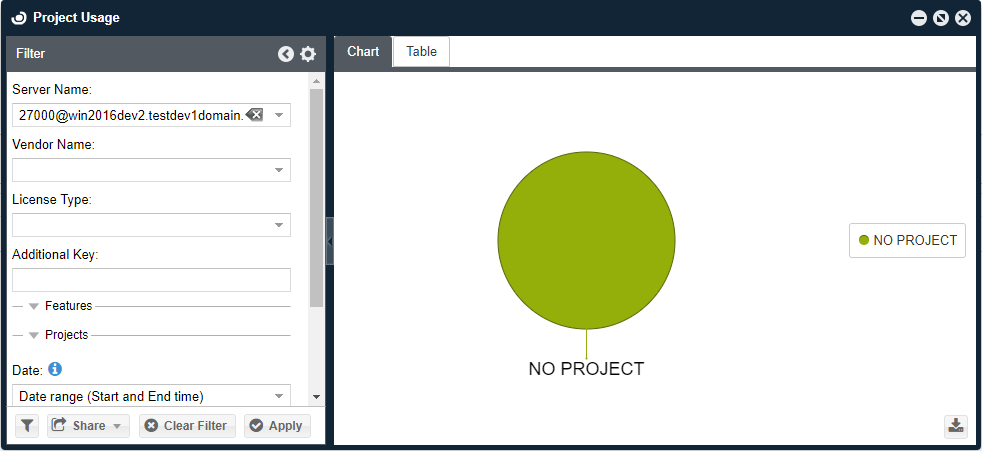
The Project Usage window is available through the EasyAdmin interface by clicking EasyAdmin User Interface Start → Reports → Project Usage.
Set the filtering options on the left-hand side of the screen then click Apply to run the usage query. It is also possible to view the report in chart format (by clicking the Chart tab) or as a CSV file (by clicking the download icon in the bottom right of the window).
Prerequisites
-
Grouping license usage by the project is a feature that requires additional licensing. If you don't see the Projects_Billing tag in the OpenLM License window, please contact sales@openlm.com.
-
When the OpenLM SLM uses authentication, project configuration requires administrative privileges.
-
OpenLM Workstation Agent must be installed on the end-users' workstation in order to be able to select the active project.
Projects Settings
The Projects Settings screen defines the policy of the Project usage monitoring capability. In order to open it, go to EasyAdmin Start → Administration → Projects. The Projects window appears:
Administration - Projects
Log projects information
Check the Log projects information box to start grouping license usage information according to which project it has been allocated to.
Minimal usage duration for project
This setting defines the shortest duration for logging purposes. Shorter periods would be merged together to form significant usage periods. For example, if the minimal duration is set to 5 minutes and a user has had an application open for a total of only 3 minutes, this usage period will not be added to the current session but merged with the following session instead.
Workstation Agent's behavior settings
These settings define what the end-users will see on their workstations if they work on more than one project for their organization.
The default method for project assignment is by the project name, as they are stored in the OpenLM database. This method is enabled with the "Use OpenLM Projects" radio button, as opposed to the environment variables method, which is discussed further below.
When end-users are assigned to only one project in EasyAdmin, OpenLM will log their license usage and assign it to that project without any additional action required on the end-users' part.
When end-users work on more than one project, OpenLM Workstation Agent will present a dialog box on their screen prompting them to select the current project.
Hide projects option from menu
End-users may select the active project in one of two ways:
-
By right-clicking the Agent icon in the tray and selecting "Set Active Project".
-
Waiting for the project selection pop-up box to appear and selecting it from there.
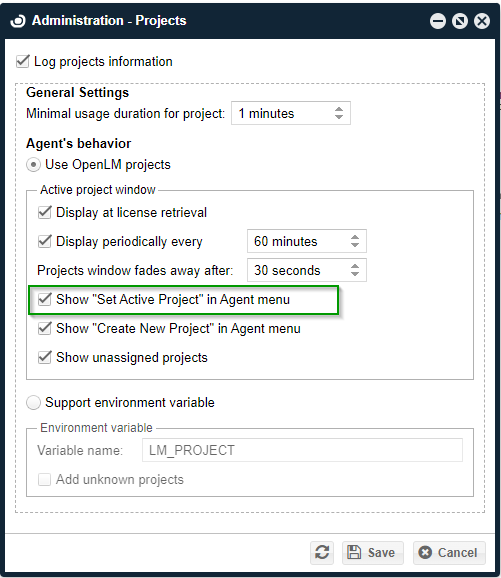
The difference between the two is that the "Set Active Project" menu includes all the projects listed in OpenLM, whereas the pop-up menu contains only the project to which the user is assigned. This checkbox hides the Set Active Project entry in the Agent's right-click menu. The user will still be able to select a project according to the project selection pop-up menu.
Projects window fades away after
OpenLM enables users to ignore the project dialog box by having it fade away after a predefined number of seconds.
Allowcreation of projects in Workstation Agent
The OpenLM project management module facilitates project creation via the OpenLM Workstation Agent. Check the "Create New Project" box to enable this option, thus adding a new menu item in the OpenLM Agent interface (see image below).
When an end-user selects this option, the "Create New Project" window opens. End-users can then create new projects and assign themselves to them.
Editing these newly created projects is possible in EasyAdmin only. The origin of the project will be apparent in the EasyAdmin Projects list window (See "Editing existing projects" below).
Show unassigned projects
By default, users can only see projects they have been assigned to in the Workstation Agent → Set Active Project menu option. Checking this box will produce a list that contains all enabled projects in the system and the user will be able to select any project from this list.
Support environment variable
The support environment variable option is a backward-compatibility option. Choosing this will override the default OpenLM project management option. OpenLM Workstation Agent will read the predefined Windows variable (LM_PROJECT by default) and use its value as the project towards which it will assign the license usage for the user session.
This variable must be set separately for each workstation, so there is no option of overriding its value between users. Users will also not see the project selection pop-up like when the regular OpenLM projects functionality is used.
Setting environment variable can be done manually by the user:
- Press "Windows + R" to open the Run window, type "sysdm.cpl" in the text box and press Enter to open System Properties.
- Go to the "Advanced" tab and select "Environment Variables".
- The Environment Variables panel appears on the screen. You can observe two types of variables and set them according to your needs.
Also, this can be achieved by the system administrator in bulk through a CRM, ERP or any other remote management solution.
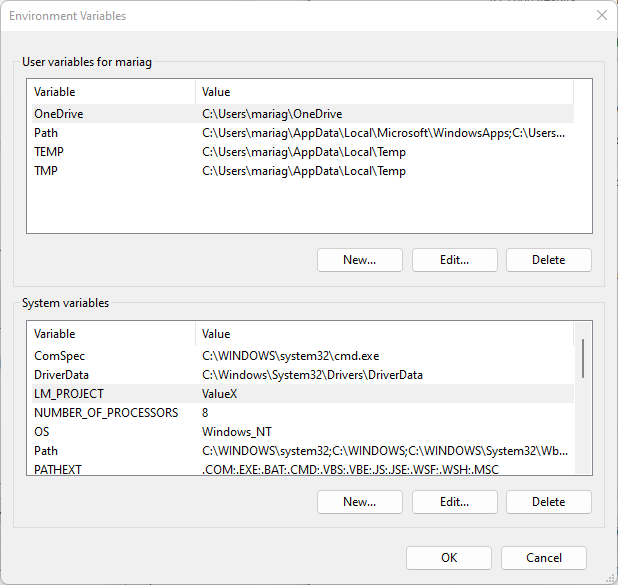
The environment variable option is disabled by default. It is recommended to use the OpenLM supplied solution, unless backward support of the environment variable option is required.
The Add unknown projects option presents an administrative filter for project names that are unknown to the OpenLM SLM:
- Checked: Any unknown project name that is not already found in OpenLM's project list will be added to the list of projects and set as the current one.
- Unchecked (default): If the value of the environment project is not found in OpenLM's project list, the unknown project will not be set and usage will not be tracked.
Project creation in EasyAdmin User Interface
In the previous section, we have seen the method for creating projects via the Workstation Agent. Projects can also be created via the EasyAdmin user interface too:
Click EasyAdmin User Interface Start → Management → Projects. The Project window appears.
Click Add then fill in the information in the "Add Project" form.
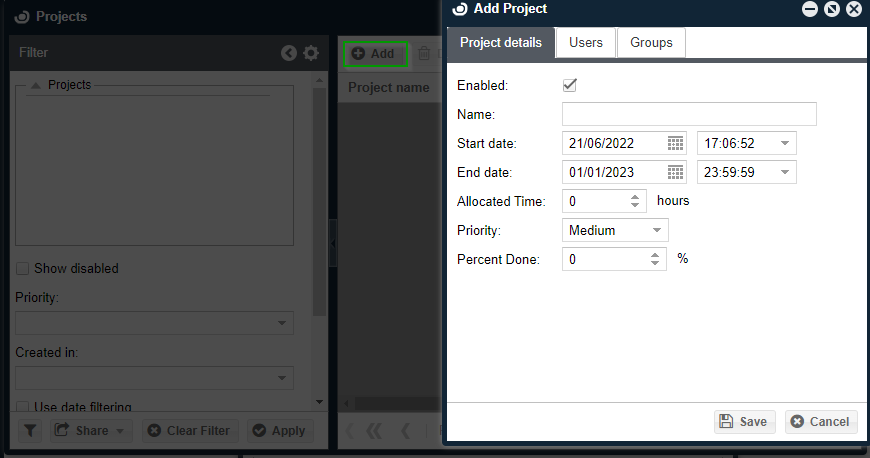
In the Project details tab, the Administrator can set up the following fields:
- Project name
- Start and End time for the project
- Number of working hours allocated to this project
- The project's priority
- The project's completeness percentage
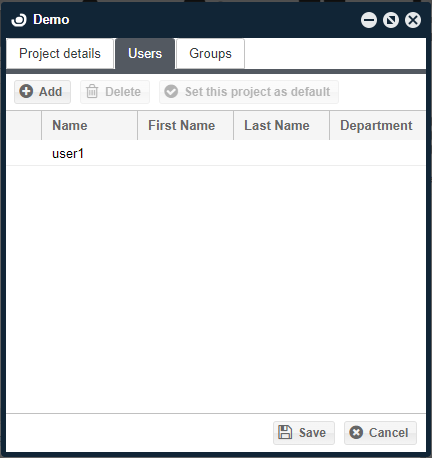
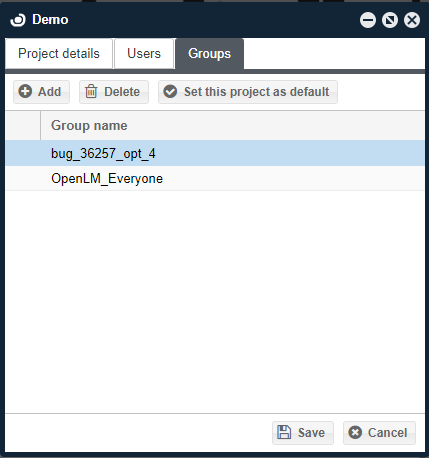
Users and user groups may be assigned to the project upon its creation via the Users and Groups tabs. After configuring these items, click Save.
Editing existing projects
New Projects are presented in the Projects window (EasyAdminUser Interface Start → Management → Projects).
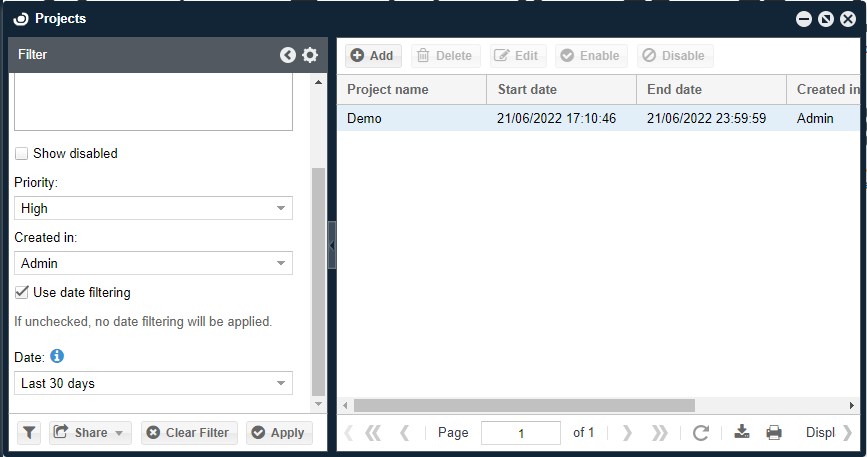
This window allows creating new projects, as well as deleting or editing existing ones. It is split in two panels:
The left panel serves as a filter for projects to be shown in the right panel.
- The Priority drop-down list allows filtering by priority level: Low, Medium or High.
- The Created in the drop-down list allows filtering by the source where the Project was created: Admin for EasyAdmin User Interface or Agent for those created with OpenLM Workstation Agent
The right panel displays a list of existing projects. The action bar at the top allows adding a new project, deleting, editing a project's properties, and finally enabling or disabling a particular project.
Attaching users and user groups to a project
When creating a project, it's possible to add users or user groups to it as soon as the configuration is complete. To do so:
- Highlight the target project then click Edit.
- Select the Users or Groups tab in the Project window. Click the Add button then highlight the user or group from the Search window that pops up.
- Click Select when finished.
- Click Save to commit the changes.
