GitLab
Follow these steps to configure OpenLM to monitor license usage and retrieve statistics from GitLab.
Before you begin
- OpenLM Platform
- OpenLM Broker v25.x or higher installed on the same machine as Gitlab, and approve it in Broker Hub.
Monitoring capabilities
The current monitoring capabilities for GitLab through OpenLM Broker are:
| Report resolution | License totals | License usage | Denials reporting | Borrowed license reporting | Expiration date reporting | Multiple server redundancy |
|---|---|---|---|---|---|---|
| By minute | Yes | Yes | Yes | No | Yes | No |
Configure OpenLM Broker
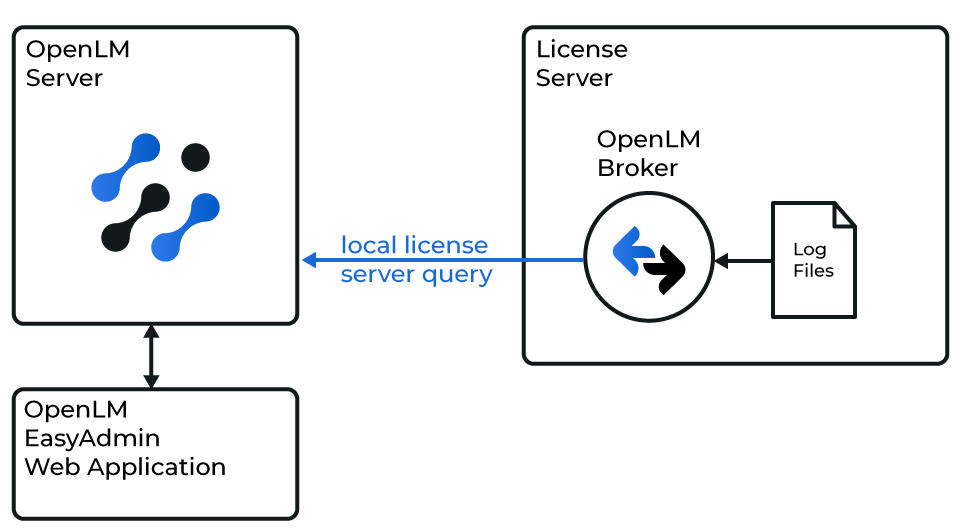 Diagram of how OpenLM interfaces with GitLab
OpenLM Broker must already be installed and configured to report to OpenLM Server before proceeding.
Add manually
-
Open Broker UI at http://localhost:5090/.
-
Go to License Managers → Add License Manager.
-
Select Gitlab, enter the port number, and select Add.
-
In the Commands node, select Data Inquiry and enter the GitLab API endpoint for users, for example:http://FQDN:80/api/v4/users
-
In C:\Program Files\OpenLM\OpenLM Broker, open the gitlab@80.properties file, provide login information, and save.
 In Broker, select Execute, then Apply. Ensure the license data output is displayed.
 -
Under Vendors, select the vendor placeholder node, enter GitLab, and select Apply.
-
Select Restart Broker.
Approve GitLab in OpenLM Platform
- Sign in to OpenLM Platform.
- From the menu, go to License Servers → Pending Server.
- Select the GitLab license manager, then select Approve and Merge.
Verify the integration
- In OpenLM Platform, go to License Servers Live → Server Statistics.
- Confirm GitLab appears with a green status indicator.
It can take up to 3 minutes for the status to update for a new connection.