QPS
QPS License Manager からライセンス使用状況とライセンス統計を収集できるよう、次の手順で OpenLM を設定します。
はじめに
ライセンスマネージャーへのクエリ前に、次をインストールしてください。
- OpenLM Platform。
- QPS と同じマシンにインストールされ、Broker Hub で承認された OpenLM Broker v25.x 以降。
監視機能
| LM Type in the Broker | Commands | Logs | Quantity | Expiration date | Denied | Borrowing | Allocations | Report resolution |
|---|---|---|---|---|---|---|---|---|
| QPS | No | Yes | No | No | No | No | No | Seconds |
Broker を使用すると、バッファリングされた通信が可能になり、ライセンスマネージャーサービスのリモートでの開始と停止も行えます。
OpenLM Broker の設定
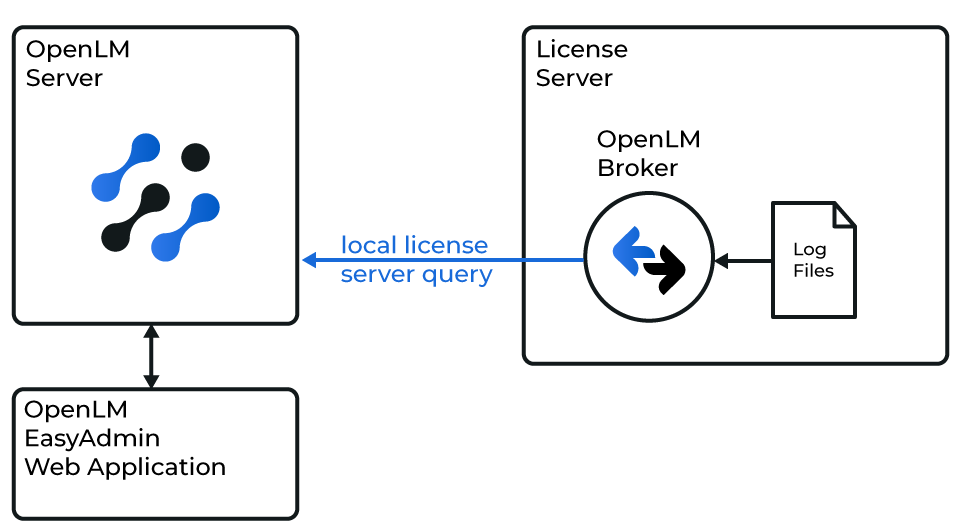 OpenLM と QPS License Manager の連携の概要
続行する前に、OpenLM Broker をインストールし、OpenLM Server に報告するように設定しておく必要があります。
手動で追加
-
Broker Web UI を
http://localhost:5090で開きます。既定のポートが使用中の場合は 5091 または 5092 を試します。 -
License Managers → Add License Manager を開きます。
-
LM Type ドロップダウンリストから QPS を選択します。
-
ポート番号(例: 1234)を入力し、Add をクリックします。
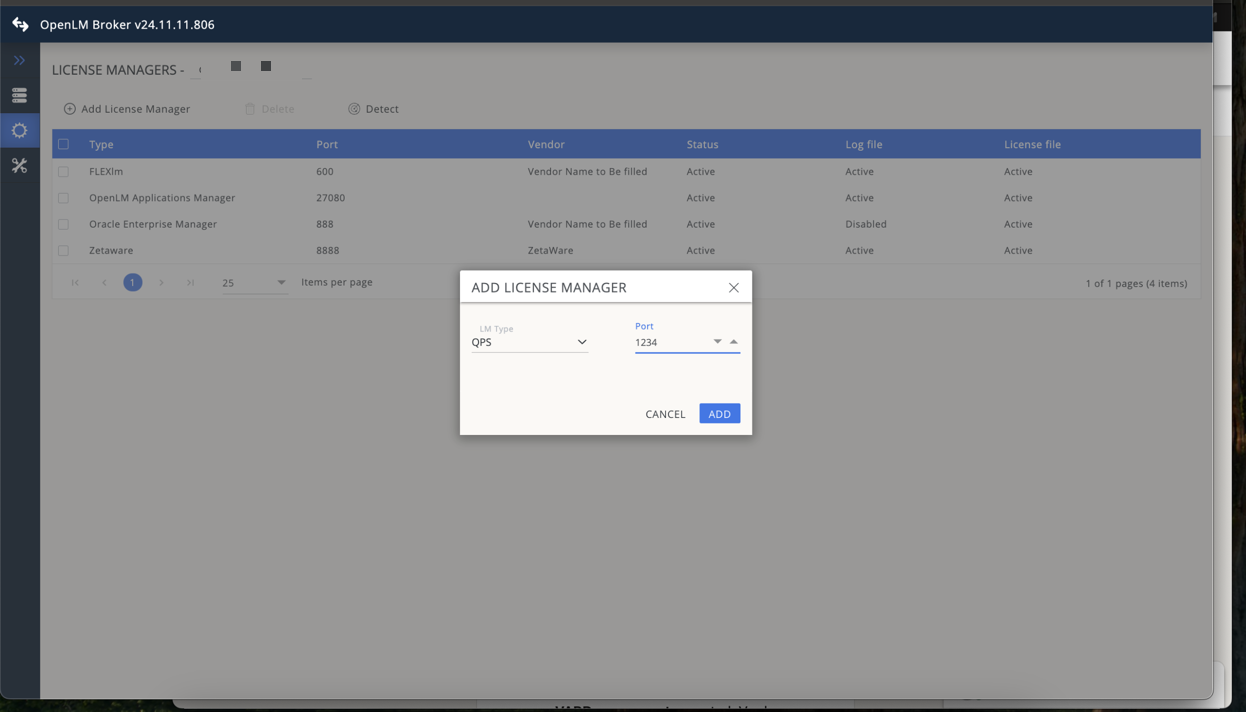 OpenLM Broker での QPS ライセンスマネージャーの追加
 -
Commands タブで、QPS のインストールフォルダーへのパスを設定します。
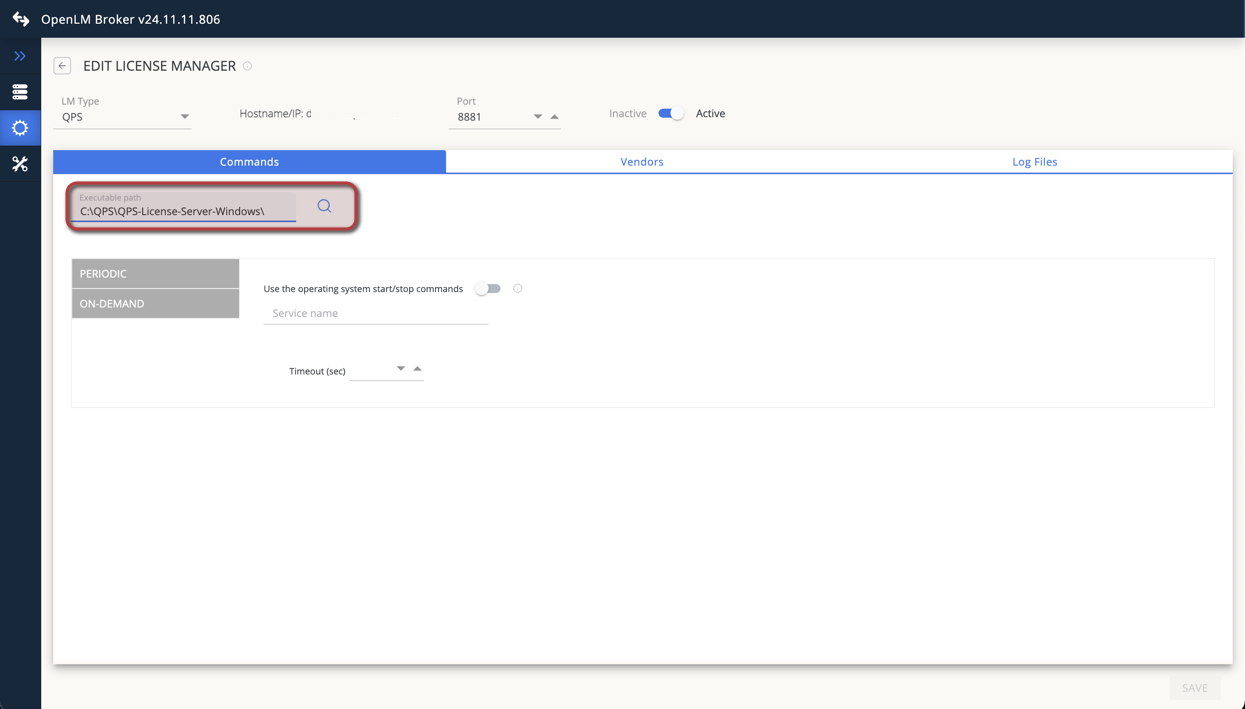 OpenLM Broker での QPS のコマンドパスの設定
 -
Vendors タブを開きます。Add Vendor をクリックし、QPS と入力して Continue をクリックします。
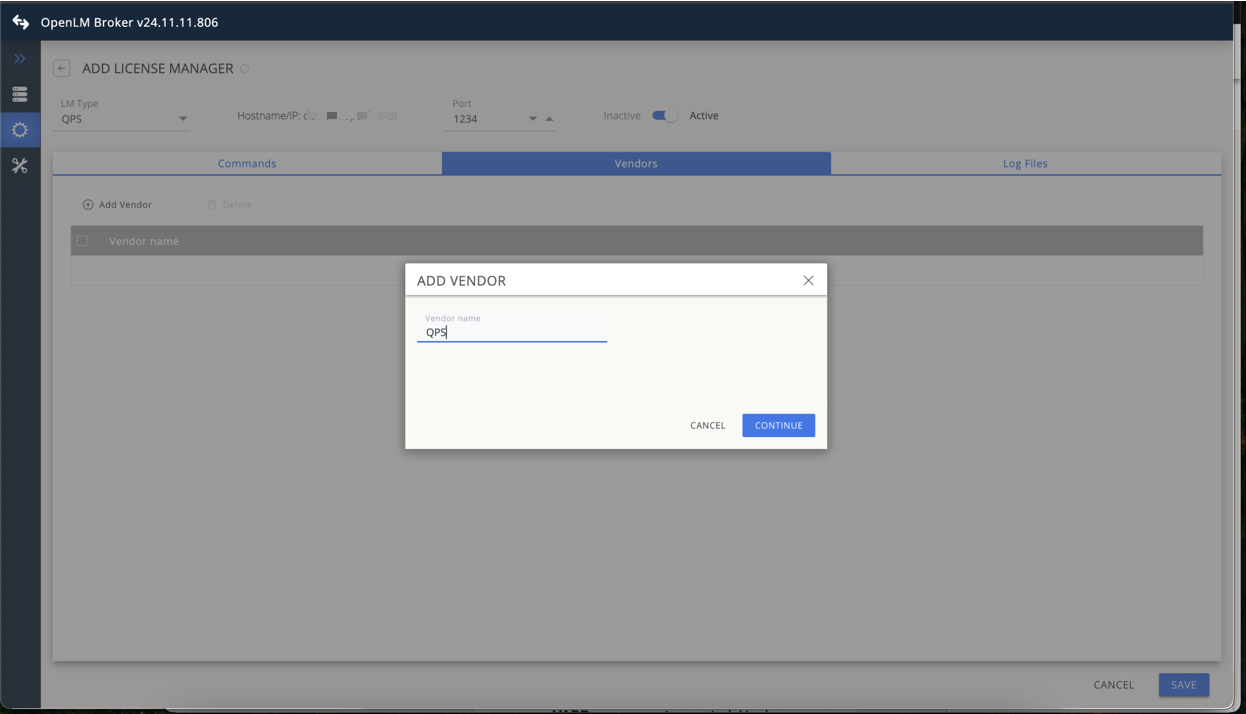 OpenLM Broker での QPS ベンダーの追加
 -
Log Files タブを開きます。Add Log File をクリックします。Watch file by pattern をオフにします。アプリケーションごとに複数のログを追加できます。Continue をクリックします。
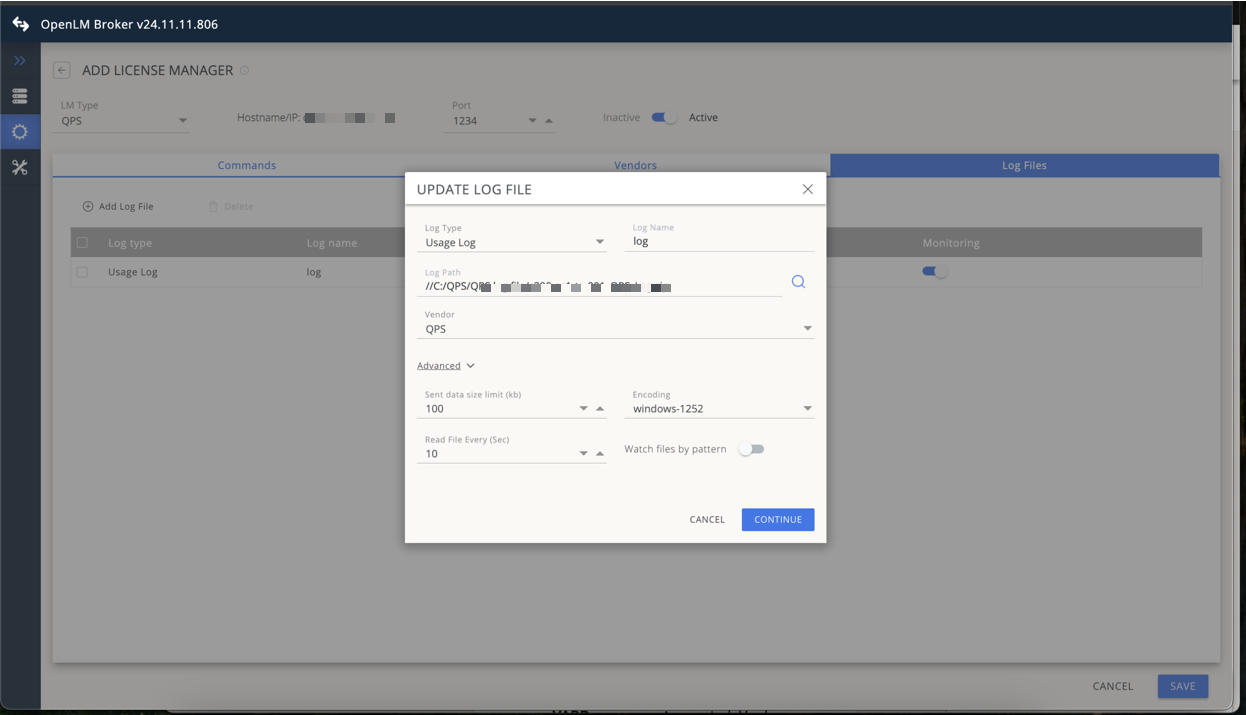 OpenLM Broker での QPS のログファイルの追加
 -
Save をクリックします。
OpenLM Platform で QPS を承認
- OpenLM Platform にサインインします。
- メニューから License Servers → Pending Server を開きます。
- QPS ライセンスマネージャーを選択し、Approve and Merge をクリックします。
連携の検証
- OpenLM Platform で License Servers Live → Server Statistics を開きます。
- QPS が緑のステータスで表示されることを確認します。
新規接続の場合、ステータスの反映まで最大 3 分かかります。