LaunchDarkly
LaunchDarkly は、開発チームが新しいコードをデプロイすることなく、特定のユーザーセグメントにソフトウェア機能を提供できるようにするフィーチャー管理プラットフォームです。A/B テスト、段階的なロールアウト、キルスイッチなどに利用されます。
はじめに
LaunchDarkly の監視を開始する前に、次のコンポーネントと権限が揃っていることを確認してください。
- OpenLM コンポーネント: Broker Hub で承認された OpenLM Cloud Broker。
- プラットフォーム固有の要件: 必要な読み取り権限を持つ個人用アクセストークンを生成するには、LaunchDarkly アカウントへの管理者アクセスが必要です。
データ収集の構成
- OpenLM Cloud Broker で LaunchDarkly のデータ収集を設定するには、次の手順に従います。
アクセストークンを作成するには:
- 左側のサイドナビゲーションにある歯車アイコンをクリックして Organization settings を表示します。
- Authorization をクリックします。
- "Access tokens" セクションで Create token をクリックします。"Create an access token" パネルが表示されます。
- トークンに、人が読みやすい Name を付けます。
- メニューから 1 つ選択して、トークンに Role を割り当てます。
- 基本ロールを使用する場合は、Reader、Writer、Admin、または Owner を選択します。
- 別のロール(自分で作成したもの、または LaunchDarkly が提供するもの)を選択するには、Custom を選択します。このオプションは、LaunchDarkly のサブスクリプションにカスタムロールが含まれている場合のみ利用できます。
- このトークンに固有のロールポリシーをインラインで作成するには、Inline policy を選択します。詳しくは、ロールのポリシーを作成するを参照してください。このオプションは、LaunchDarkly のサブスクリプションにカスタムロールが含まれている場合のみ利用できます。
-
トークンに割り当てる API バージョンを選択します。既定では、このトークンを使用して送信する API リクエストはこの API バージョンを使用します。詳しくは、バージョニングを参照してください。
-
(任意)サービストークンを作成する場合は、This is a service token チェックボックスをオンにします。この機能は、Enterprise プランのお客様のみ利用できます。
-
Save token をクリックします。新しいトークンが Authorization ページに表示されます。
-
トークンをコピーし、安全な場所に保存します。このページから離れると、トークンは表示されなくなります。
-
認証情報を追加する: OpenLM Cloud Broker のダッシュボードで LaunchDarkly インテグレーションを見つけ、アクセストークンを入力します。
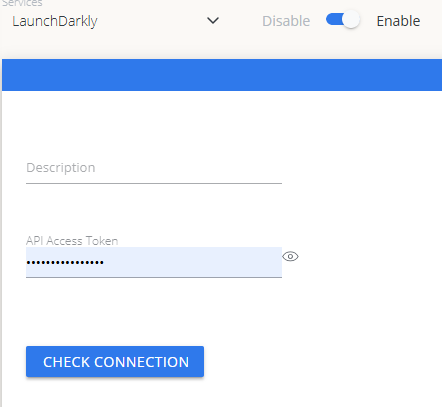 Cloud Broker での LaunchDarkly 認証情報の設定
OpenLM Platform で LaunchDarkly を承認
- OpenLM Platform にサインインします。
- メニューから License Servers → Pending Server を開きます。
- LaunchDarkly データソースを選択し、Approve and Merge をクリックします。
連携の検証
- OpenLM Platform で Allocation を開きます。
- LaunchDarkly の利用状況データが表示されることを確認します。
注意
承認後、データの反映まで最大 3 分かかります。
レポートの閲覧
- ユーザーアクティビティの推移 — プラットフォームで活発に活動しているユーザーを把握し、シートの再配分に活用できます。
- 期限切れまたは未使用ライセンス — 非アクティブなユーザーを特定し、シートを回収します。