FlexLM
FlexLM(FlexNet Publisher とも呼ばれる)は、さまざまな業界の多くのアプリケーションで利用されるライセンス管理システムです。
本ガイドでは、OpenLM を FlexLM と連携させ、ライセンス使用状況を監視して統計情報を収集する方法を説明します。
FlexLM ライセンスサーバーを問い合わせる主な方法は 2 つあります:
-
クイック方式: OpenLM Server からライセンスサーバーをリモートで問い合わせる。
EasyAdmin に使用状況を表示できます。 -
拡張方式: OpenLM Broker でローカルに問い合わせて OpenLM Server に転送する。
追加機能:- 借用ライセンスの追跡
- ライセンス拒否の監視
- オプションファイル管理
- ネットワーク/セキュリティ問題への耐性向上
OpenLM Server のみで FlexLM を連携
最初の方法は OpenLM Server から直接 FlexLM を問い合わせる設定です。

OpenLM Server が FlexLM をリモートで問い合わせる構成
開始前に、OpenLM Server のインストールと設定が完了していることを確認してください。
手順
-
EasyAdmin → Start → Administration → License Manager Servers で Add LM をクリックします。

EasyAdmin で新しいライセンスマネージャーを追加 -
ライセンスマネージャーを識別できる説明を入力します。
-
Type に FlexLM を選択します。
-
Hostname と Port を入力します(例:
win2016dev2,27000)。 -
正しい Time Zone を設定します。
-
FlexLM の冗長構成を使用する場合は Triad Configuration を有効にします。
- Checked: triad サーバーすべてを監視。
- Unchecked: 単一サーバーを監視(既定)。
-
Use Broker トグルを off にします。
-
接続をテストします。
-
成功:
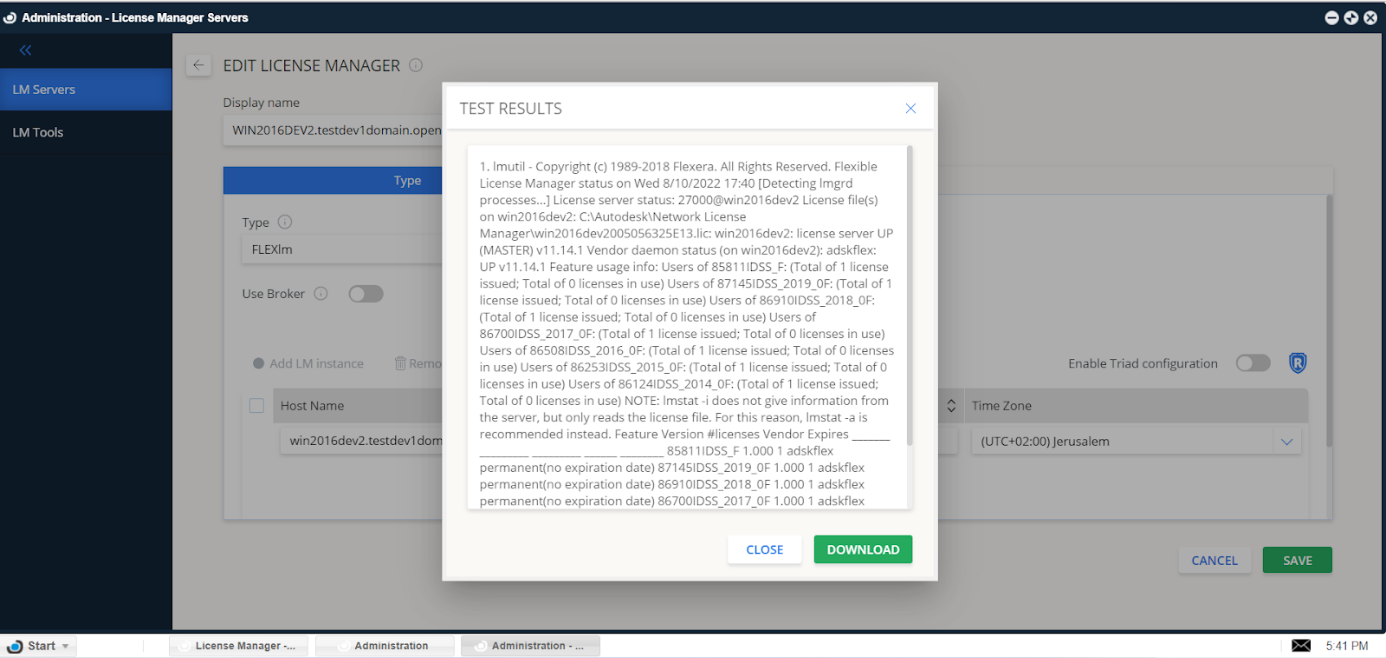
接続テスト成功 -
失敗:
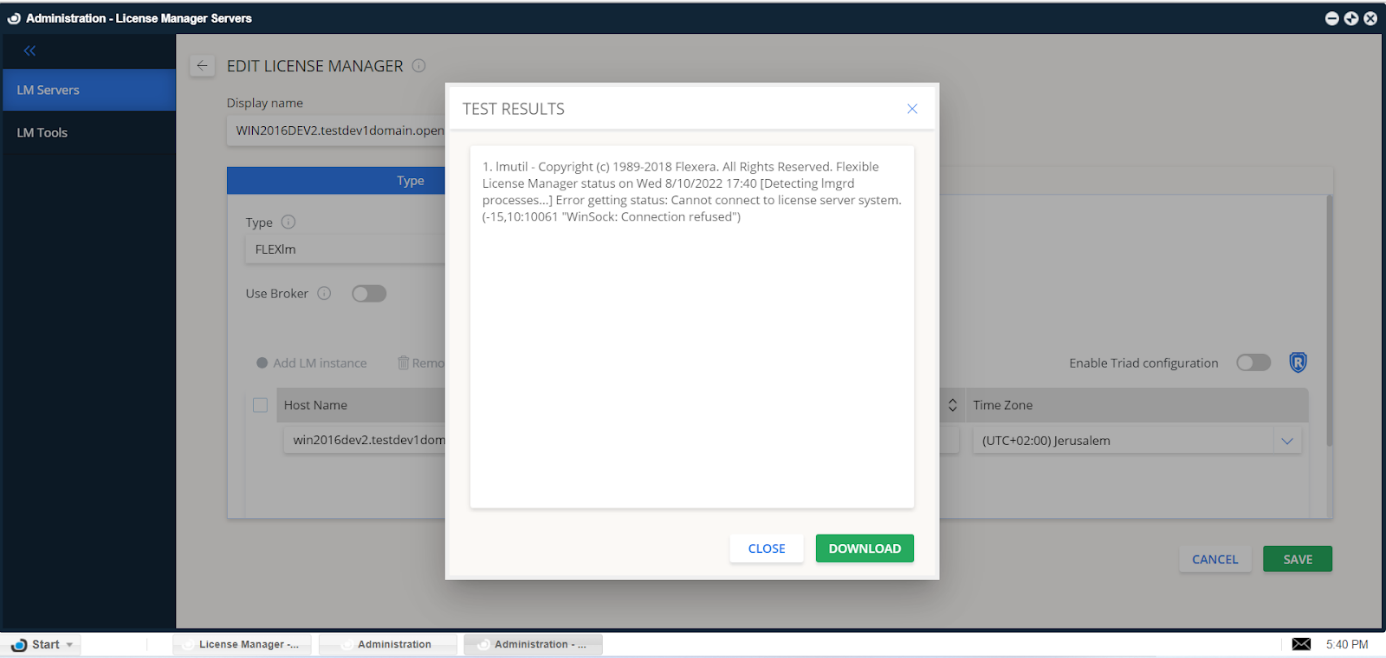
接続テスト失敗
-
-
Save をクリックします。
これで OpenLM Server が FlexLM を問い合わせ、EasyAdmin に使用状況を表示できるようになります。
LM Tools タブ
- LM Tools タブに移動します。
- ドロップダウンから FlexLM を選択します。
lmutil.exeをC:\Program Files\OpenLM\OpenLM Server\LMにコピーします。- フルパス(例:
C:\Program Files\OpenLM\OpenLM Server\LM\lmutil.exe)を入力します。 - Save をクリックします。
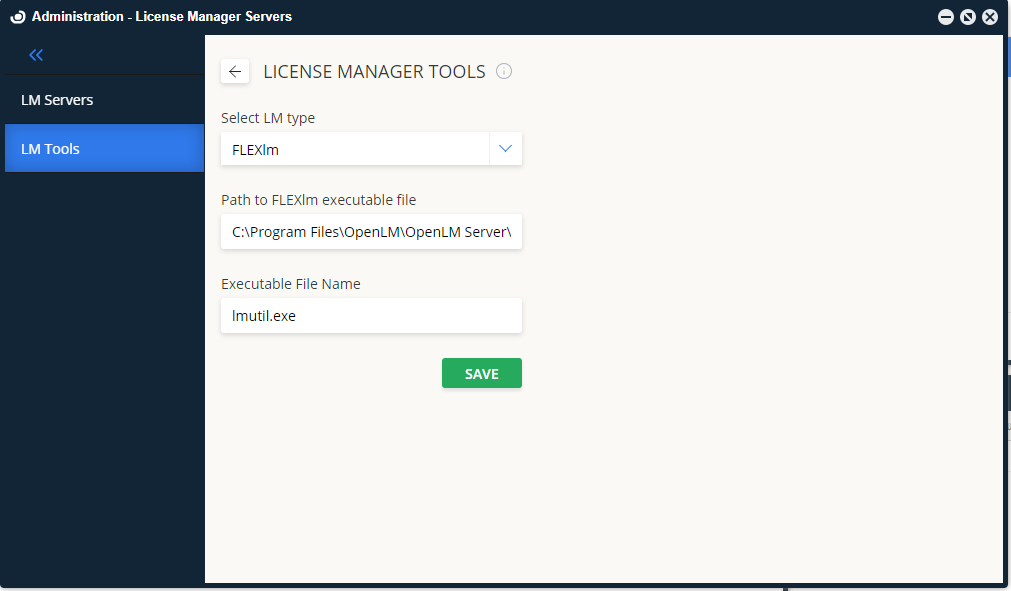
FlexLM の LM Tools 設定
OpenLM Server + Broker で監視
OpenLM Broker は拡張監視/管理機能を提供します。
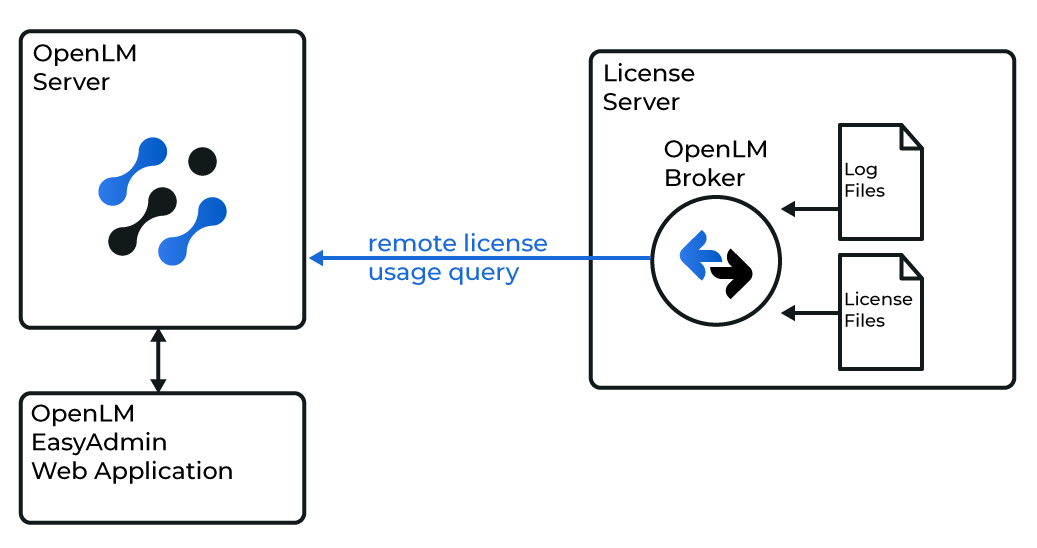
FlexLM のログ/ライセンスファイルと連携する Broker
Broker 利用のメリット
- 1 秒粒度のライセンス使用状況
- 安定したバッファ付き通信
- 借用ライセンスの追跡
- 拒否レポート
- ライセンスプール、ノードロック、名前付きユーザーの監視
- パッケージングの詳細
- オプションファイルの自動管理
- ライセンス/ログファイルのリモートインポート/エクスポート
Broker のインストール
最新の OpenLM Broker をダウンロードしてインストールします。
Broker の設定
自動検出
- Broker を開きます。
- Detect をクリックします。
FlexLM サービスが稼働していれば、Broker がポートとユーティリティパスを自動設定します。
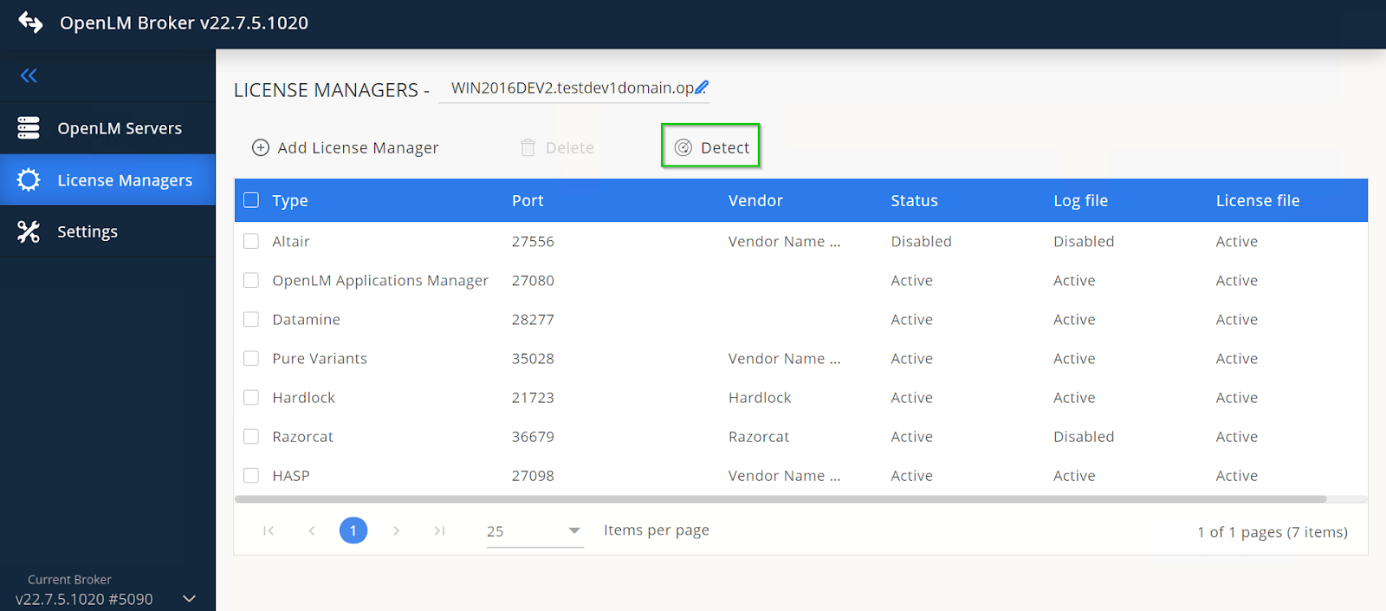
Broker の自動検出
自動検出ではすべての設定が正しく構成されない場合があります。必要に応じて手動設定を行ってください。
手動設定
-
Add License Manager をクリックします。
-
Port number を入力します。
-
ライセンスマネージャータイプに FlexLM を選択します。
-
Add をクリックします。
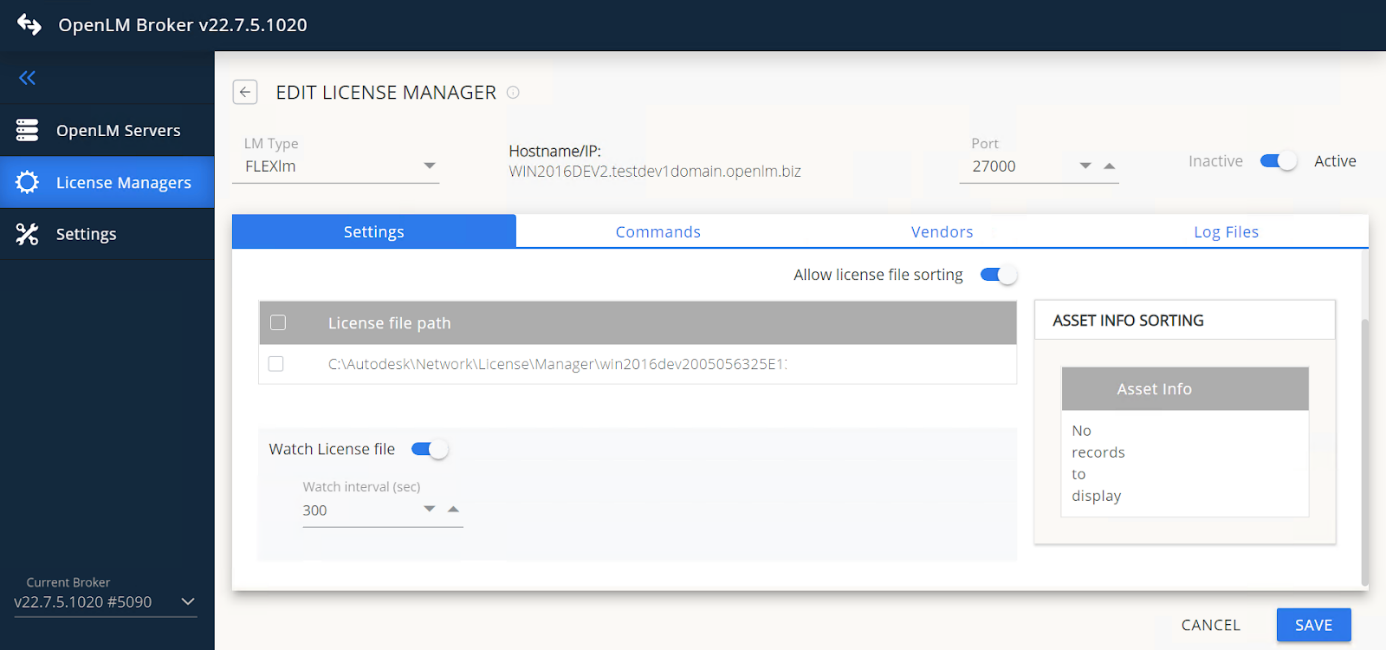
-
Settings でライセンスファイルパスを追加します。
-
Commands で正しいパスを確認し、Execute をクリックします。
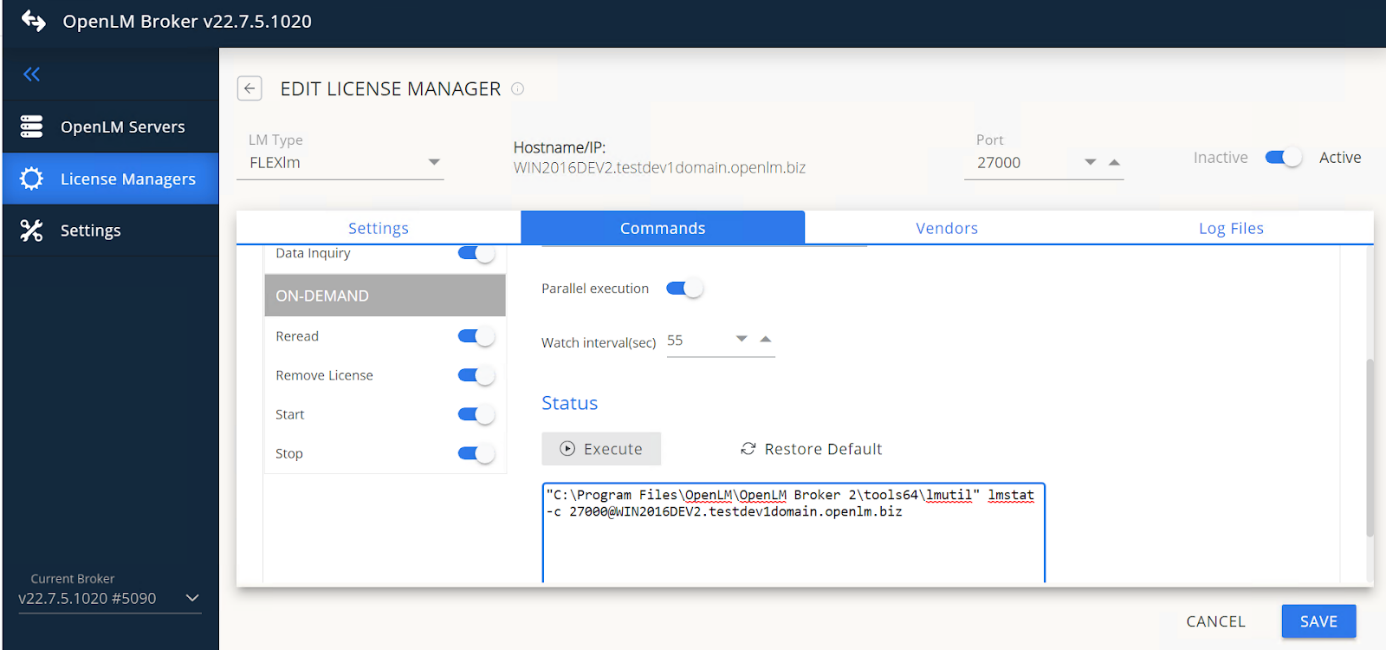 ヒント
ヒント
環境によっては lsmon が別フォルダにあります。その場合は data_inquiry ノードを手動で更新してください。
:::
-
(Windows のみ)FlexLM がサービスとして動作している場合は Use OS start/stop commands を有効にし、FlexLM License Manager を入力します。
-
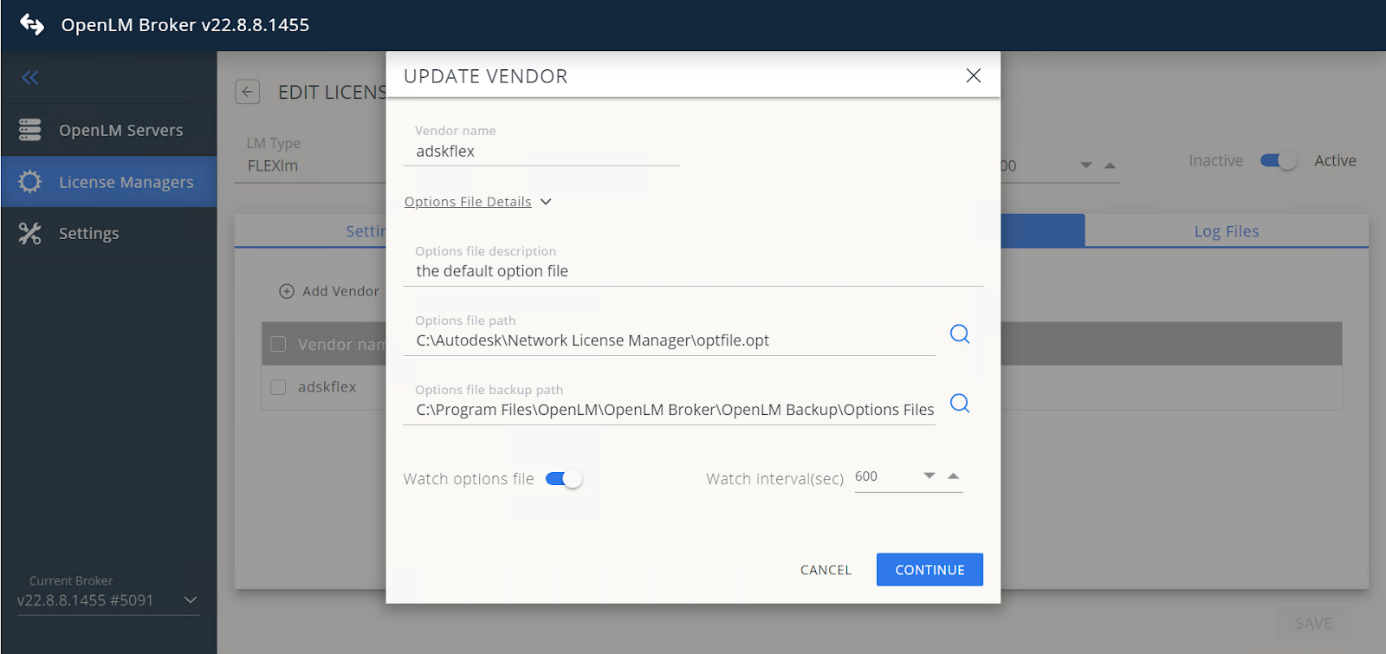
Vendors で Add Vendor をクリックします(例:
adskflex)。 -
Options File Details を展開してファイルパスとバックアップを設定します。
-
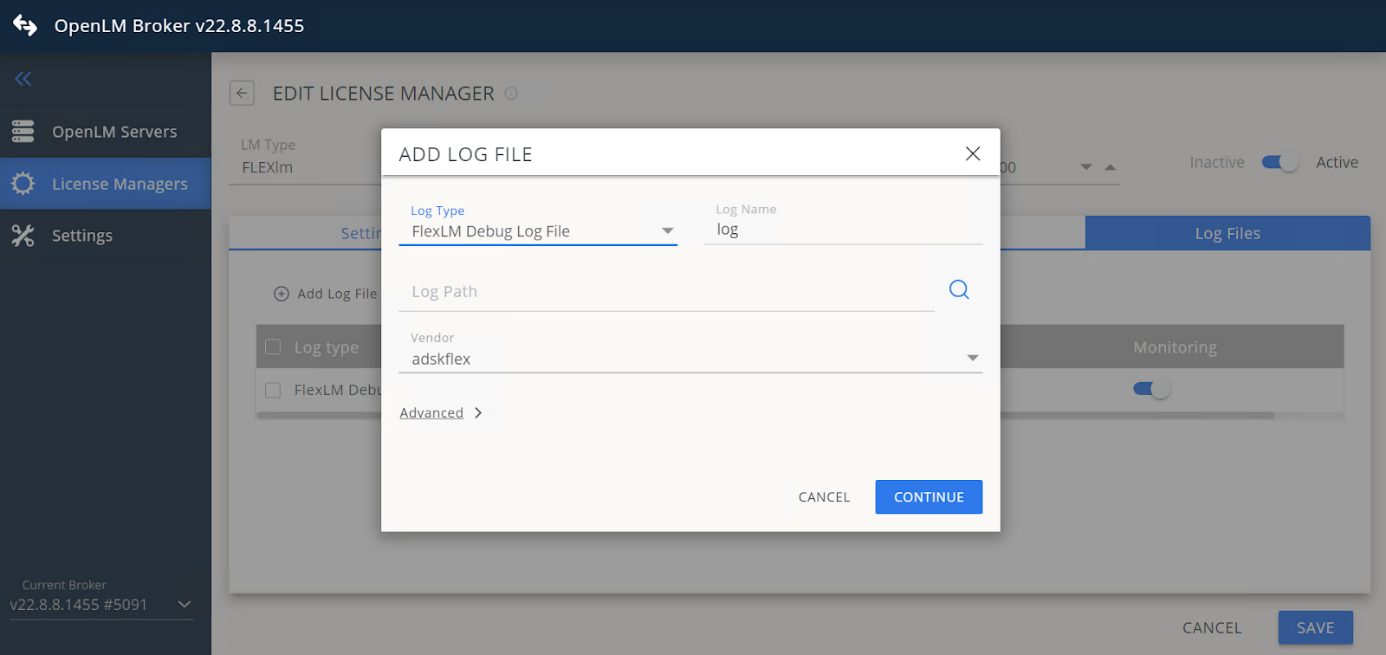
Log Files で Add Log File をクリックします。
-
FlexLM Debug Log File を選択し、パスを設定します。
-
設定を保存します。
OpenLM Server の設定
Broker の設定が完了すると、OpenLM Server にデータが送信されます。
EasyAdmin による自動設定
- EasyAdmin を開きます。
- License Servers に移動します。
- 新しい FlexLM サーバーのエントリをダブルクリックします。
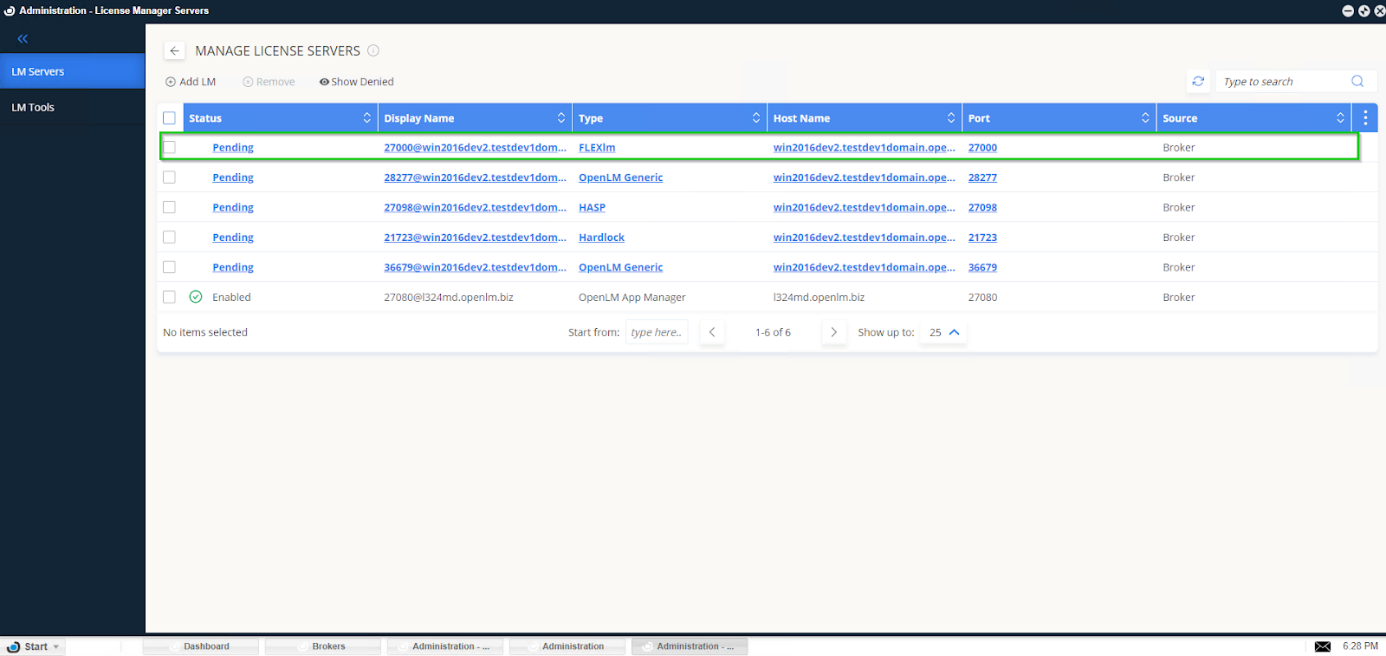
- Approve をクリックします。
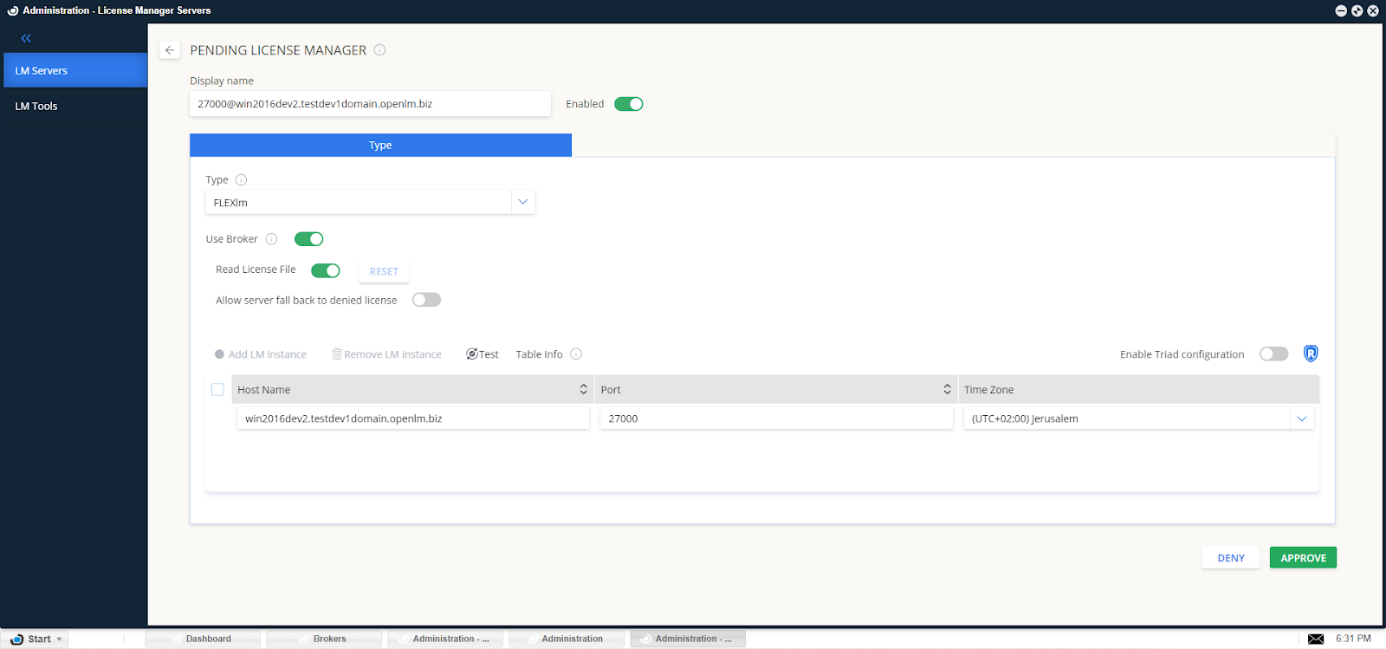
EasyAdmin で FlexLM 設定を承認
FlexLM サーバーが Broker 経由で監視され、EasyAdmin に使用状況が表示されます。
FlexNet Publisher を使用する場合
- FlexNet Publisher は
lmutil.exeとlmgrd.exeを使用しません。
Broker に含まれる既定のlmutilを使用してください:
C:\Program Files\OpenLM\OpenLM Broker\tools64\lmutil.exe。 - ベンダーポートではなく、メインのライセンスマネージャーポート(既定: 27000)を設定します。
複数プールのライセンスファイル
OpenLM は次を区別できます:
- フローティングライセンス
- 名前付きライセンス
- ノードロックライセンス
詳細は Multiple FlexLM license pool monitoring を参照してください。
ライセンスファイルのインポート/アップロード
EasyAdmin で次の操作が可能です:
- リモートサーバーからオプションファイル、ログファイル、ライセンスファイルをインポート
- 編集してアップロード
- ライセンスサーバーの再起動/再読み込み
詳細は Uploading and downloading files from license server を参照してください。
オプションファイル管理
OpenLM はオプションファイル管理機能を提供します:
- EasyAdmin からライセンス割り当て/制限を編集して適用
- Active Directory と同期してオプションファイルを更新
- オプションファイル経由でユーザー/グループをインポート
参照:
借用ライセンスの監視
ライセンス借用は、オフライン利用のためにワークステーションにライセンスを紐付ける機能です。
OpenLM は EasyAdmin → License Servers に借用ライセンスのデータを表示します。
FlexLM 設定の確認
- EasyAdmin を開きます。
- Start → Widgets → License Servers に移動します。
- 緑色の丸アイコンはサーバーが接続されていることを示します。
- Start → Reports → Denials でライセンス拒否を確認します。
拒否は Broker にデバッグログが設定された後にのみ記録されます。過去分は取得できません。