IPGLock
以下の手順で OpenLM を設定し、IPGLock ライセンスマネージャーのライセンス使用状況を監視して統計情報を取得します。
要件
開始前に次を用意してください:
- 組織内のマシンに OpenLM Server v2.x をインストール済み、または SLMC アカウント
- IPGLock ライセンスマネージャーと同じマシンに OpenLM Broker v4.17 以降
監視機能
OpenLM Broker 経由で IPGLock に対して利用できる監視機能は次のとおりです:
| 機能 | 粒度 | ライセンス総数 | ライセンス使用状況 | 拒否レポート | 借用ライセンスのレポート | 有効期限のレポート | 冗長化(複数サーバー) |
|---|---|---|---|---|---|---|---|
| 対応 | 秒 | ✔ | ✔ | ✔ | ❌ | ✔ | ❌ |
OpenLM Broker の設定
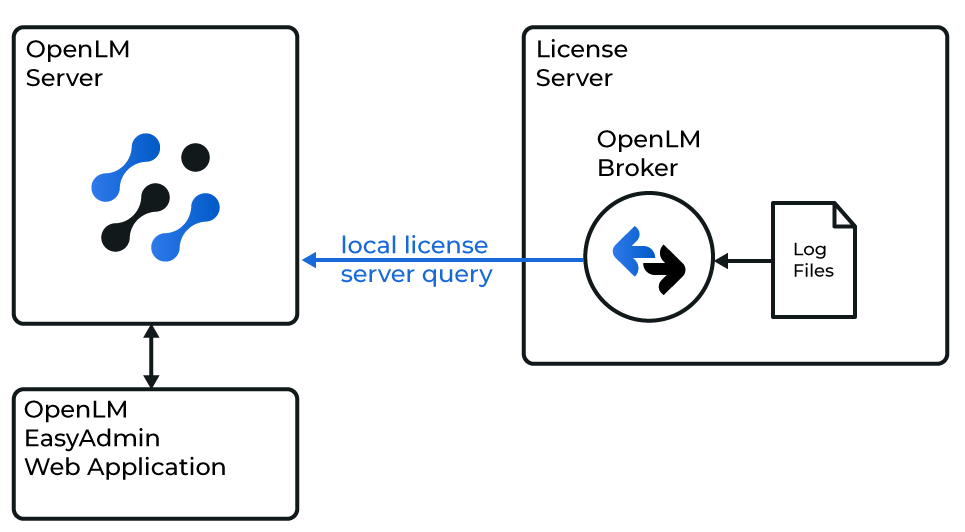
OpenLM と IPGLock ライセンスマネージャーの連携図
注意
OpenLM Broker を事前にインストールし、設定してから開始してください。
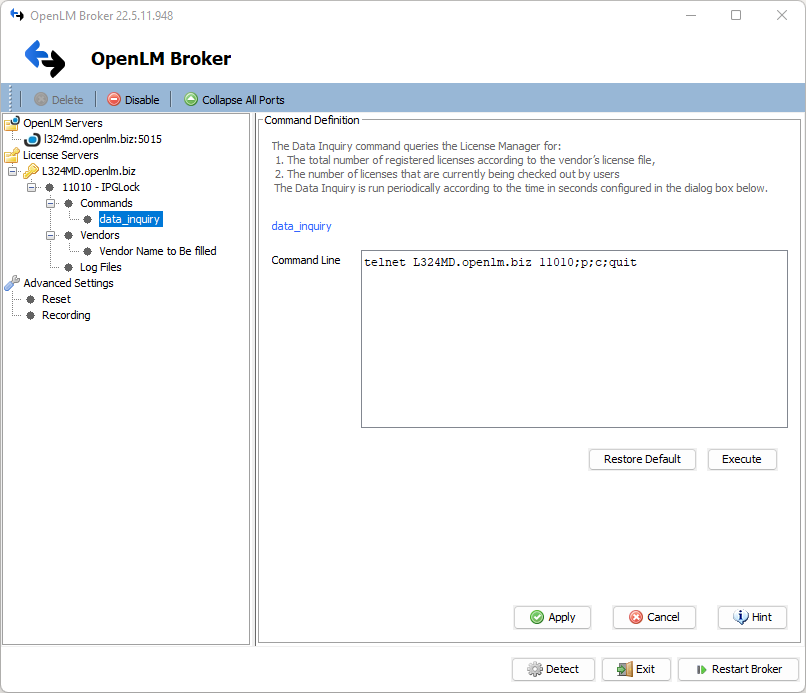
手動設定(Broker デスクトップ UI)
- Add Port をクリックします。
- IPGLock サーバーのポート番号(既定:
11010)を入力します。 - License Manager Type から IPGLock を選択し、Apply をクリックします。
- Commands で Data Inquiry を選択し(IPGLock は Telnet プロトコルを使用します)、Execute をクリックします。出力が有効であることを確認します。
- Vendors ノードに移動し、ベンダー名に IPGLock を入力して Apply をクリックします。
- Log Files ノードを選択し、IPGLock のログファイルの場所を参照します。
手動設定(Broker Web UI)
- ブラウザで http://localhost:5090/ を開きます。
- License Managers → Add License Manager に移動します。
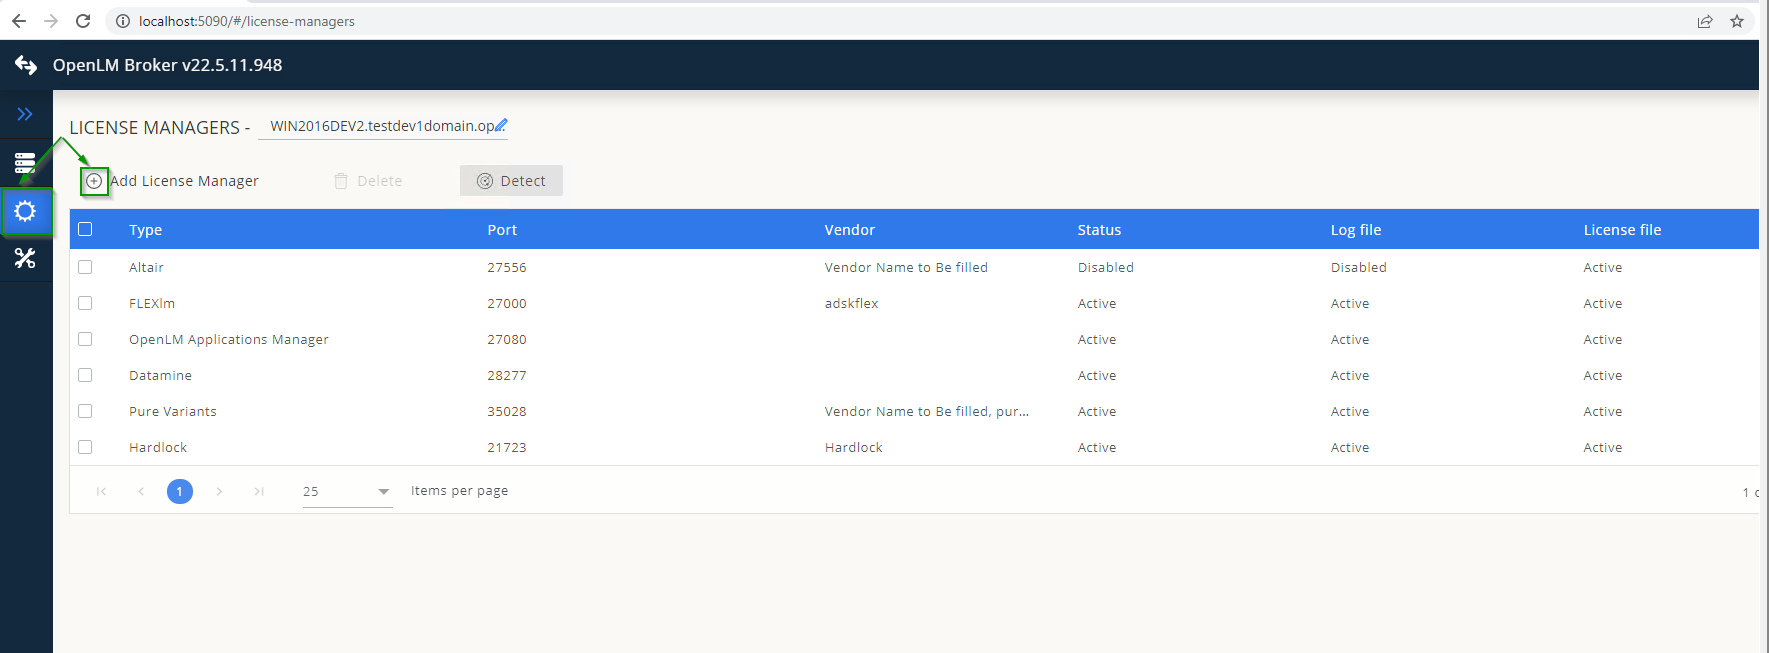
- 種別のドロップダウンから IPGLock を選択し、ポート番号を入力して Add をクリックします。

- Commands タブで Service Name が正しいことを確認し、Execute をクリックして Telnet コマンドが動作することを確認します。
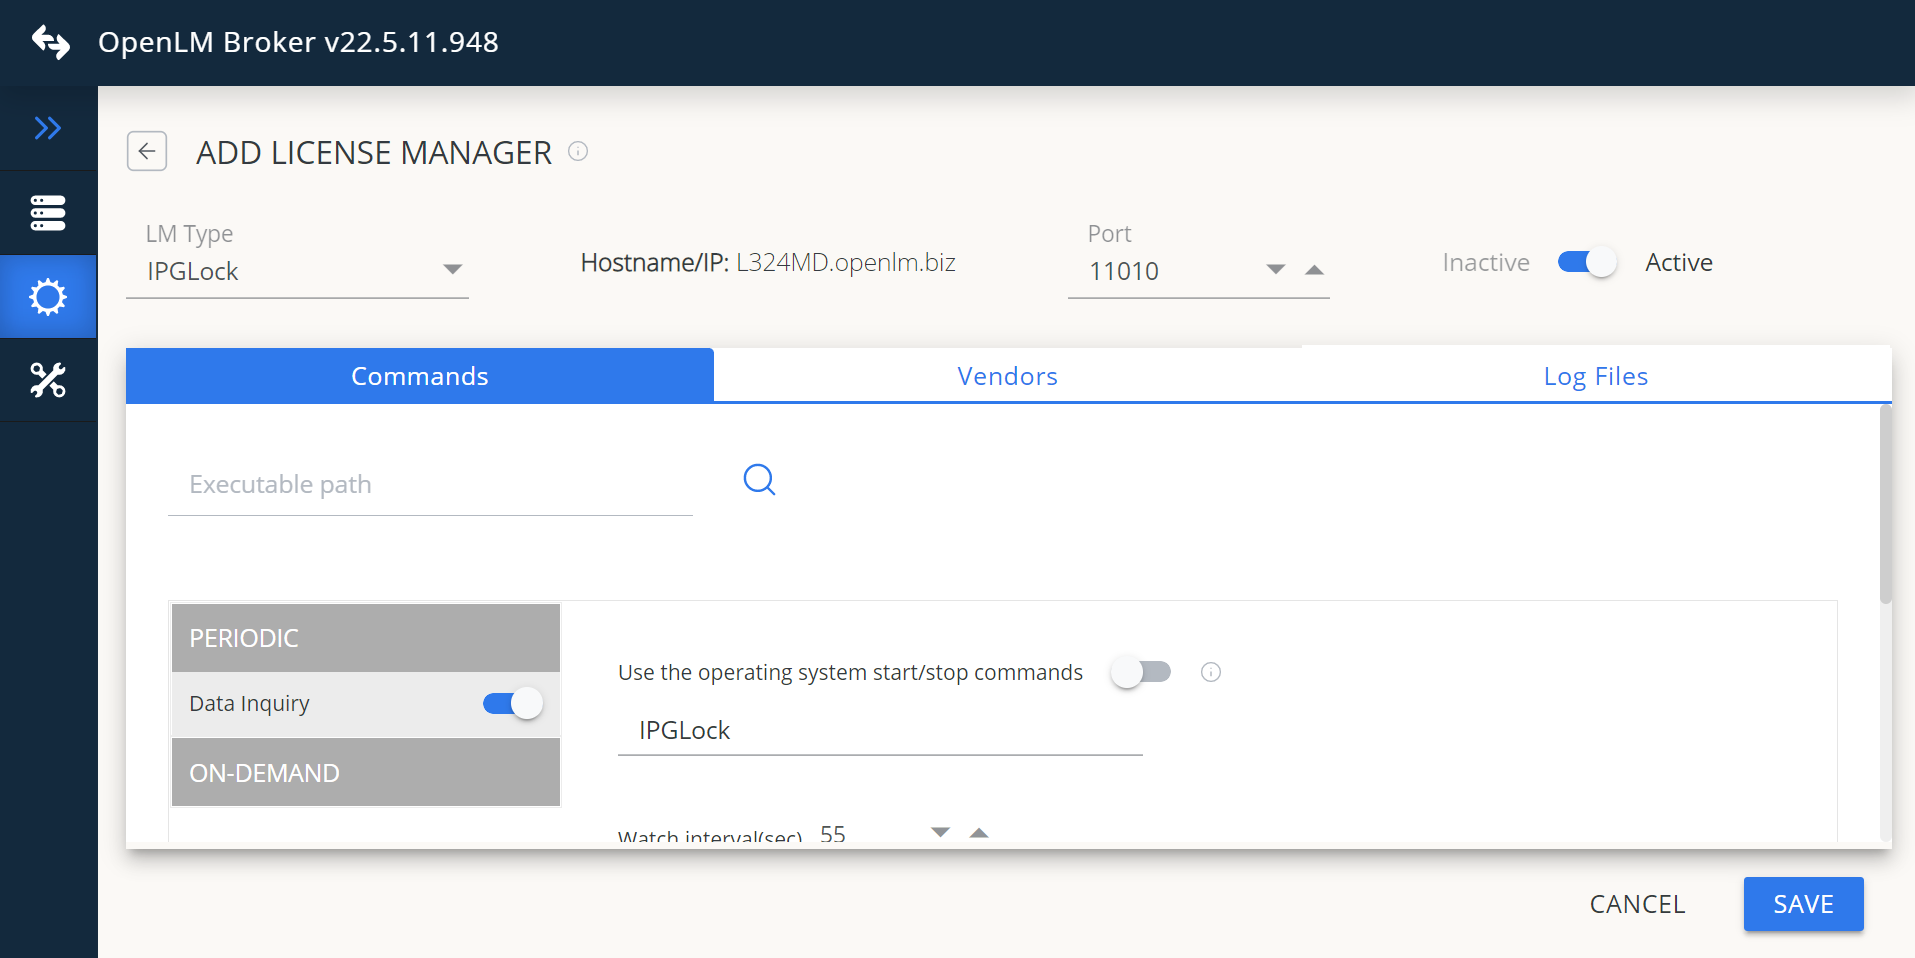
- Vendors タブ → Add Vendor に進み、IPGLock を入力して Continue をクリックします。

- Log Files タブに移動し、IPGLock のログファイルを参照して Continue をクリックします。
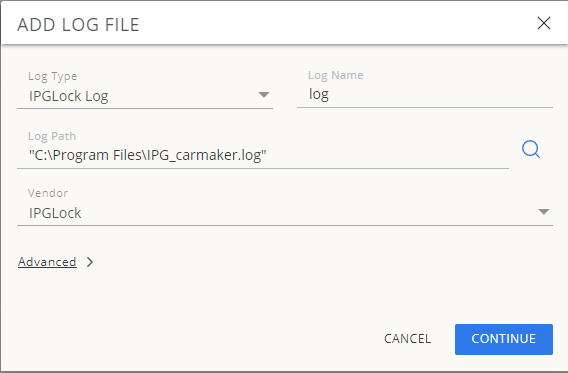
- Save をクリックします。
OpenLM Server の設定
EasyAdmin による自動設定
- EasyAdmin を開きます(Start → Widgets → License Manager - Servers)。
- Servers pending approval アイコンをクリックします。
- IPGLock のエントリをダブルクリックします(種別は OpenLM Generic と表示されます)。
- (任意)接続名を変更し、種別は OpenLM Generic のまま、Enabled をオンにして Approve をクリックします。
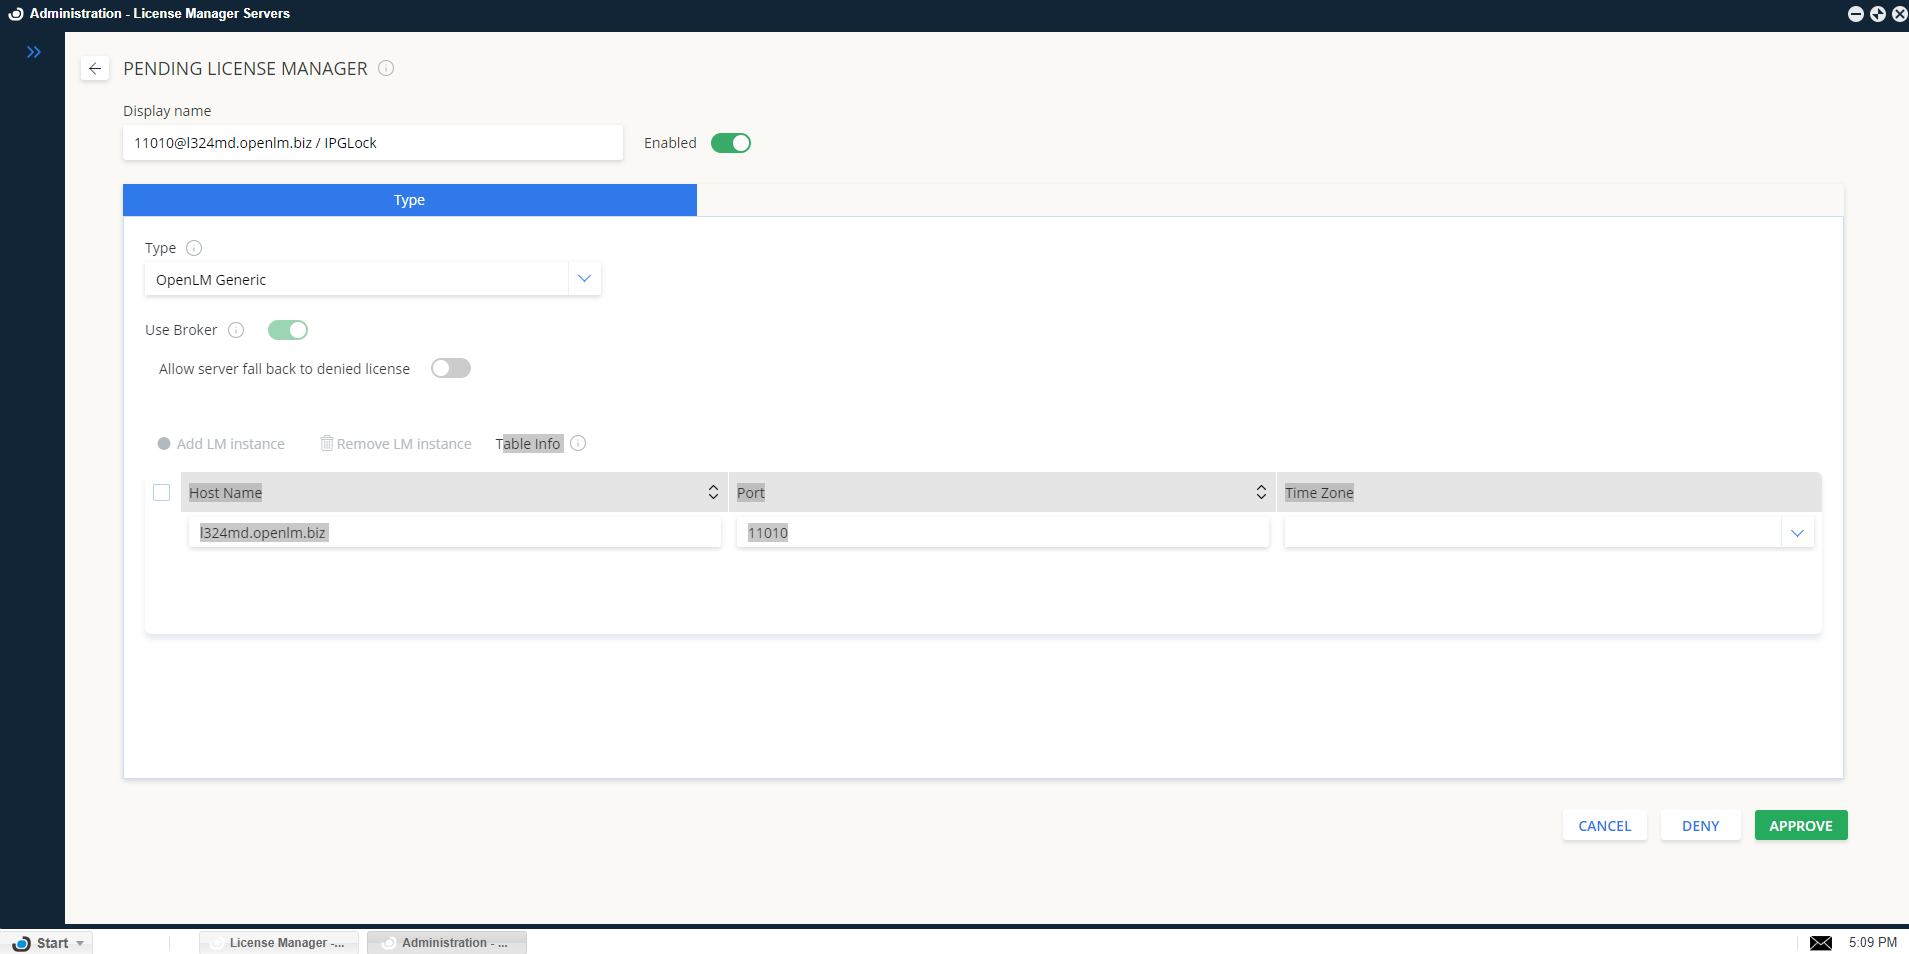
これで IPGLock ライセンスマネージャーが追加され、少し時間が経つとデータが表示され始めます。緑色の丸アイコンは接続が有効であることを示します。
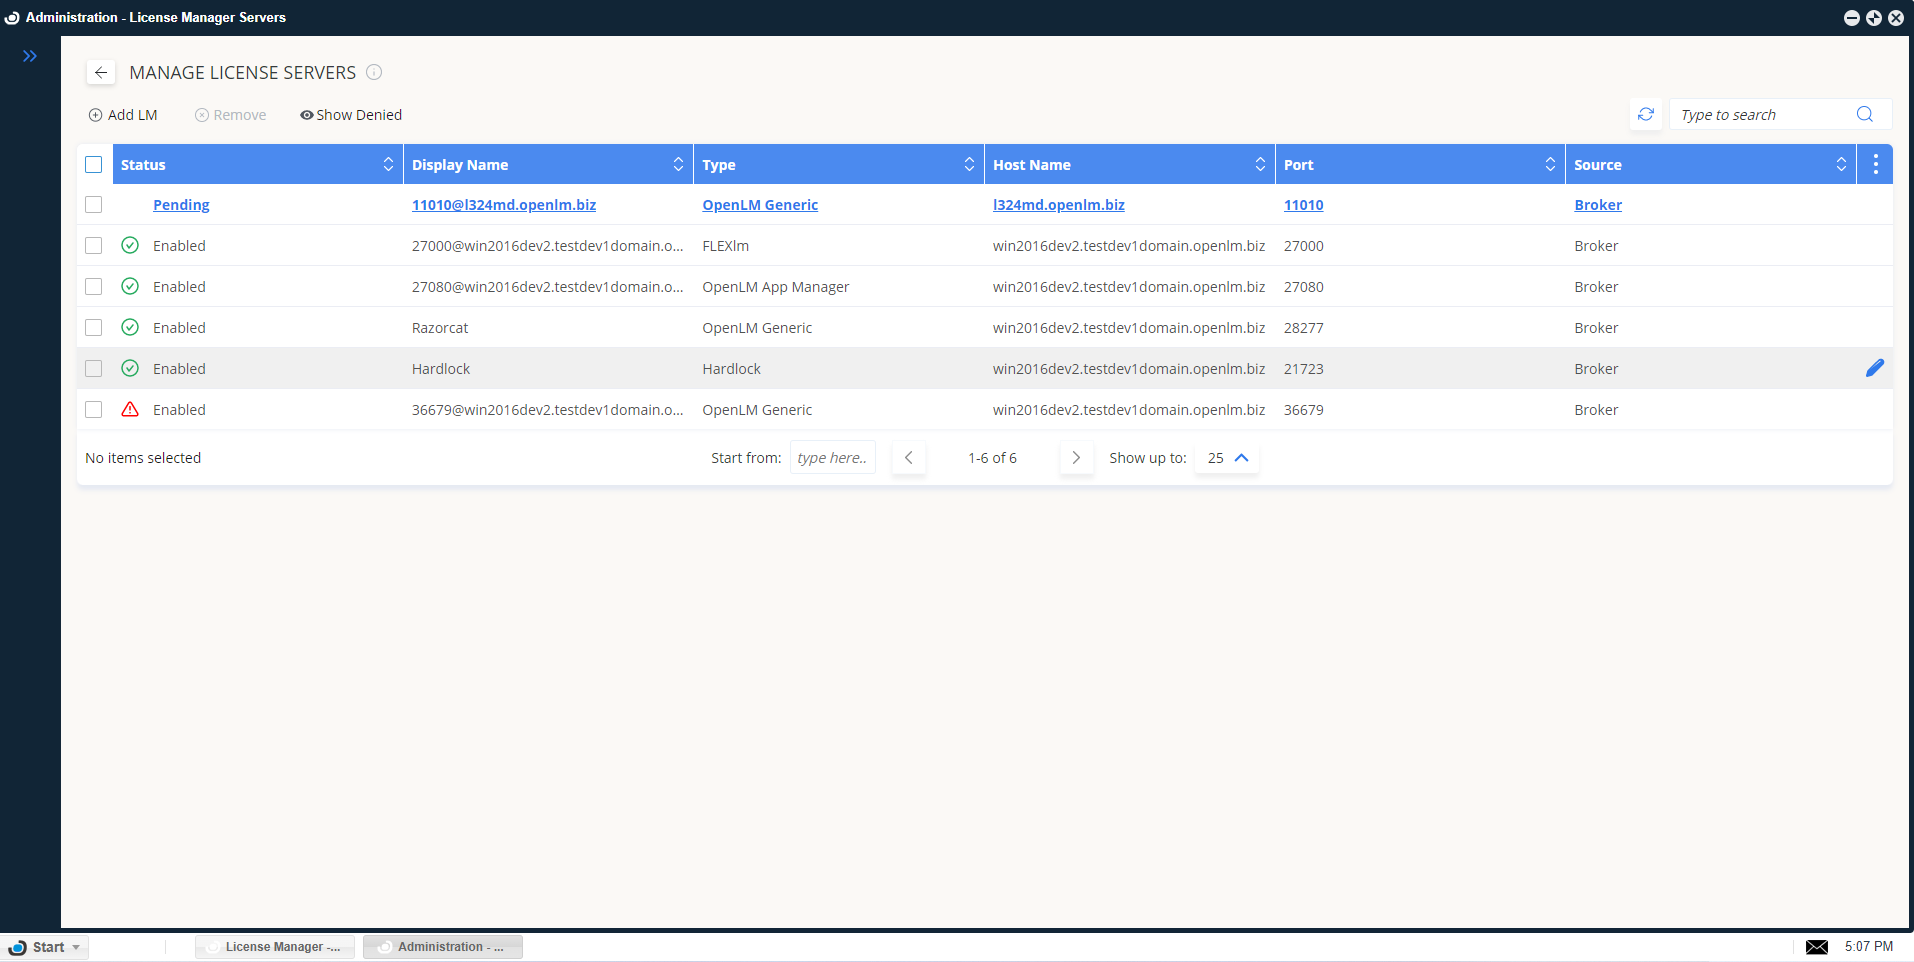
設定の確認
- ブラウザで EasyAdmin を開きます。
- Start → Widgets → License Servers に移動します。
- 一覧に IPGLock が表示され、緑色の丸アイコンになっていることを確認します。
注意
新しい接続の後、アクティブ表示まで最大 3 分かかることがあります。