Canvas
This document describes the steps required to interface OpenLM with Canvas, allowing you to monitor license usage and obtain statistics.
Requirements
To query Canvas, install the following components:
- OpenLM SLM v2.x on your premises (installed on a machine in your organization) or an SLMC account
- OpenLM Broker v25.2 or higher installed on the same machine as the Canvas LicenseMonitor
Monitoring capabilities
The current monitoring capabilities for Canvas through OpenLM Broker are:
| LM Type in the Broker | Commands | Logs | Quantity | Expiration date | Denied | Borrowing | Allocations | Report resolution |
|---|---|---|---|---|---|---|---|---|
| Canvas | No | Yes | No | No | No | No | No | Per second |
OpenLM Broker configuration
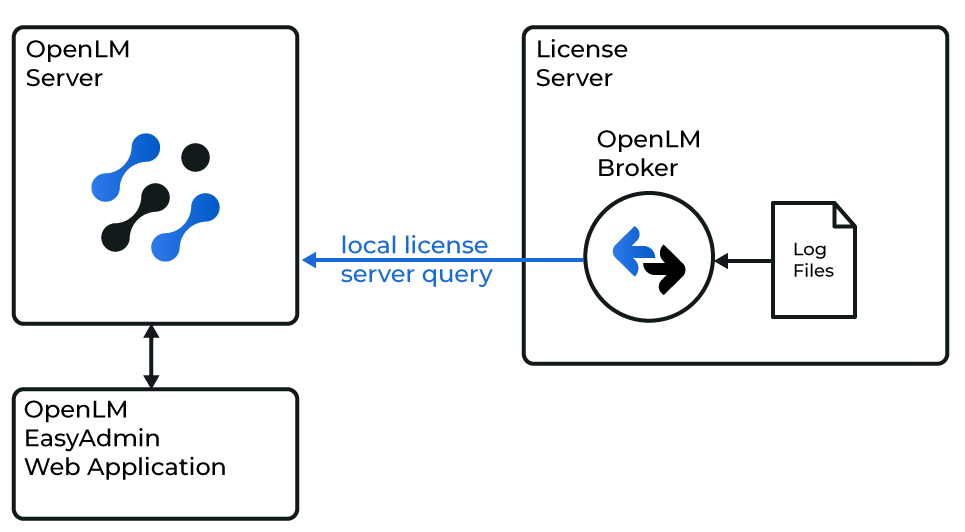
Diagram of how OpenLM interfaces with the Canvas License Manager
OpenLM Broker must already be installed and configured to report to OpenLM before proceeding.
-
Open your browser and navigate to http://localhost:5090
If port 5090 is occupied, use an incremental port (for example, 5091, 5092). -
Select the License Managers tab.
-
Select Add License Manager.
A pop-up appears. -
From the LM Type drop-down list, select Canvas.
-
Enter the Canvas port number (for example,
5093) and select Add.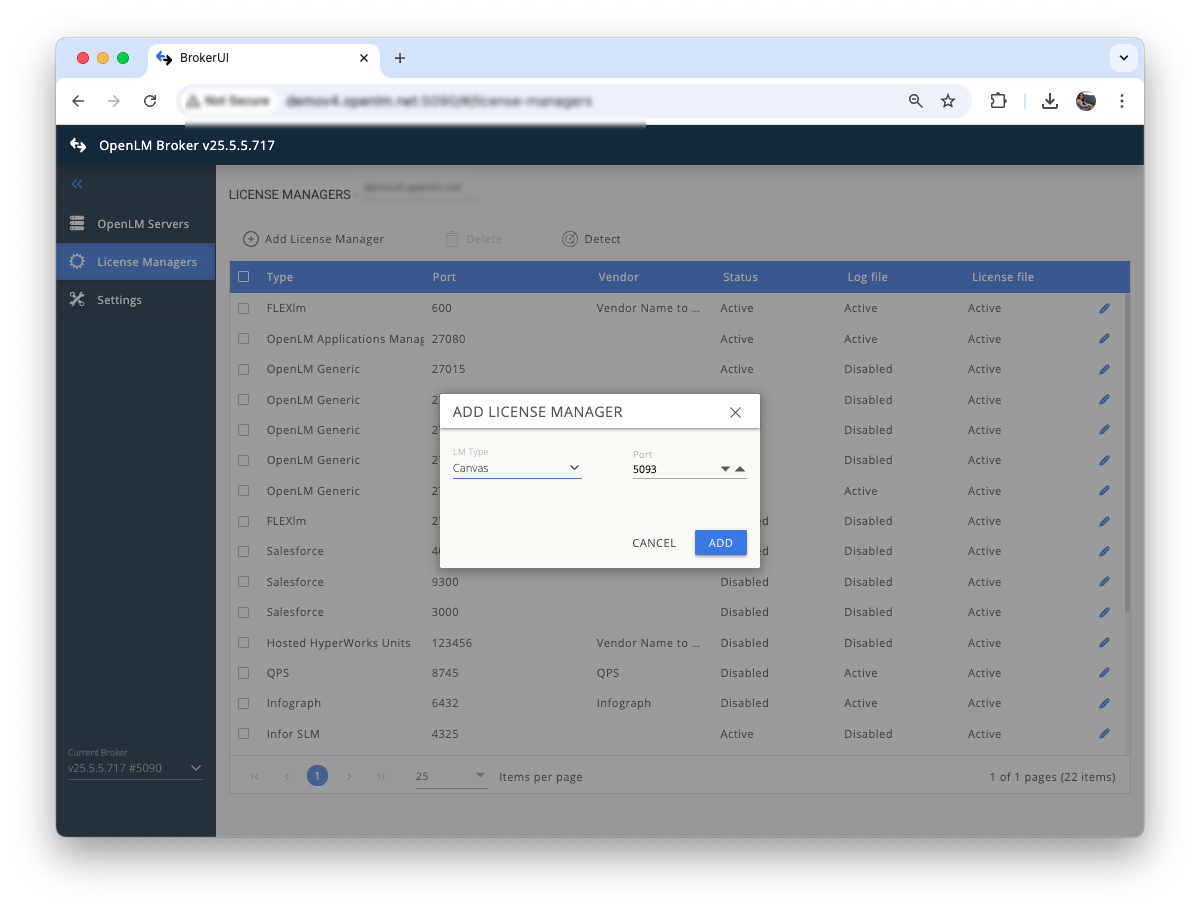
Adding a Canvas license manager in OpenLM Broker -
Select the Vendors tab. Select Add Vendor.
In the pop-up, enterCanvasas the vendor name and select Continue.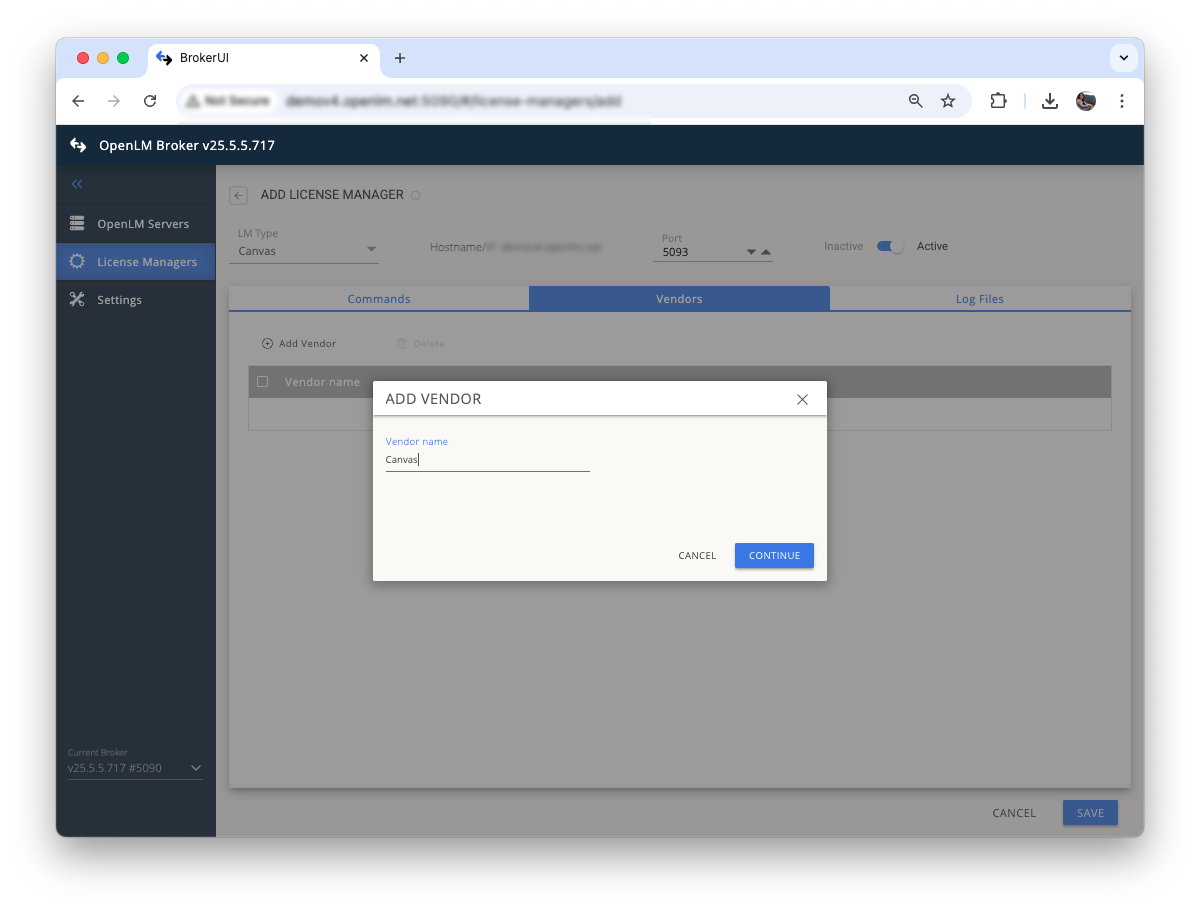
Adding Canvas vendor in OpenLM Broker -
Switch to the Log Files tab. Select Add Log File.
Make sure Watch file by pattern is turned off.
You can add multiple logs. Browse to the location of the activity log, then select Continue.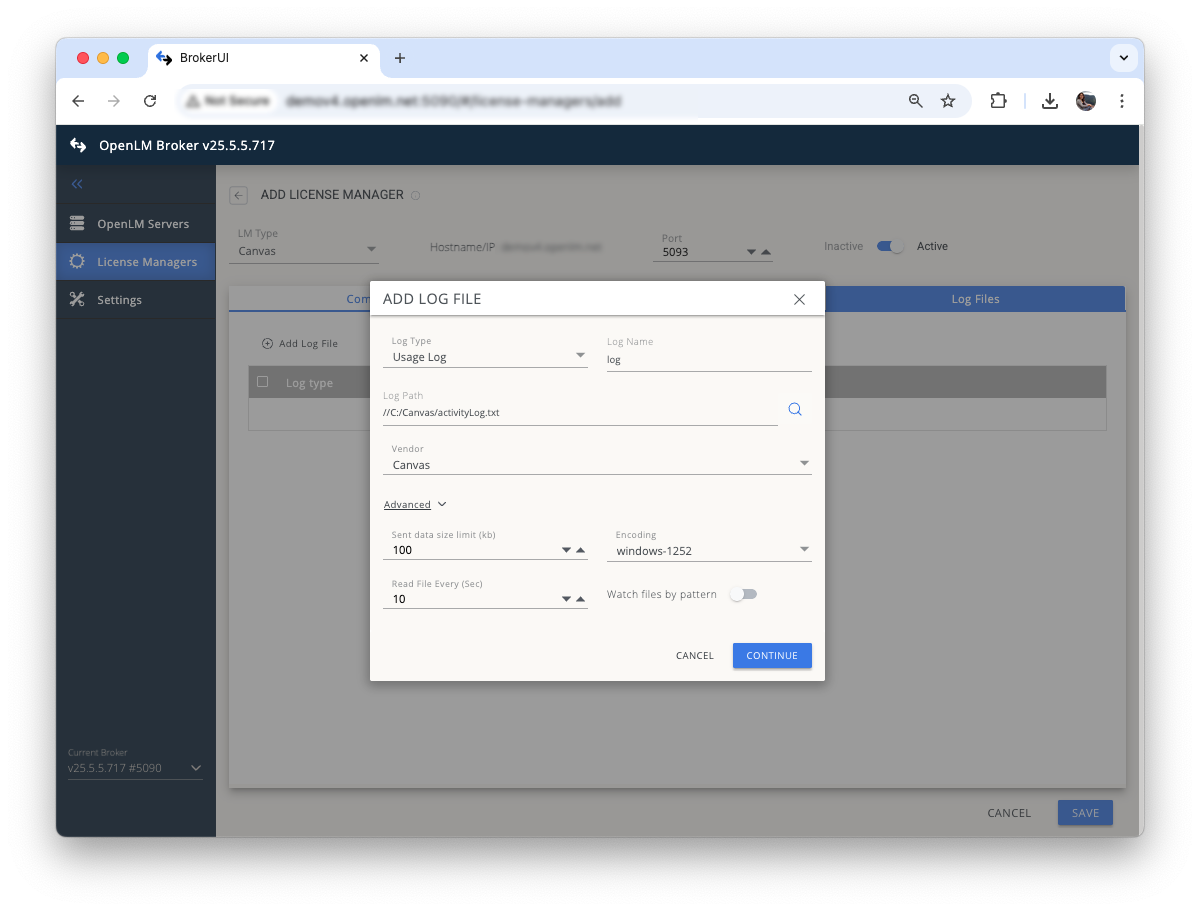
Adding a log file for Canvas in OpenLM Broker -
Select Save.
OpenLM configuration
If you have followed the steps above, OpenLM Broker should now be transmitting data to OpenLM.
The final step is to approve the configuration in the EasyAdmin UI:
-
Access EasyAdmin and go to Start → Widgets → License Manager Servers.
-
Select the icon for Servers Pending Approval.
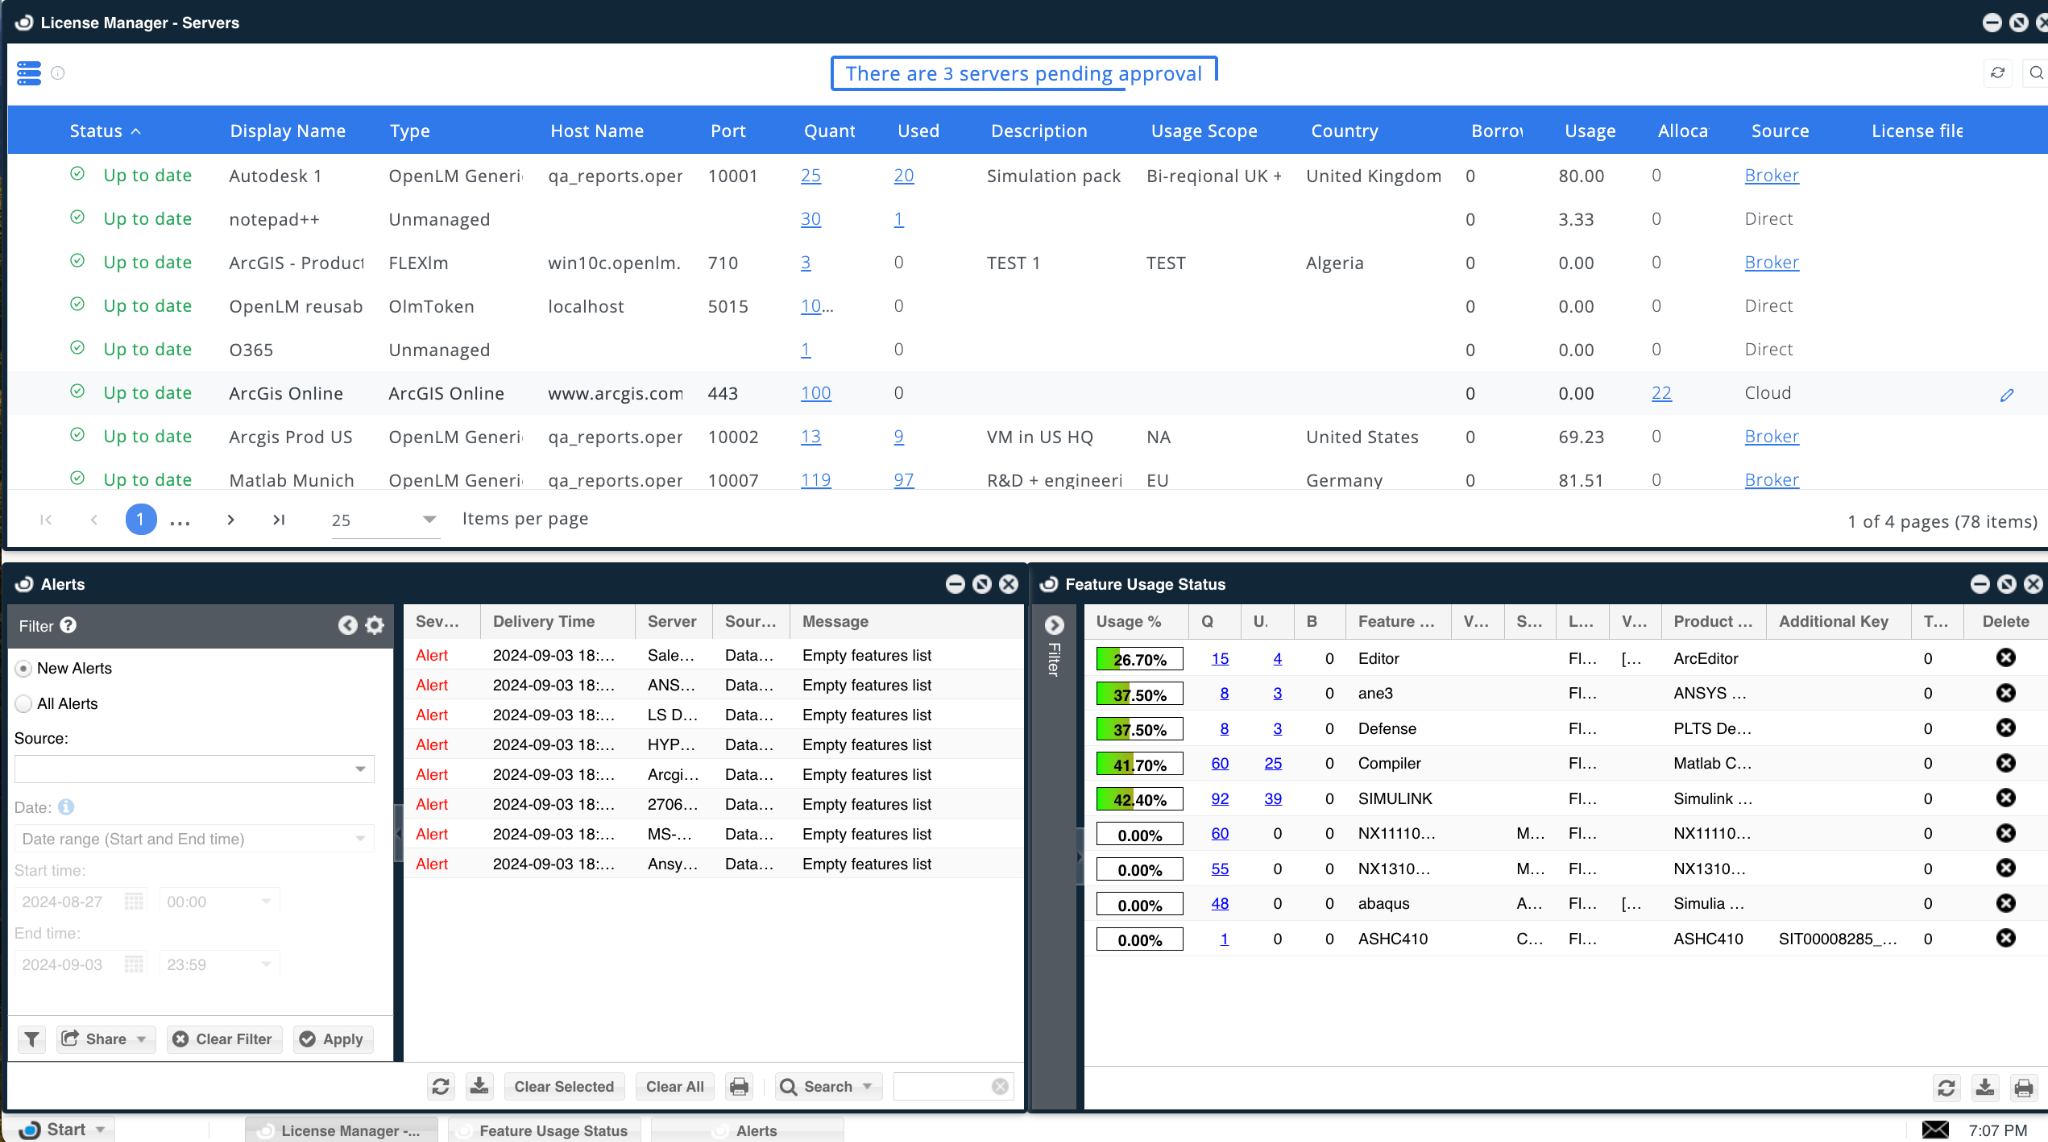
Pending license managers in EasyAdmin -
Double-click the pending license manager.
It will be displayed as OpenLM Generic.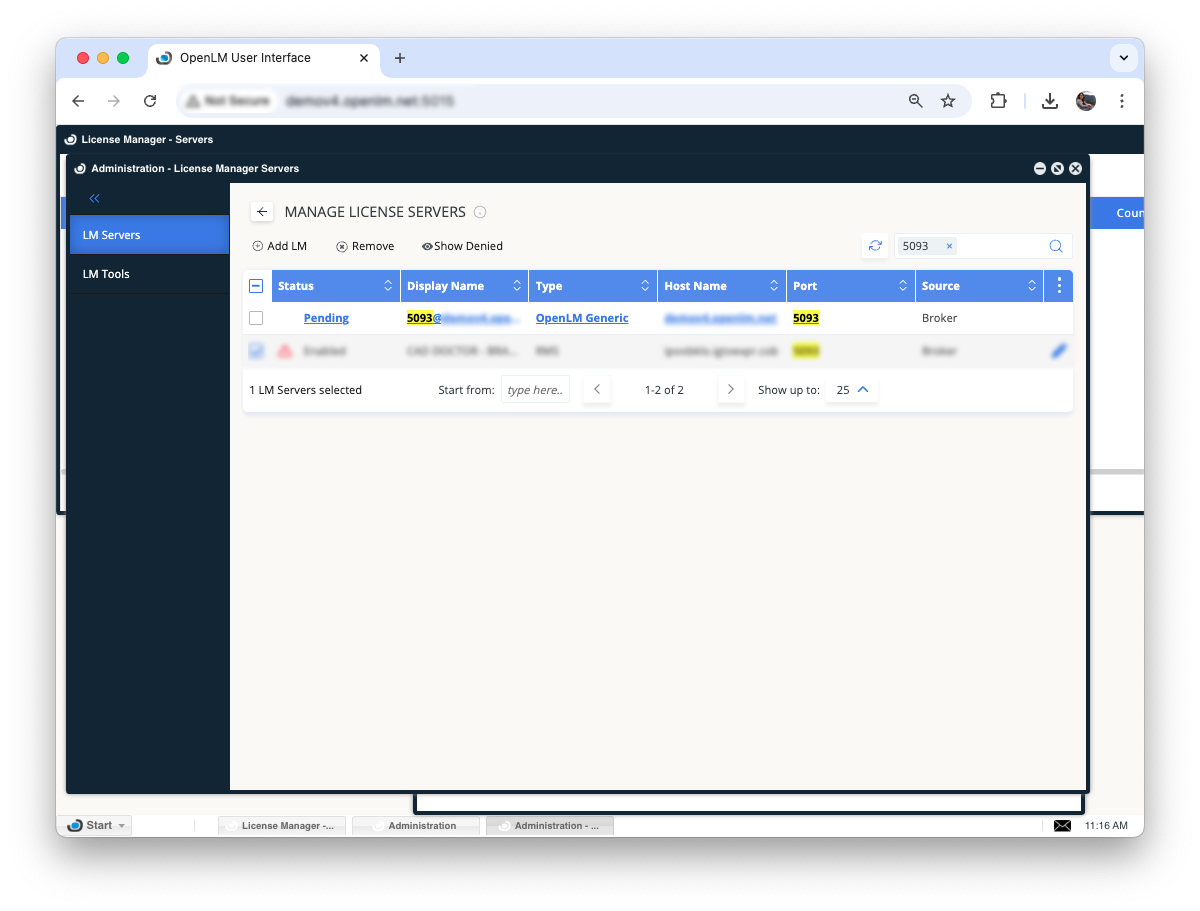
Pending Canvas license manager in EasyAdmin -
(Optional) Modify the display name. Verify the configuration, then select Approve.
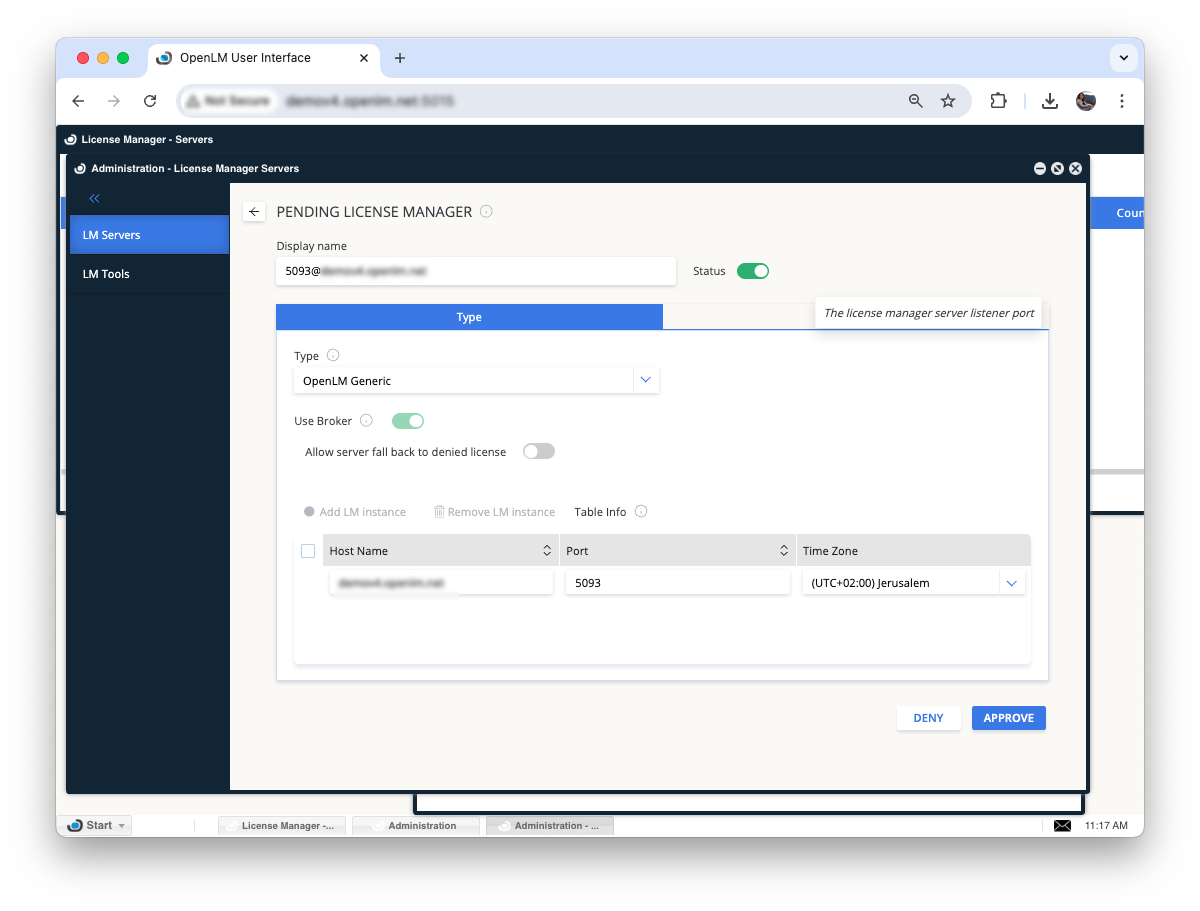
Approving a Canvas license manager in EasyAdmin -
(Optional) Switch to the Custom Fields tab to add details such as country, usage scope, and description.
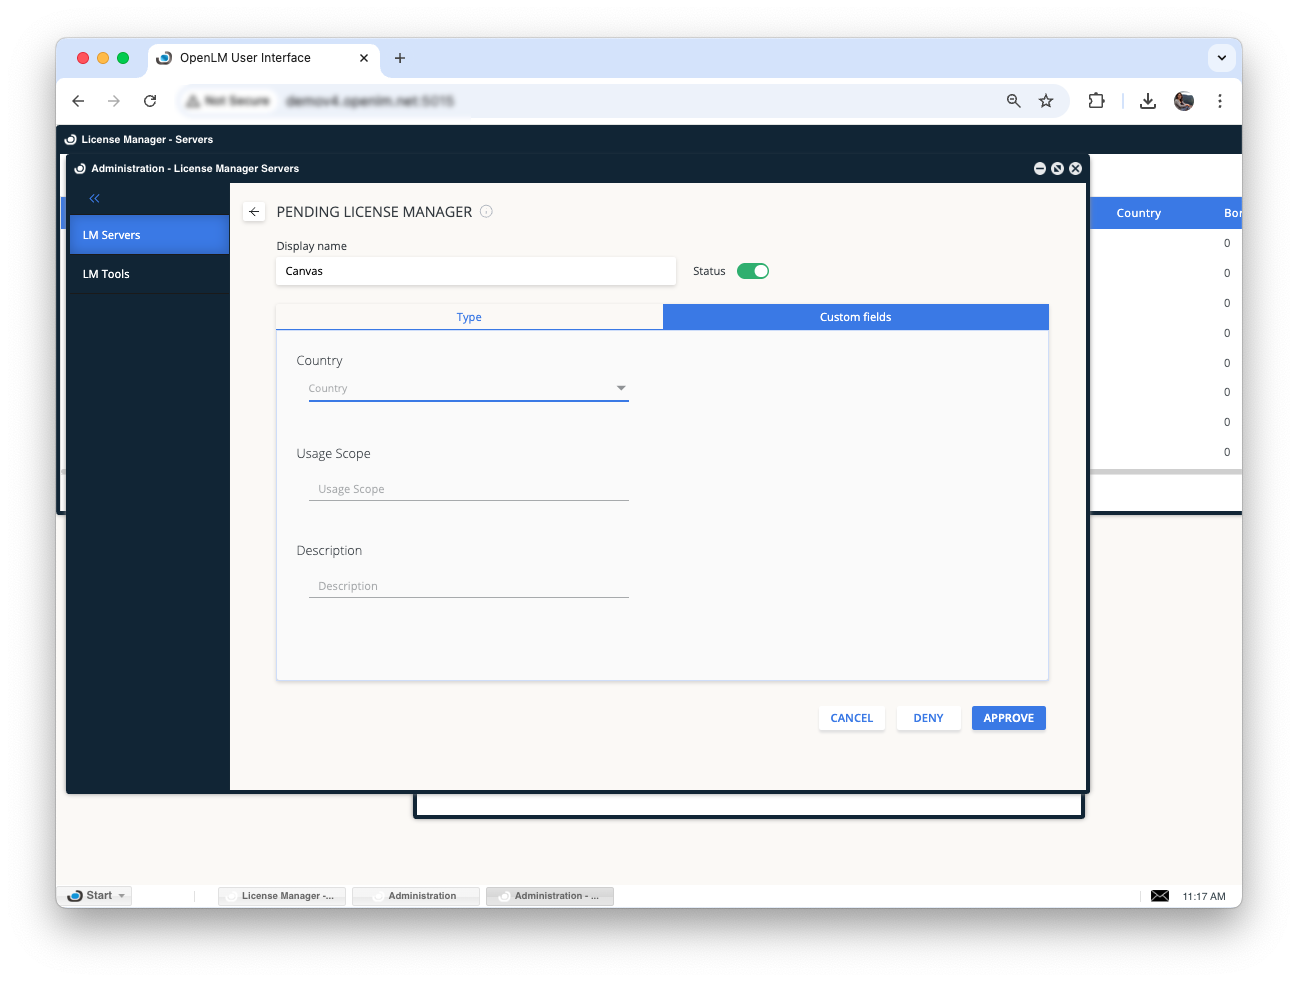
Adding custom fields for a Canvas license manager
At this point, Canvas is added to OpenLM SLM, and the configuration is complete.
It will take a few moments for the data to be parsed and available.
A green circle icon confirms an active connection.
How to verify your Canvas configuration
-
Open EasyAdmin in your browser.
-
Go to Start → Widgets → License Servers.
-
Verify that the configured license manager appears in the server list.
A green circle icon indicates an active connection.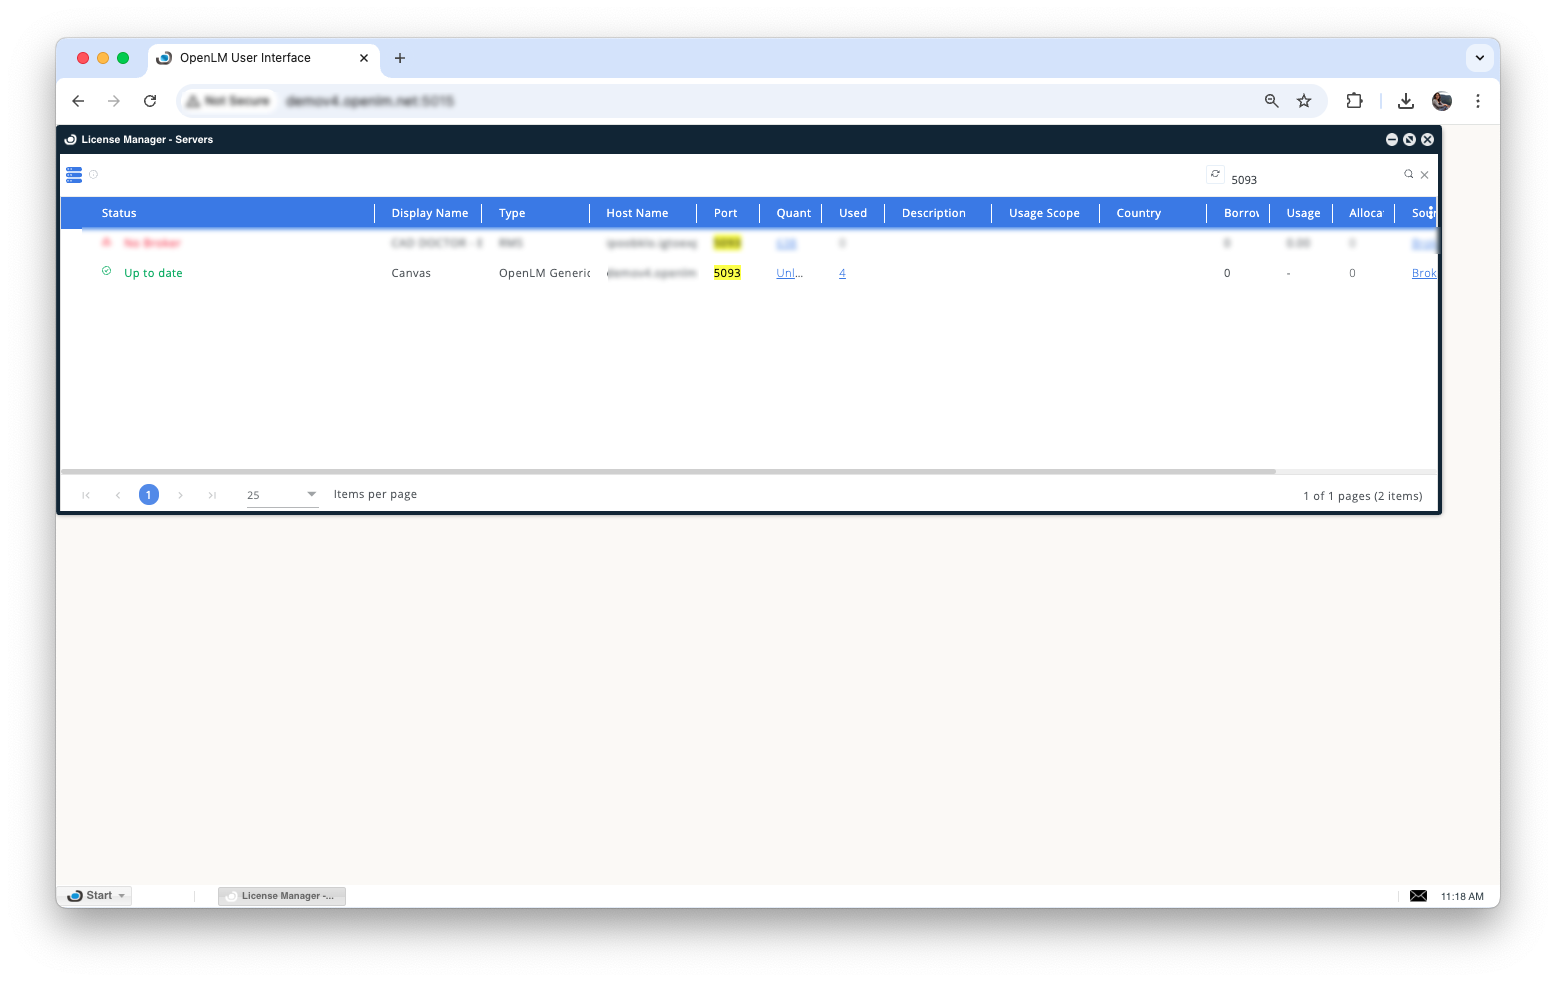
Green circle indicating an active connection in EasyAdmin
If this is a new connection, it may take up to 3 minutes for the status indicator to update.