Upcoming Webinar: Register now >>

Monitoring the DSLS license manager with OpenLM

Scope

OpenLM supports license monitoring of a wide and ever-growing variety of license managers.

This application note elaborates on the steps required to configure OpenLM to interface the Dassault Systemes License Server (DSLS), monitor license usage, and obtain license statistics.

There are two options to query the DSLS License Server:

  1. Directly query the license server from the OpenLM Server. This method only provides license usage information.
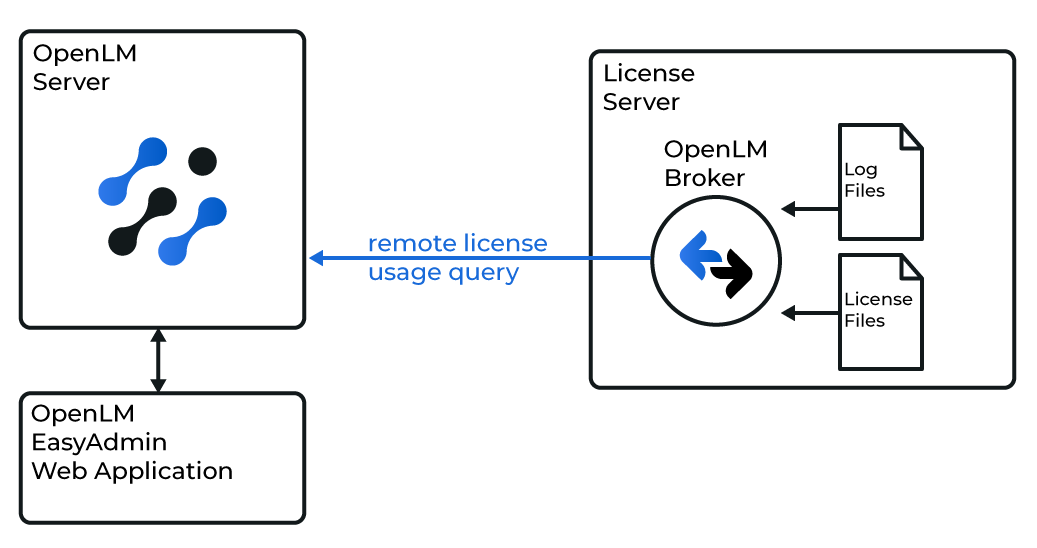
  2. Query the license server locally by the OpenLM Broker and propagate the information back to the OpenLM Server. This option may provide additional information, such as license denials and offline (borrowed) licenses.

Interfacing the DSLS License Server using OpenLM Server only

OpenLM Server interfacing directly with the LM

Adding a new DSLS server

1. Access your OpenLM Server instance. Navigate to Start→ Administration→License Manager Servers. The License Manager tab opens.

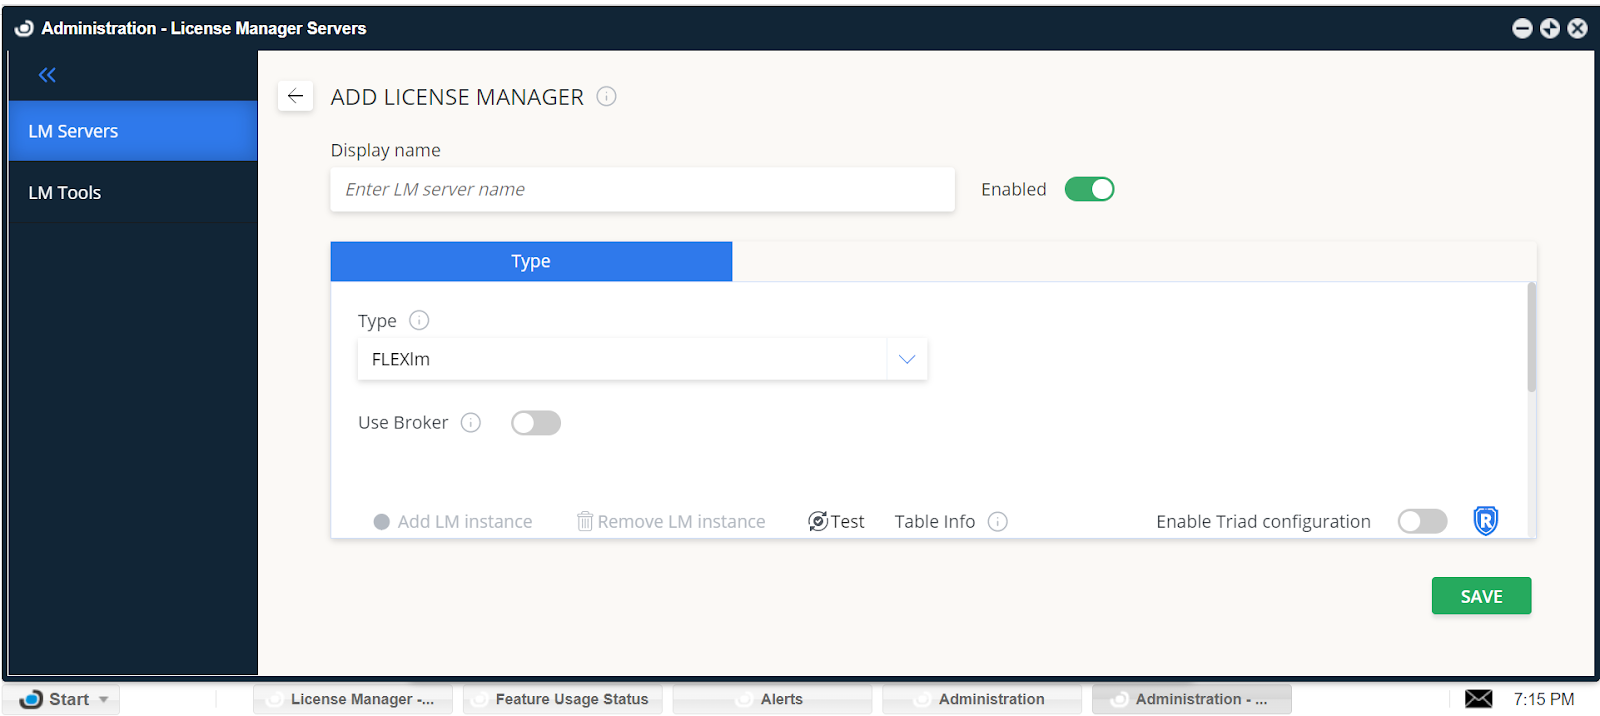
2. Click Add LM in the upper left corner. The following configuration screen appears:
(stay on the LM Servers tab).

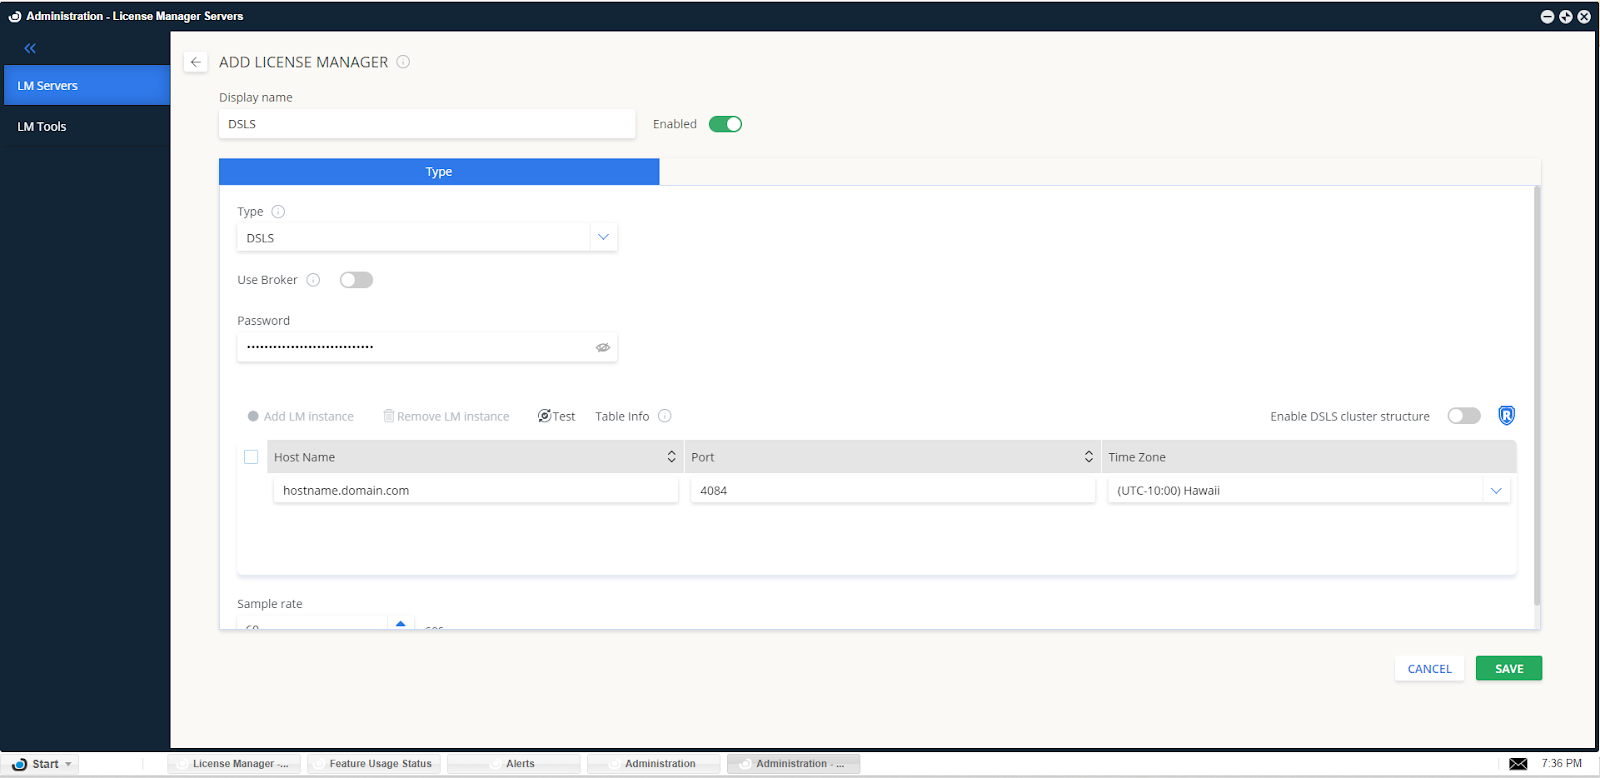
3. In the Display Name field, input a unique name to identify the license server.  (e.g. DSLS).

4. From the Type drop-down list, select DSLS.

5. Use Broker toggle:

  • Checked (Default): Usage information is obtained solely via the OpenLM Broker installation on the License manager machine.
  • Unchecked: The OpenLM Server actively queries the license manager. For this method (OpenLM Server only), make sure this is unchecked.

6. Password (‘Set’): DSLS license servers may be password protected. Enter the required password.

7. Type in an appropriate Hostname and Port number (e.g. L312MD and 4084 respectively).

5. Set the Time Zone to where the License Server physically resides (e.g. Pacific TZ).

7. Enable DSLS cluster structure: Set DSLS cluster structure configuration to support LM server redundancy. If you choose to work with OpenLM Broker, make sure the Broker is installed on all the servers.

  • Checked: The OpenLM server will monitor the activity of all DSLS servers of the multiple server redundancy configurations.
  • Unchecked (Default): The OpenLM server will only monitor the activity of a single DSLS license server.

11. Click SAVE.

12. Switch to the LM tools tab.

13. Select the LM Type – DSLS

14. Enter the full path to DSLS executable file (e.g C: Program FilesDassault Systemes DS License Serverwin_b64codebin)

15. Click SAVE.

The OpenLM Server is now ready to query the DSLS license manager and present the information over the EasyAdmin User Interface.

Interfacing the DSLS License Server using OpenLM Server + OpenLM Broker

Broker interface with log and license files

The OpenLM Broker is optional, though highly recommended component, that should be installed and configured on the DSLS license manager machine. The OpenLM Broker queries the license server locally and propagates the data to the OpenLM Server. It facilitates robust, buffered communication with the OpenLM Server to overcome temporary network failures.

The OpenLM Broker also facilitates querying the DSLS License Server and presents:

  • License usage reports
  • Information regarding denied license requests
  • License borrowing (‘offline’ licenses) information.

OpenLM Broker configuration

1. Download and install the latest OpenLM Broker version. Follow the installation and configuration instructions on the OpenLM Broker configuration guide.

2. Access your Broker web UI instance (http://localhost:5090/)

3. Navigate to the License Managers tab.

2. By default, if the license manager service is running, using the Broker’s “Detect” function should find and configure the DSLS license manager automatically.

3. If the Detect button did not work, follow the steps below:

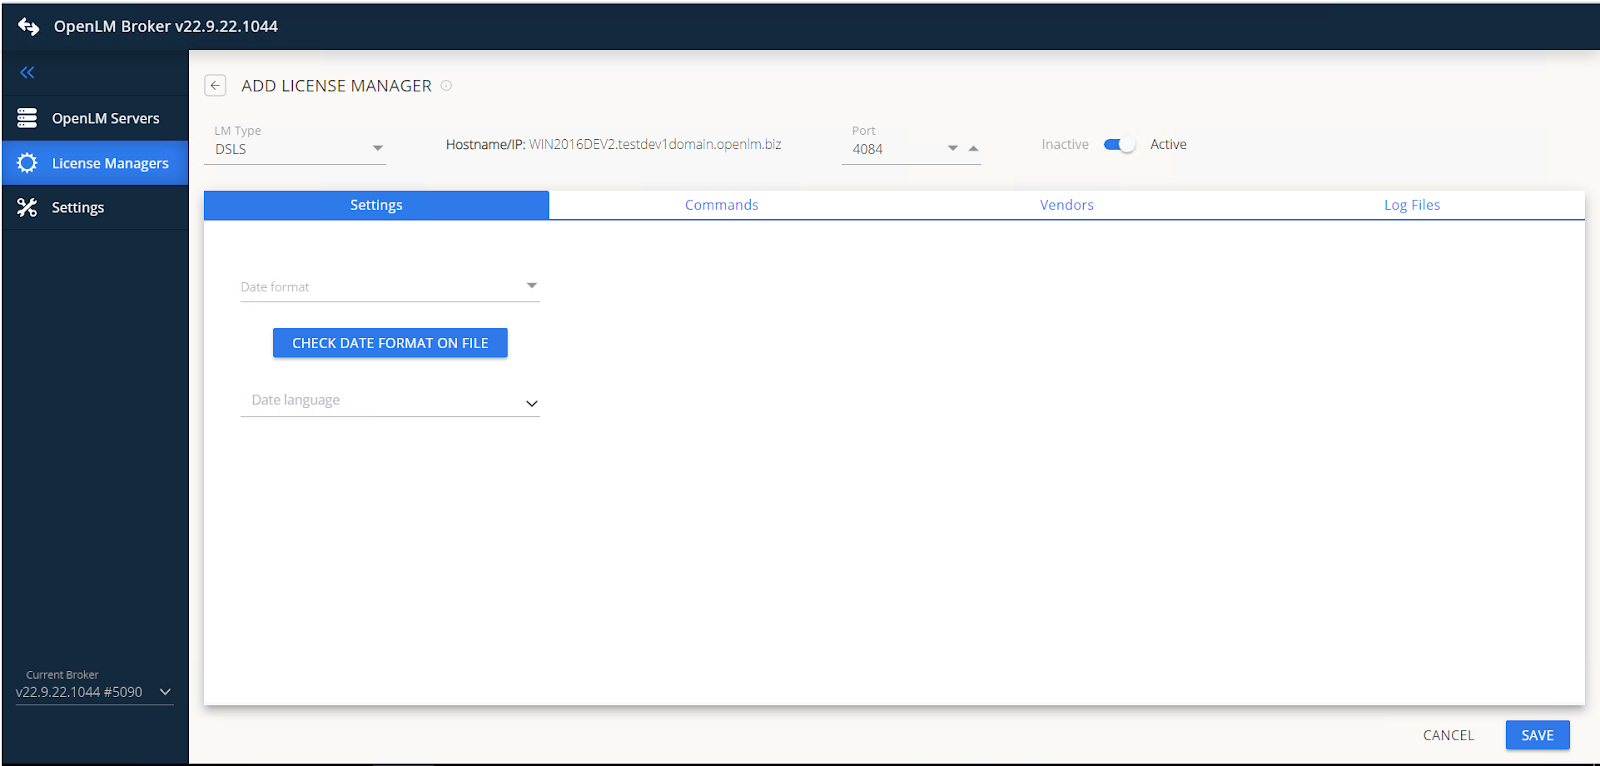
4. Click Add License Manager. A pop-up will appear.

5. Settings tab: from the LM Type drop-down list, select DSLS. Type in the DSLS port number.  Click ADD. The ADD LICENSE MANAGER configuration window appears:

6. Date format and Date language: make sure to choose the ones on the license file.

7. Switch to the Commands tab. In the Executable path field, type the full path or browse to where DSLicSrv.exe resides on the DSLS license manager machine. Click Execute and make sure the output is valid.

If the DSLS license manager has been configured to use a password, you must edit the individual syntax for the following commands with your own password like so:

Note: make sure there is a space character before each semi-colon separator

For status and data_inquiry:

“C:…DSLicSrv” -admin -locale en_US;connect DESKTOP-7CRIQ3C 4048 -r ;PASSWORD ;getConfig ;getLicenseInfo ;getLicenseUsage -all;disconnect ;quit

For denial:

“C:…DSLicSrv” -admin -locale en_US;connect DESKTOP-7CRIQ3C 4048 -r ;PASSWORD ;showLog -from @date@format:yyyy/MM/dd HH:mm:ss@ -to @date@format:yyyy/MM/dd HH:mm:ss@;disconnect ;quit”

5. Switch to the  Vendors tab.  Click Add Vendor.  A pop-up appears.   Type in “Dassault Systemes” for the name then click Continue.

Click Apply after each edit to commit the changes.

6. In case of a multiple-server redundancy configuration (“triad”), the OpenLM Broker will need to be installed on each of the DSLS license servers, through the same process as described above.

7. Make sure that the commands “status”, “data_inquiry” and “denial” have the locale “en_US” configured.

DSLS Log file information

In order to configure the DSLS log you need to:

1. Switch to the  Log files tab then click the Add Log File button. A popup appears.

3. Select the ‘Other’ type

4. Add a descriptive name (e.g. “The DSLS log file”)

5. Fill in or browse to the full path of the DSLS log file (e.g. “C:…my_dsls_log.log“).

6. If more than one vendor has been introduced, make sure that the one selected is “Dassault Systemes“.

7. DSLS logs may be configured to change names periodically. In order to continue acquiring DSLS log information throughout such changes, check the “Watch files by pattern” box so that the Broker will detect such log files heuristically.

Verify the DSLS configuration on the EasyAdmin User Interface

To check if the DSLS License Server is configured properly:

  • Open the EasyAdmin User Interface.
  • Click EasyAdmin Start → Widgets→ License Servers. The License Servers window appears. Click on the License pending approval. Verify that the configured license managers appear on the list. A green circle node indicates an active connection to a license server (this might take a few minutes.)

DSLS denials reports

DSLS denials will be presented in the EasyAdmin web application Start → Reports → Denials.

Notes:

1.  DSLS denials are subject to “True denials” filtering. That means that denials’ reporting will be delayed for a while, to assert that the user has not been granted a license in the meantime.

Your OpenLM system is now configured to monitor DSLS licensing information. If you require further assistance on this subject, please get in touch with support@openlm.com and our team will be glad

What are your feelings
Skip to content