
This document describes the steps required to monitor the Managed DSLS with OpenLM and obtain license usage and statistics.
Requirements
- To see the Managed DSLS license usage information, the OpenLM Server must be installed on a machine in your organization or you need to be registered in OpenLM Software License Management Cloud.
- Installed OpenLM Broker v22.6 or higher on a machine with access to dslsstat utility.
Monitoring capabilities and features
Monitoring capabilities will depend on which method you choose to query the Managed DSLS license server:
- Querying remotely through the OpenLM Server only gives you license totals and license usage data.
- Querying locally through OpenLM Broker gives you the same data as when queried through Server plus additional benefits such as:
- Buffered communication with the OpenLM Server to overcome temporary network failures
- Ability to remotely start/stop the license manager service
- Access to license denial information
- 1-minute resolution for license usage reports
- Ability to read Managed DSLS license and log files
- Ability to view Managed DSLS license file content in EasyAdmin User Interface
Interfacing Managed DSLS using OpenLM Broker

Diagram of how OpenLM interfaces with the Managed DSLSusing OpenLM Broker
The OpenLM Broker component should be installed and configured on the same machine where the Managed DSLS resides. OpenLM Broker reads the data and then sends this data back to OpenLM Server.
To automatically configure OpenLM Broker with the Managed DSLS, access the Broker on your Managed DSLS machine, click the License Managers Tab, then click Detect:

If the Managed DSLS service is started, Broker will detect and configure all the required settings automatically. We recommend executing the Manual configuration section below to make sure that the server is queried successfully without any errors.
Manual OpenLM Broker configuration
If auto-detect did not work, you can also add and configure the license manager manually. To do so:
- Navigate to your Broker instance and click on the License Managers tab → Add License Manager. A pop-up will open.
- Select DSLS Cloud from the “LM Type” drop-down menu, enter the Managed DSLS server port number then click ADD. The Add License Mangers window opens.
- Select the Commands tab.
- In the Executable path field, fill in the correct filename and full path in the text box (or click on the magnifier and browse to the license file location).
- If you have configured Managed DSLS to run as a service, set the Use the operating system start/stop commands file toggle to ON, then type in the service name.
- Set the Data Inquiry toggle to On.
- Click Execute and make sure the output is valid.
- Switch to the Vendors tab.
- Click Add Vendor. A pop-up appears. Input the vendor name then click Continue.
- Switch to the Log Files tab → Add Log File. A pop-up appears.
- Input the Managed DSLS latest Log file path, select the vendor then click Continue.
- Click SAVE.
OpenLM Server configuration
To have OpenLM Server configured automatically via EasyAdmin User Interface:
- Open the EasyAdmin interface either by accessing in your browser or through Windows Start → OpenLM → OpenLM EasyAdmin User Interface)
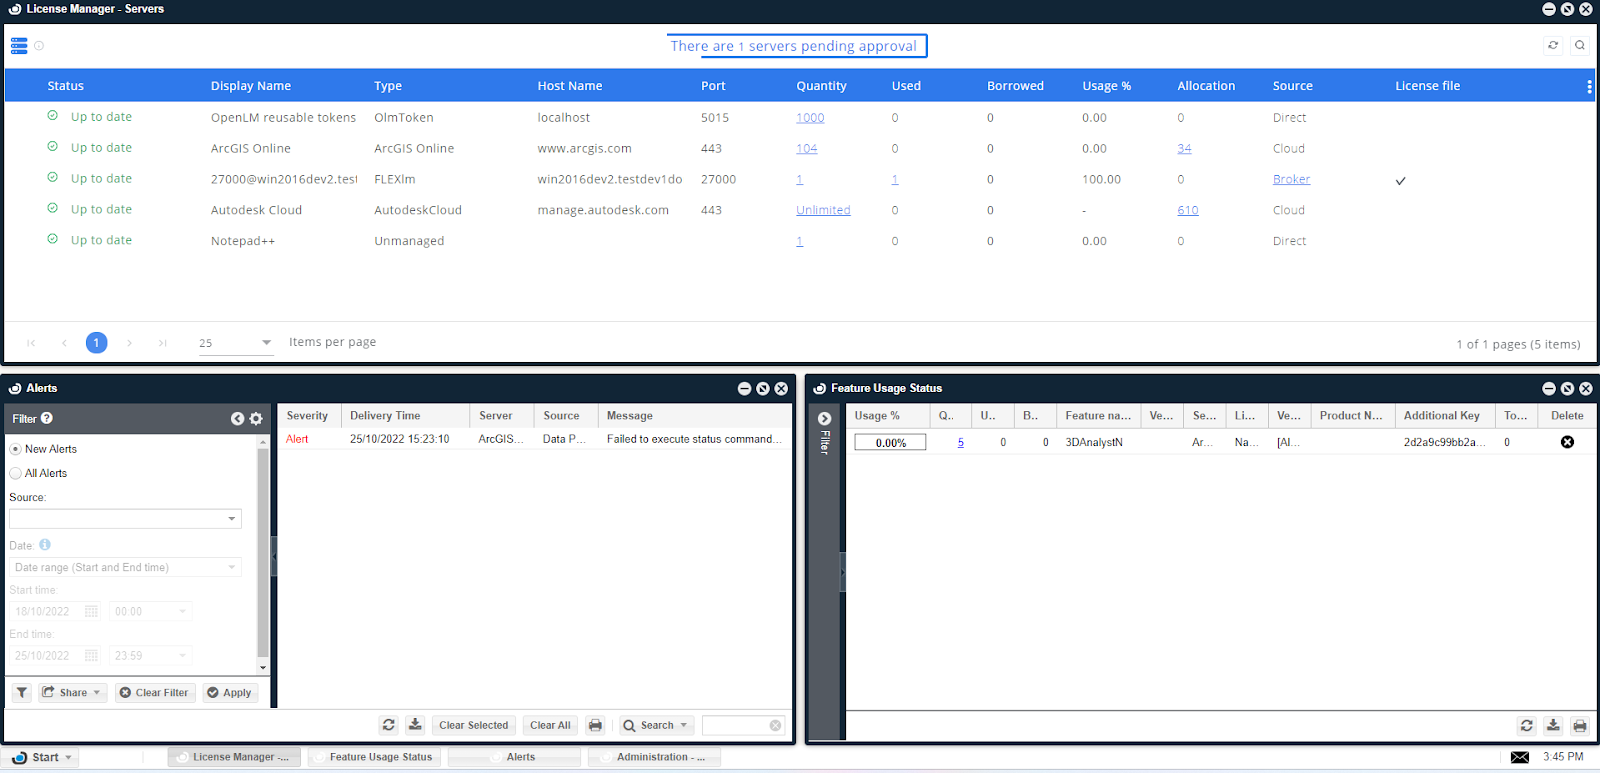
- In the License Servers window, Click “there is x servers pending approval”. Click on it to approve the new entry.

How to verify your Managed DSLS configuration
To check if the Managed DSLS License Server is monitored correctly:
- Open the EasyAdmin user interface in your browser
- Click EasyAdmin Start → Widgets → License Servers. The License Servers window will open. Verify that the configured license manager(s) appears on the list. A green circle node indicates an active connection to the license server
Please note that sometimes it may take up to 3 minutes for the status indicator to change if this is a newly added connection.


