How to manually import users into OpenLM (HT900)
This document explains how to manually import users from an external data source into the OpenLM database. An external data source can be a directory service (for example, Active Directory), an accounting system, or any database that contains user information.
Prepare a CSV in the OpenLM user table format
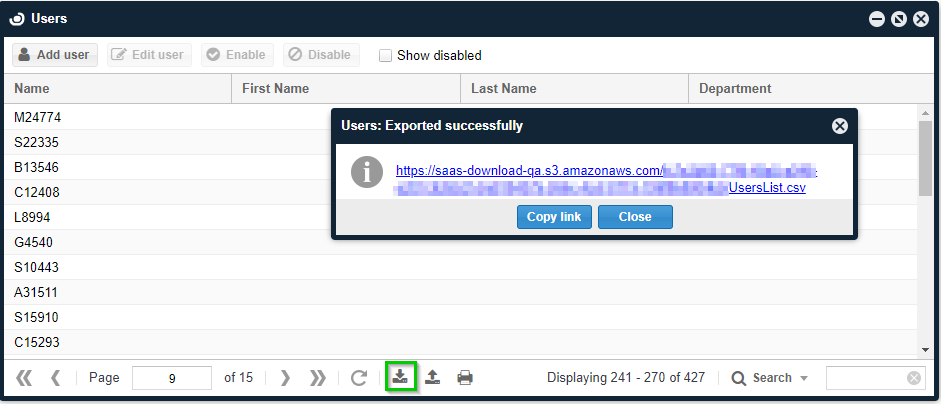
The easiest way to get a sample CSV is to export your current users from OpenLM:
- Open the OpenLM EasyAdmin User Interface.
- Click Start and go to Users & Groups.
- Open Users.
- Click Export.
- Download the CSV file.
The CSV must use the OpenLM user table format below.
| Column name | Required | Notes |
|---|---|---|
| Username | Yes | Must be unique. Single value. |
| First Name | No | Single value. |
| Last Name | No | Single value. |
| Department | No | Single value. |
| Display Name | No | Single value. |
| Title | No | Single value. |
| Phone | No | Single value. |
| Office | No | Single value. |
| Description | No | Single value. |
| No | Single value. | |
| Enabled | Yes | TRUE or FALSE. |
| Groups | No | Use the pipe character ` |
| Default Group | No | Single value. |
| Projects | No | Use the pipe character ` |
| Default Project | No | Single value. |
Note: Any groups or projects referenced in the CSV must already exist in the OpenLM database or the import will fail.
Import the CSV into OpenLM
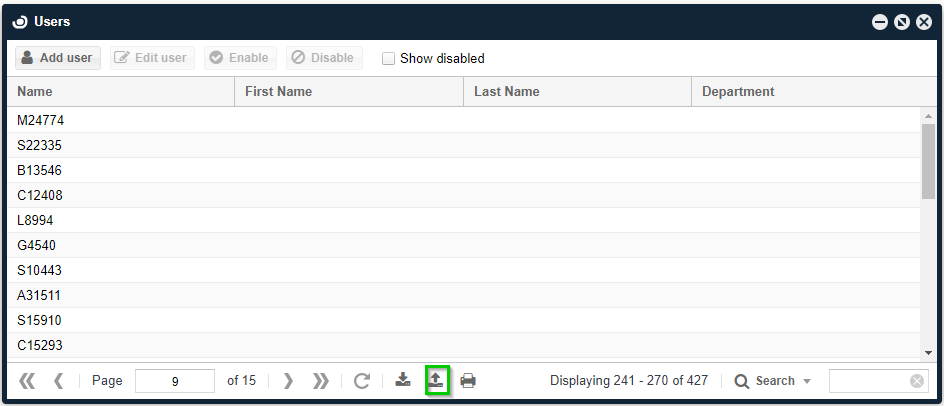
- Open the OpenLM EasyAdmin User Interface.
- Click Start and go to Users & Groups.
- Open Users.
- Click Import.
- Browse to the CSV file and click Open.
- Review the success or failure dialog.
Importing users from Active Directory
OpenLM supports full synchronization with Active Directory via Directory Sync components, but you can also import specific users manually by using a CSV file. The process includes exporting users from Active Directory, editing the CSV to match the OpenLM format, and importing it.
Export users from Active Directory
- Open Active Directory Users and Computers.
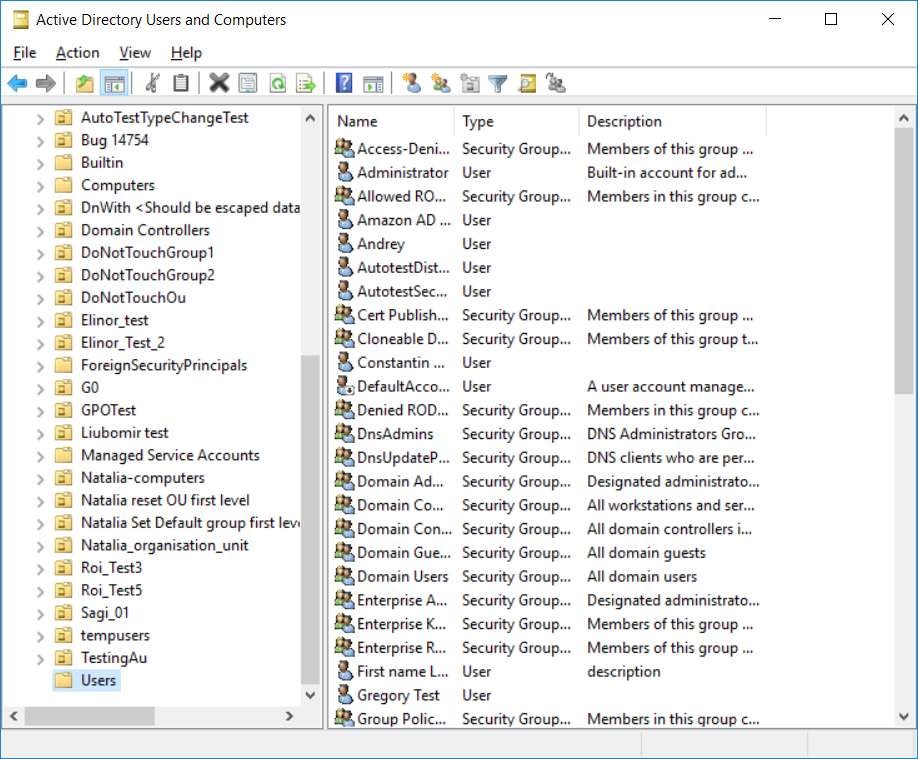
- In the left panel, expand your domain and select the Users folder.
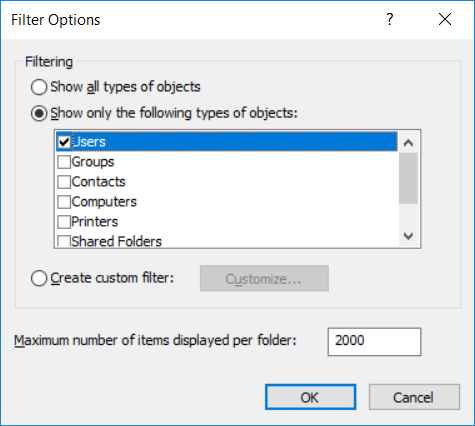
- Click the Filter icon.
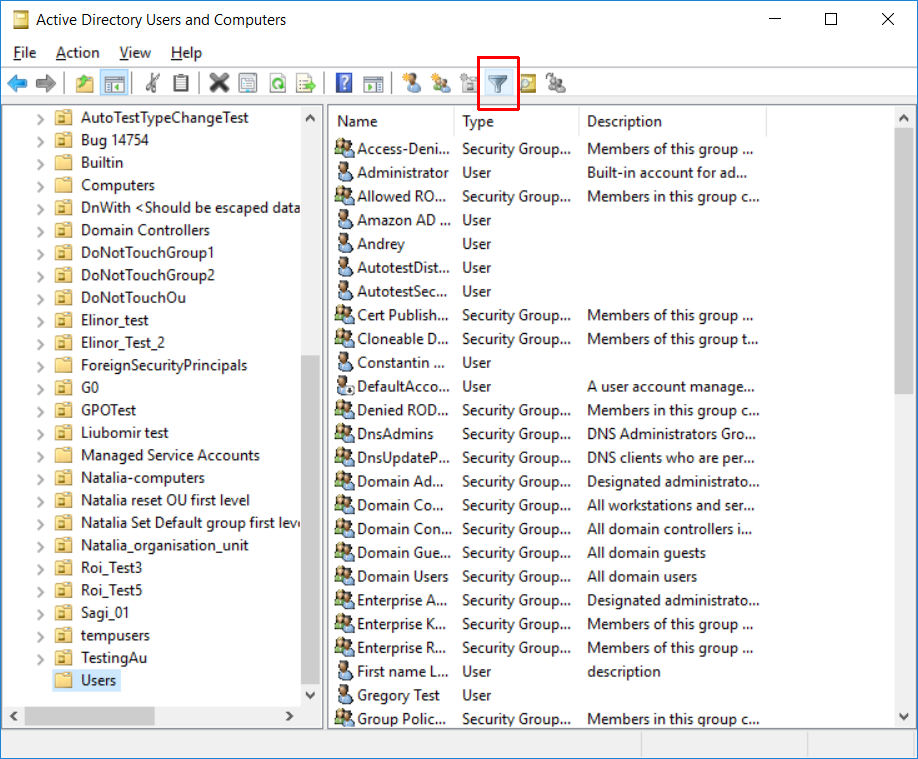
- Select Show only the following types of objects, check Users, and click OK.
- On the menu, click View and choose Add/Remove Columns.
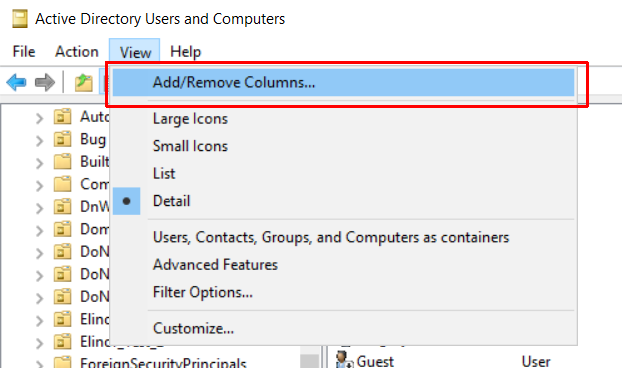
- Add the following columns in this order, then click OK:
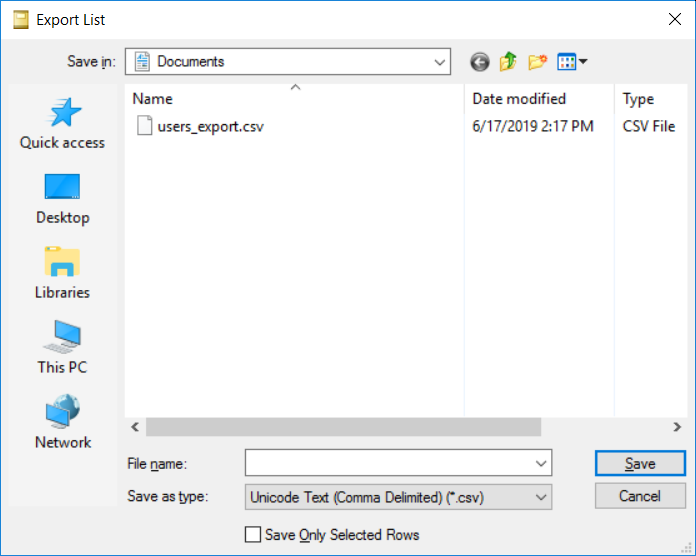
User Logon Name,First Name,Last Name,Department,Name,Job Title,Business Phone,Office,Description,E-mail Address. - Click the Export icon.
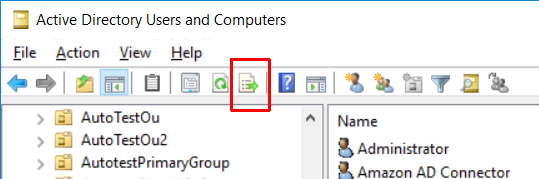
- Choose a save location.
- For Save as type, select Unicode Text (Comma Delimited) (*.csv).

- Optional: To export only selected users, check Save Only Selected Rows.
- Click Save.
Edit the CSV to match the OpenLM format
- Open the exported CSV in a spreadsheet application.
- Rename these column headers:
| Original header | New header |
|---|---|
| User Logon Name | Username |
| Name | Display Name |
| Job Title | Title |
| Business Phone | Phone |
| E-mail Address |
- Add these column headers at the end of the file in this order:
Enabled,Groups,Default Group,Projects,Default Project. - Set the
Enabledvalue to TRUE for enabled users and FALSE for disabled users. - Save the file as CSV.
Import the edited CSV into OpenLM
- Open the OpenLM EasyAdmin User Interface.
- Click Start and go to Users & Groups.

- Open Users.
- Click Import and browse to the edited CSV file.
- Confirm the success dialog.