Users and Groups
Manage users, groups, email aliases, user aliases, and workstations. View, create, and edit entries for each entity.
Prerequisites
Users and Groups is active by default for every account.
Users panel
The Users panel lists all users added from any source (manual, license usage, options file, agent, LDAP).
Controls:
- Top right:
- Import – Export the current list as a CSV template, modify it, then re-import to update or add users.
- Export – Download the list as CSV or PDF.
- Refresh – Reload the list.
- Filter – Enable column filters.
- Search – Find users by any field.
- Columns menu (⋮) – Show or hide columns, restore defaults, or print the current page.
- Top left:
- Add user – Open the Add User form.
- Disable user – Deactivate selected users.
- Show disabled – Toggle visibility of disabled users.

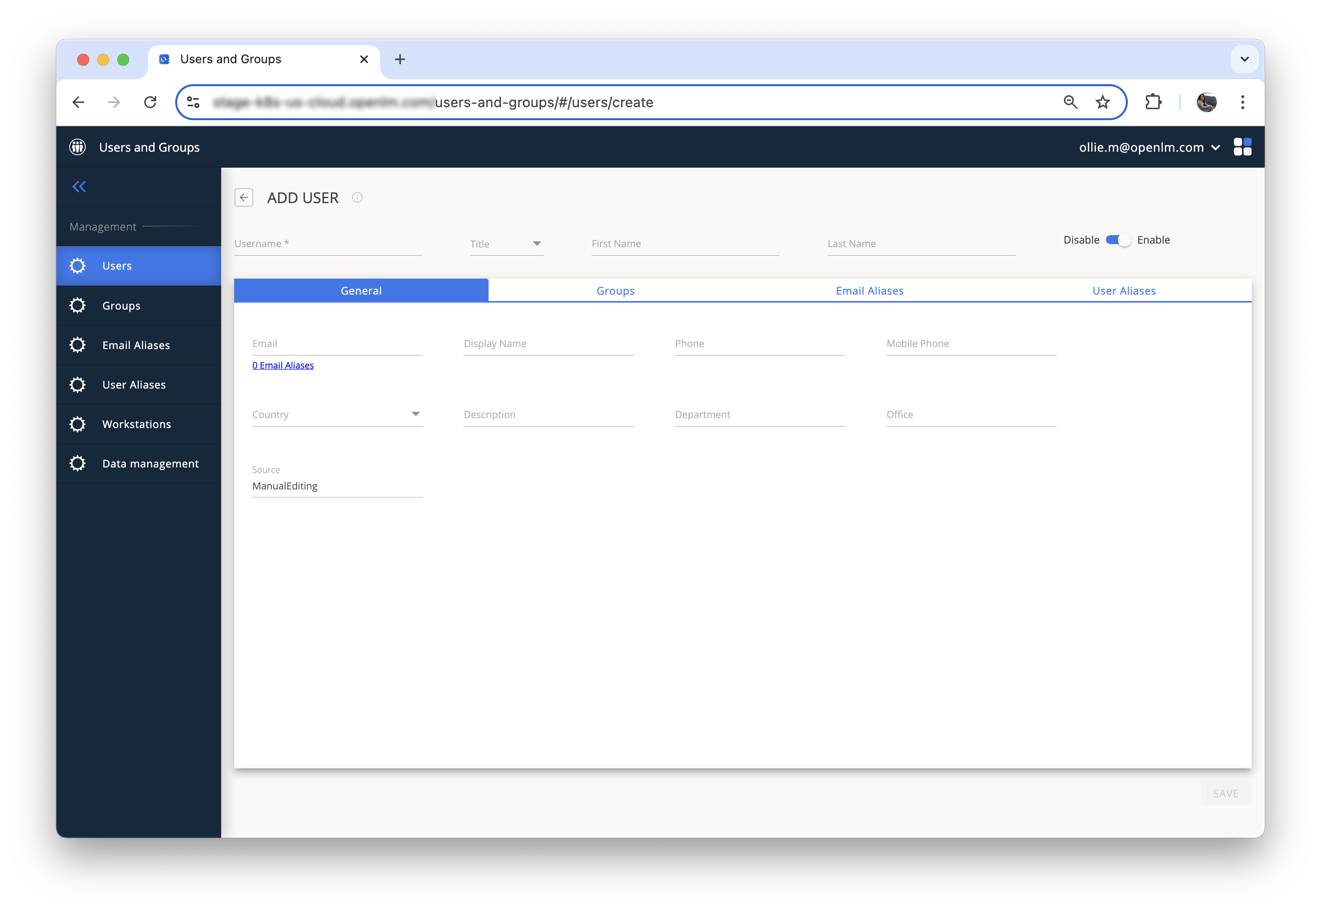
Add a new user
- Click Add user.
- In the General tab, Username is required; all other fields are optional.
- For Title, choose from the dropdown or enter a custom title and click Add to list.
- Toggle Enabled on or off (default: on).
- Select Country from the dropdown (used by Compliance).
- Fill in any additional fields as needed:
- First Name
- Last Name
- Display Name
- Phone
- Mobile Phone
- Description
- Department
- Office
- Source (always “ManualEditing” when creating manually)
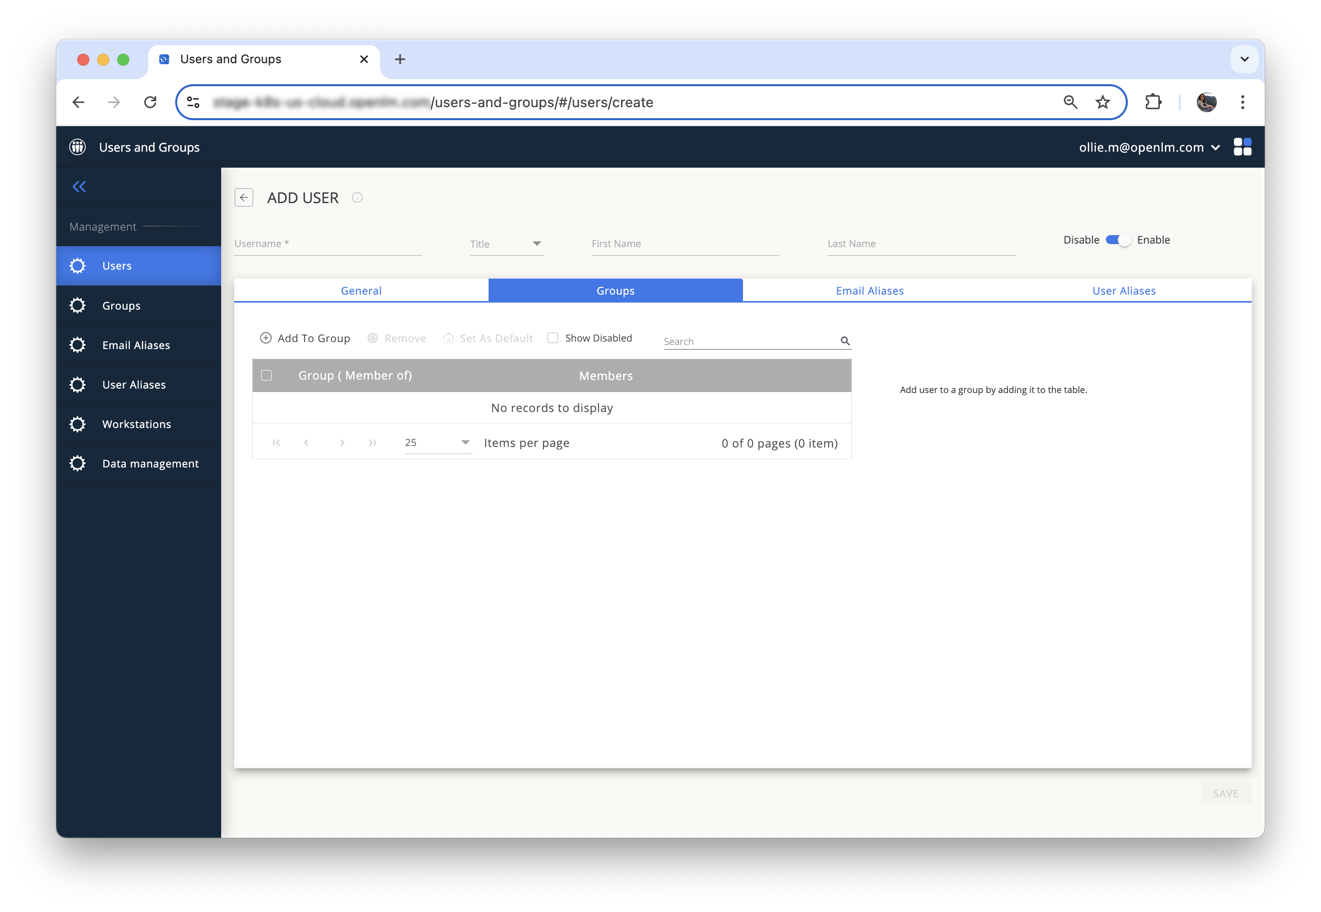
Add user to groups
- Open the Groups tab.
- Click Add to Group.
- Select one or more groups and click Add.
- To remove a user from a group, select the group and click Remove.
- Click Set as default to choose the user’s default group (used in reporting).
- Check Show Disabled to view disabled groups.
- Use Search to filter the group list.
Manage email aliases
Email aliases link multiple email addresses to a user.
- Open the Email Aliases tab.
- Click Add alias.
- Select an existing alias, or
- Enter a new alias and click Add.
- To detach an alias, select it and click Remove.
Manage user aliases
User aliases merge related user accounts under a primary user.
- Open the User Aliases tab.
- Click Attach alias.
- Select one or more existing users to attach as child aliases.
- To detach an alias, select it and click Remove.
Edit an existing user
- In the Users panel, click the Edit (pencil) icon on the desired row.
- Update any field using the same options described in Add a new user.
- Click Save to apply changes.
Groups panel
Coming soon
This section is not yet available. We’re working to add the content shortly.