Identity
Overview
Identity lets you manage OpenLM Platform users, configure single sign-on (SSO) with external providers, and generate authorization files for OpenLM components.
Identity is automatically activated for your account as it is a core system product.
Authentication and SSO
You can connect to external identity providers for authentication. Supported options include Okta, Azure Active Directory, and OpenID Connect.
Role-based access control (RBAC)
Identity defines roles to control access:
- Administrator: Full system access, including configuration and management.
- Viewer: Read-only access to data and reports.
Data retention (SaaS)
OpenLM Platform retains user data for the duration of the subscription. Upon termination, data is deleted in accordance with the service agreement:
- Active subscription: Full data retention.
- Suspended account: Data retained for 30 days.
- Deleted account: Data removed after 60 days.
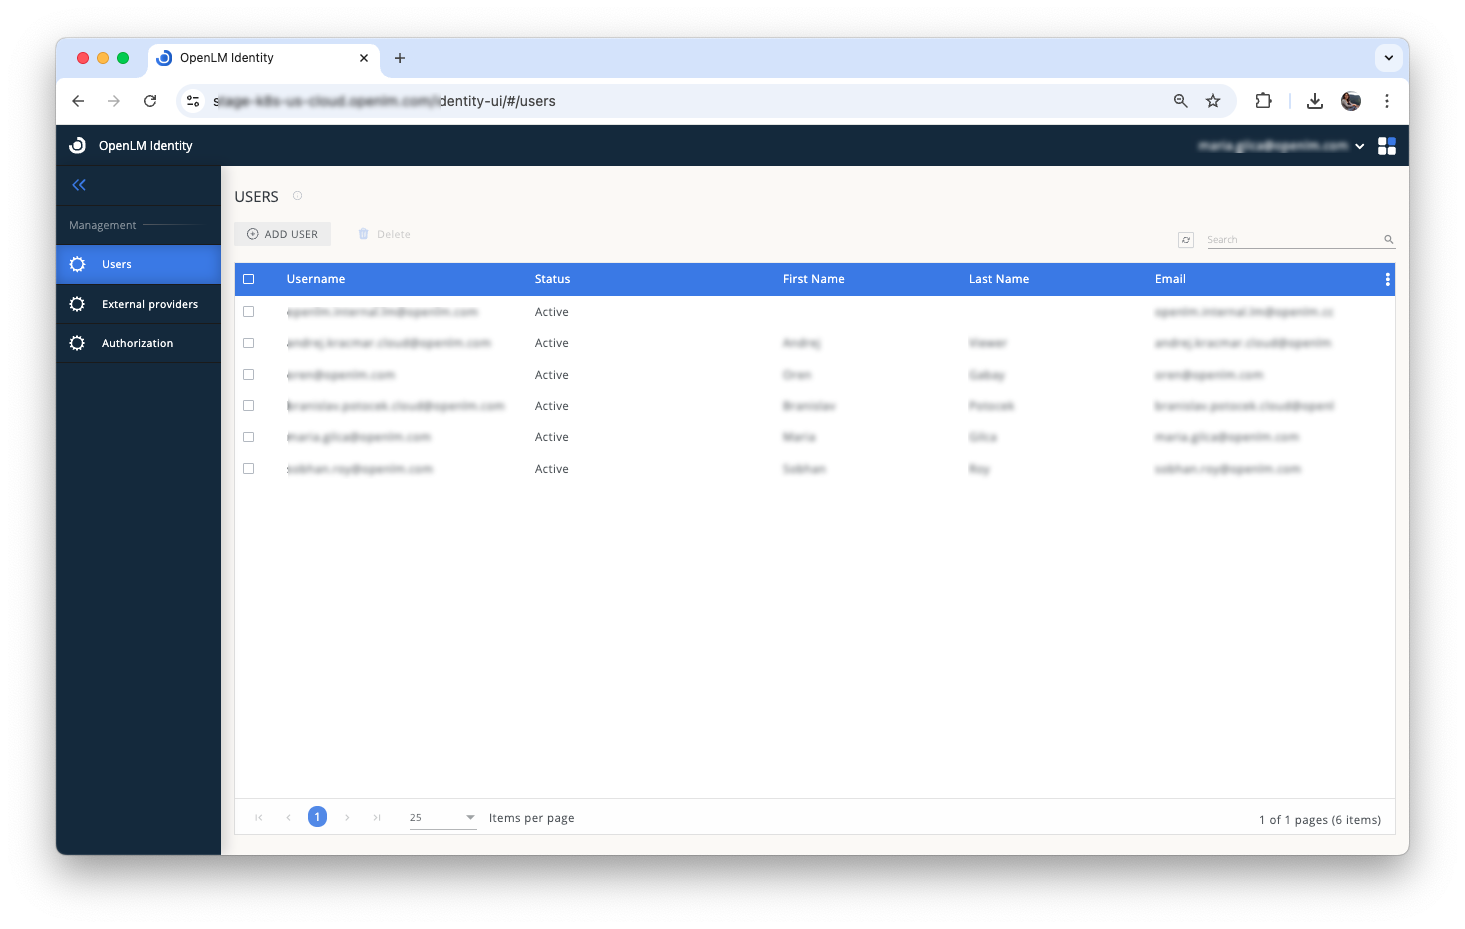
Users management
In the Users panel, account administrators can add new users and edit or delete existing users. The user who creates a cloud account automatically receives an Account Administrator role.
Add a new user
To add a new user:
Interactive guide - expand to see
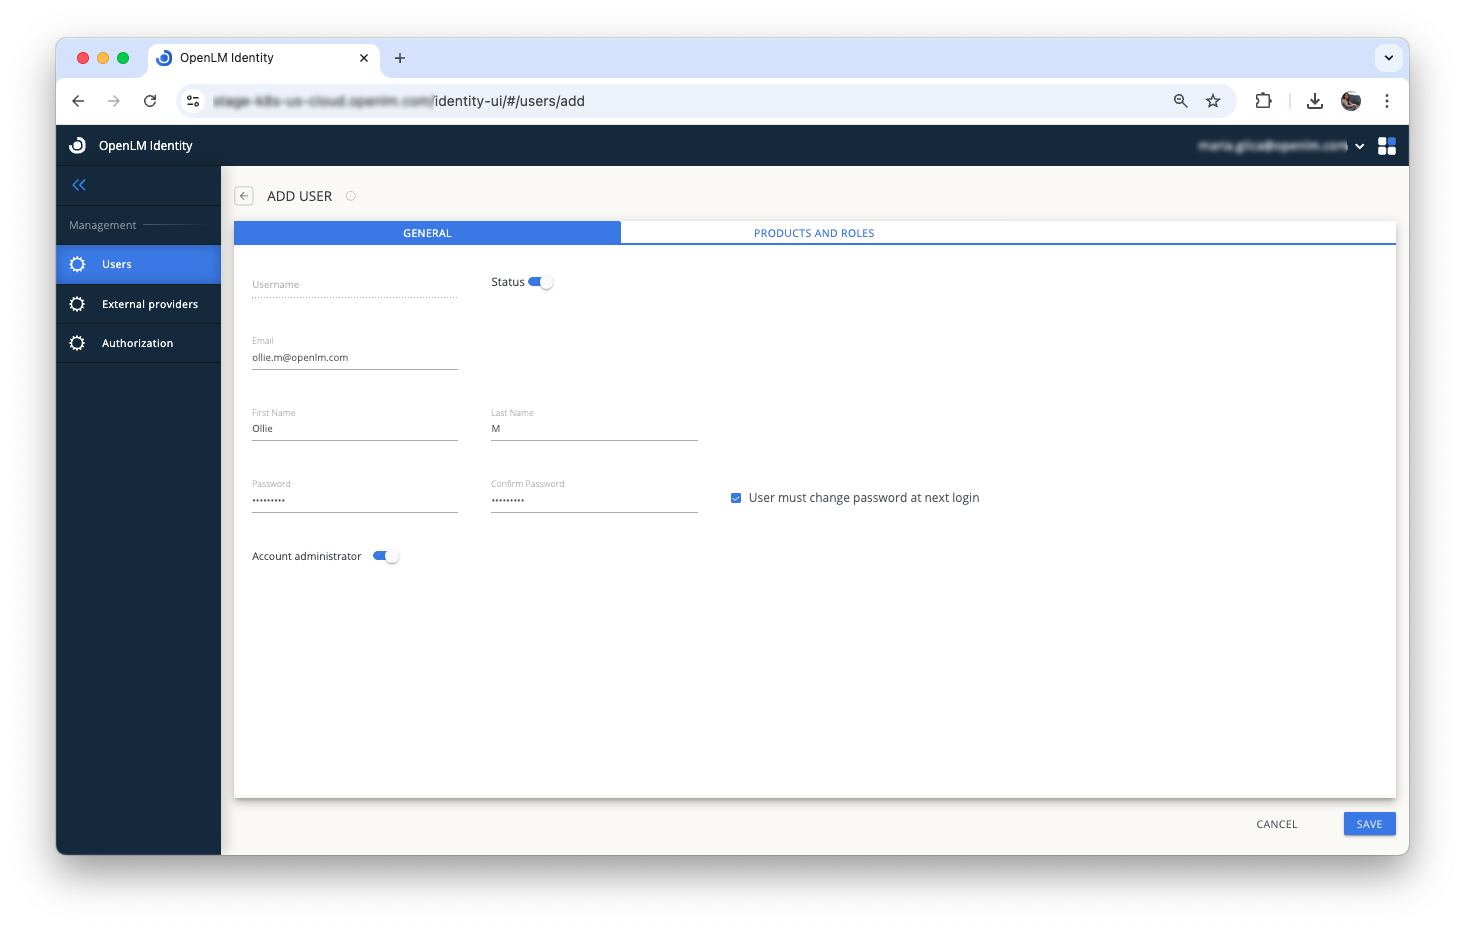
- In the Users tab, select Add User.
 2. In the General window:
- Enter the user's email address. The user will receive their login details and a link to the cloud portal at this email address.
- The Status toggle is active by default. To create an inactive user, deselect this toggle.
- First Name and Last Name fields are optional and can be updated later by users or account administrators.
- Set a temporary password. If required, select User must change password at next login.
- Enable the Account Administrator toggle if the user needs permission to manage other users.
- In the Products and Roles tab, set the user's access level (Admin or Viewer) for each activated product.
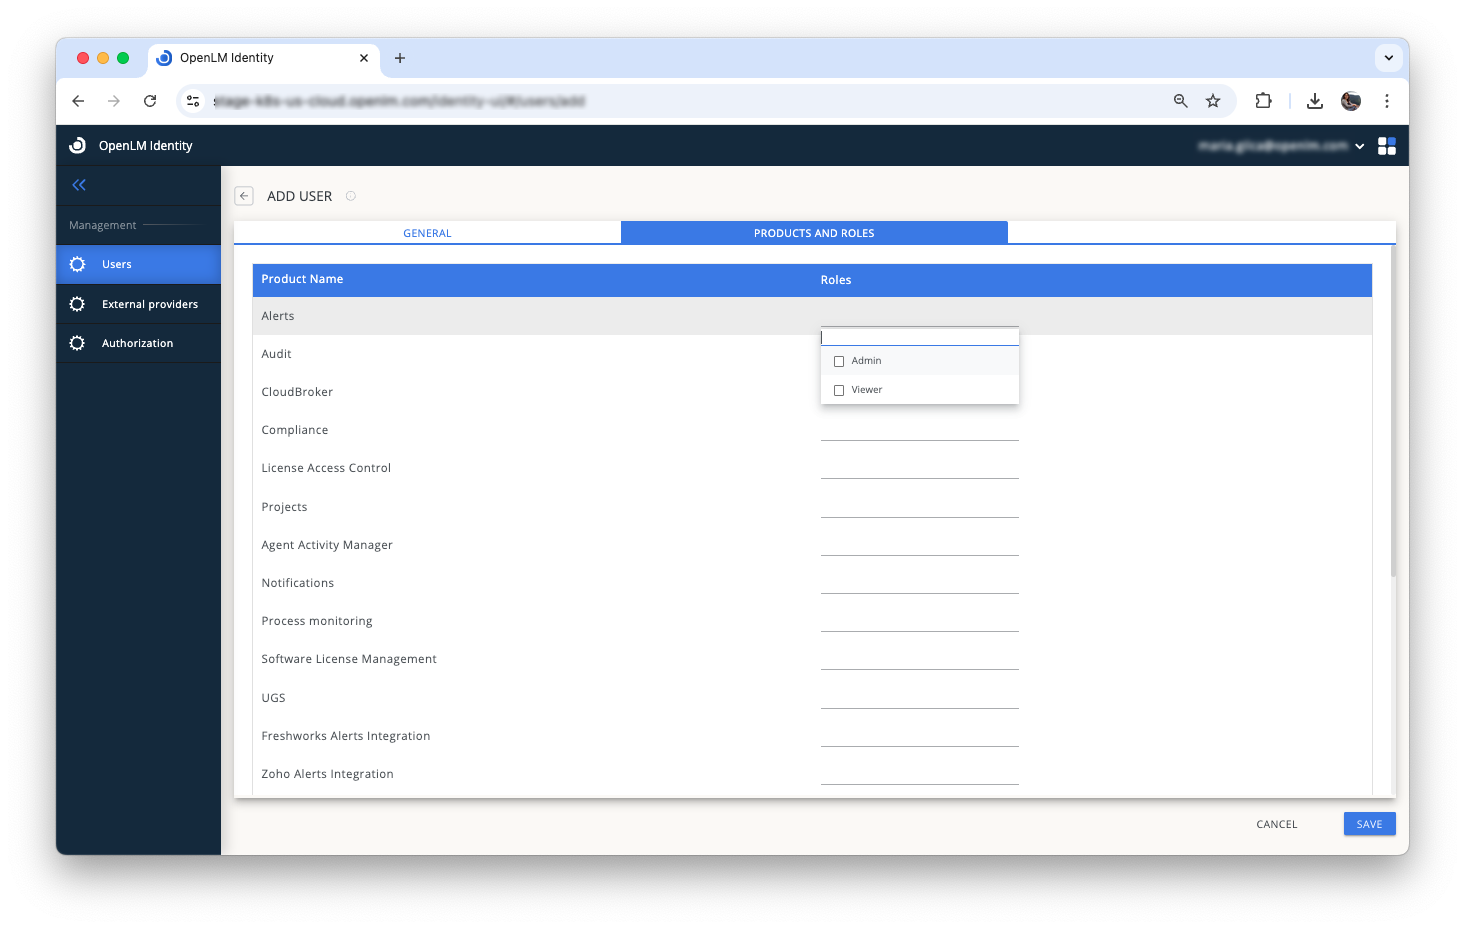 4. Select Save to confirm your settings.
Delete a user
To delete one or more users:
- Select the user(s) you want to delete.
- Select Delete.
- Confirm your action when prompted. To temporarily deactivate confirmation prompts, select Don’t ask for next 5 minutes.
Edit a user
To edit user details:
- Hover over the user’s row and select the Edit (pencil) icon.
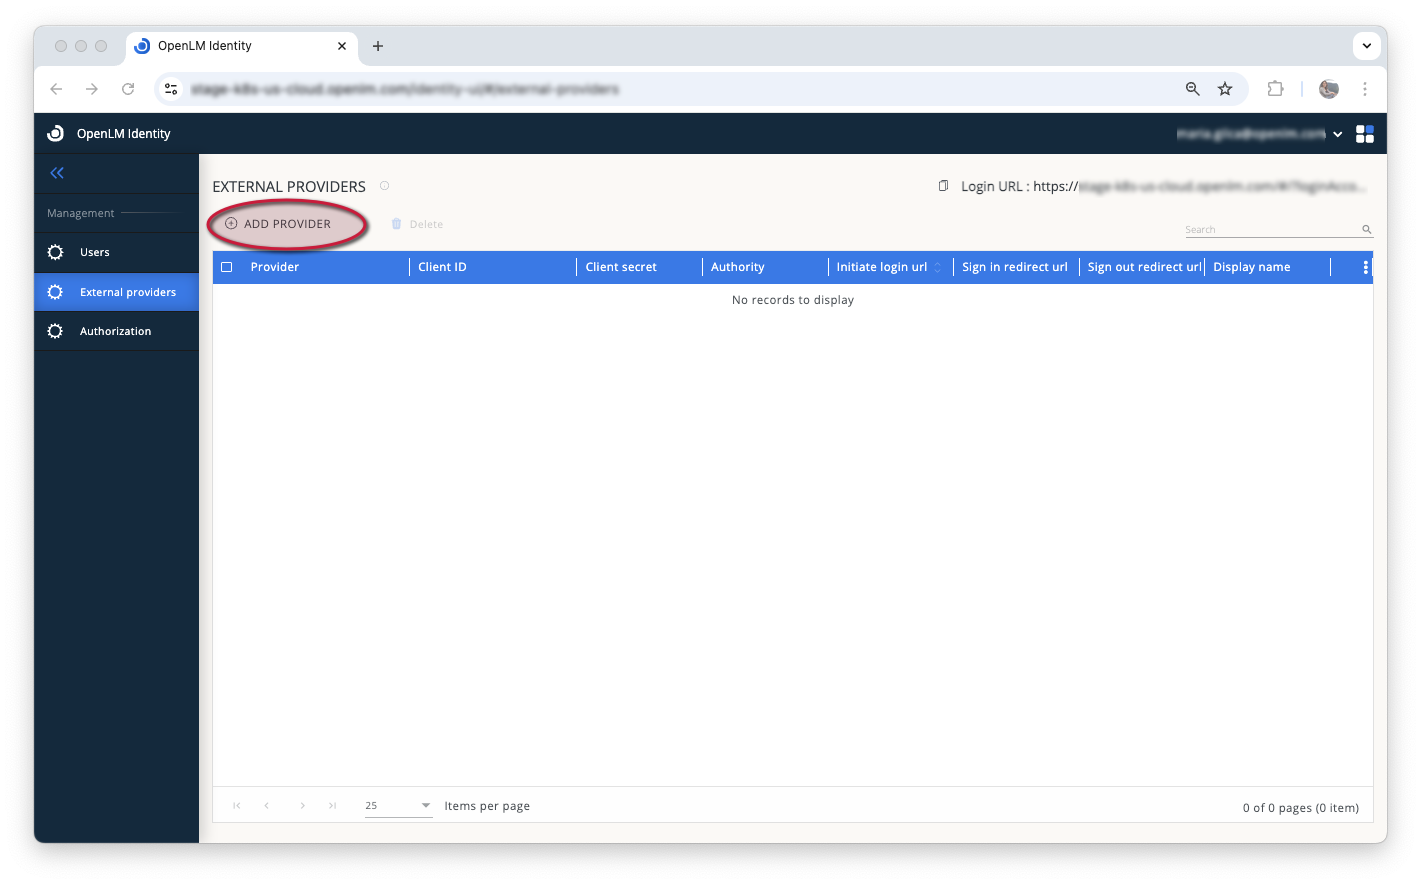
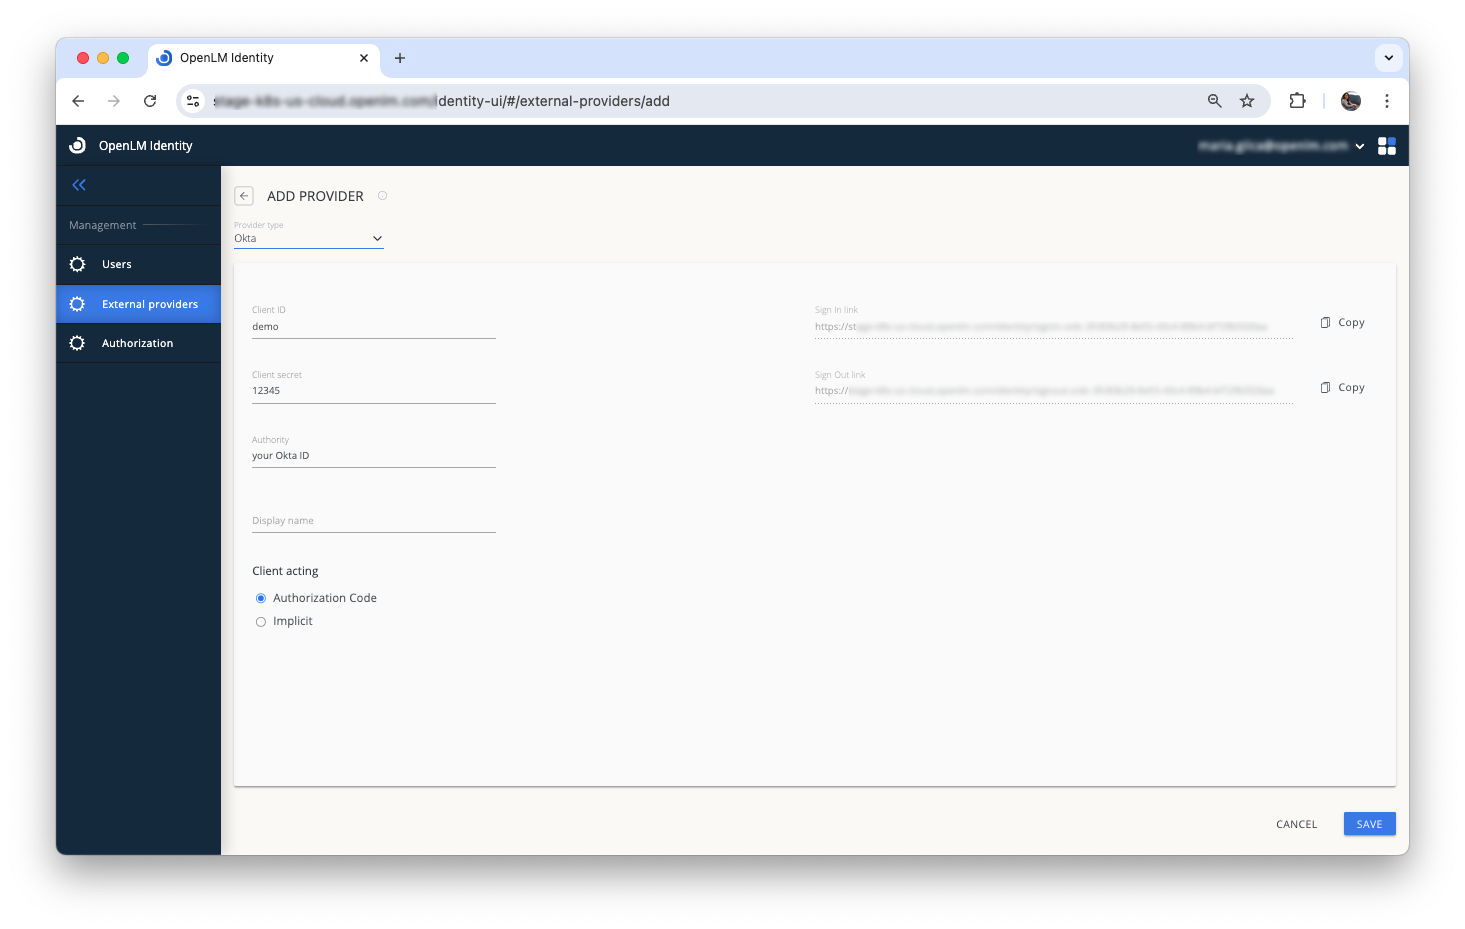
External providers (SSO)
Use the External Providers tab to configure SSO with identity providers such as Okta, ADFS, Azure, or OIDC.
To add an SSO provider:
- Select Add Provider.
-
From the dropdown list, choose one of the following providers: Okta, ADFS, Azure, or OIDC.
-
Enter the required details from your provider account:
- Client ID
- Client Secret
- Authority (e.g.,
dev-12345678.okta.com) - Display Name
To delete an existing SSO configuration:
- Select the provider you want to delete.
- Select Delete and confirm the action when prompted.
Note: To log in via SSO, access the system using the link generated as Login URL along with your account ID.
Client Acting
The Client Acting setting determines how OpenLM Identity communicates with your Identity Provider during Single Sign-On (SSO) authentication.
There are two options:
-
Authorization Code Flow (Secure - Recommended)
Use this option when your Identity Provider requires secure token handling and does not allow implicit grants. It enables OpenLM to authenticate using an authorization code, offering improved security and support for refresh tokens. -
Implicit Flow (Basic)
Use this option only if your Identity Provider allows it. Tokens are passed directly through the browser.
Tip: Check with your IT or security team to confirm which method is supported by your Identity Provider before configuring this setting.
Authorization
In the Authorization tab, generate authorization files to allow OpenLM components to authenticate with the Identity. Components without valid files will be denied access.
Generate a new authorization file
- Select Add Client.
- Select the client type, add a description (optional), then select Save.
- Copy and paste the provided client ID and secret, or download the entire file as
.json.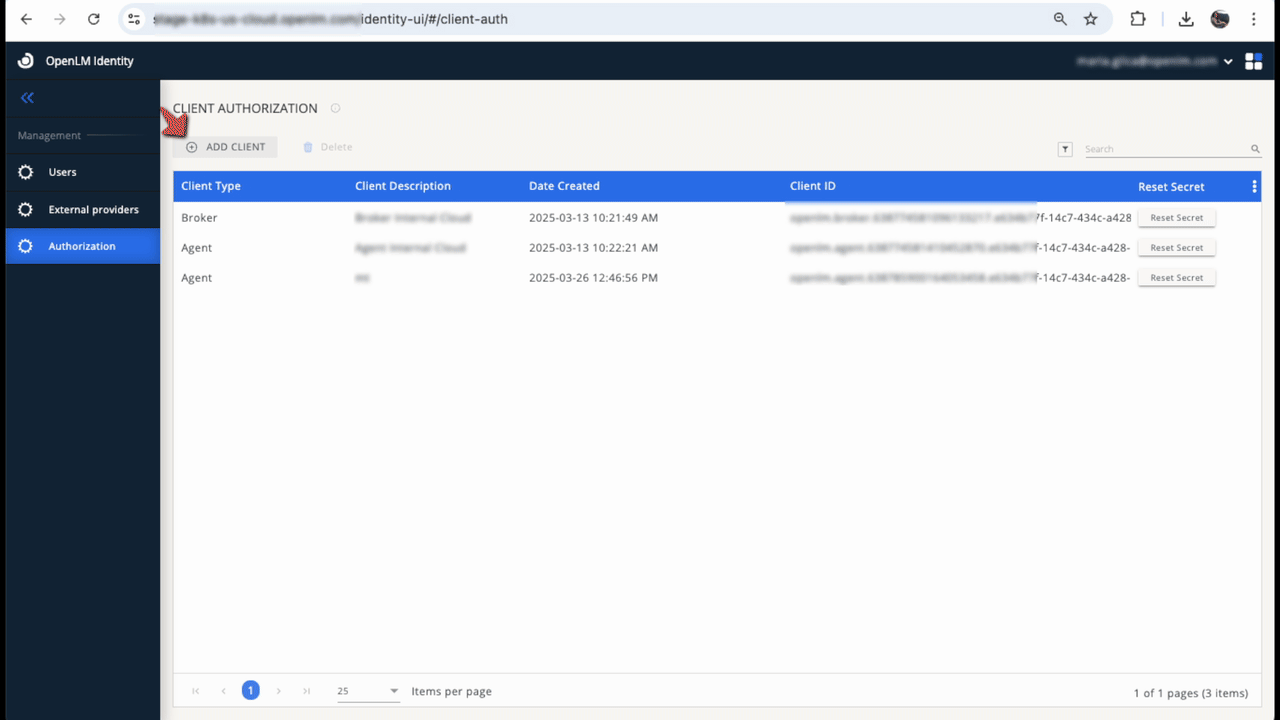
To delete an existing authorization file:
- Select the authorization entry.
- Select Delete and confirm the action when prompted.
- After deletion, components using this authorization will lose access to the system.
Reset client secret
To reset a client secret:
- Select Reset Secret on the desired authorization entry.
- Confirm the action in the confirmation window.
- Copy the new secret or download the new authorization file. After resetting, the previous secret becomes invalid, and components using it will no longer connect to the system.