TASKING
OpenLM can interface with the TASKING License Management System (TLM) via OpenLM Broker to monitor license usage, denials, and other statistics.
Requirements
- OpenLM SLM — on-premises or cloud account.
- OpenLM Broker v4.8.8 or higher installed on the same machine as TLM.
Monitoring capabilities and features
| Feature | Resolution | License totals | License usage | Denials reporting | Borrowed license reporting | Expiration date reporting | Multiple server redundancy |
|---|---|---|---|---|---|---|---|
| Support | By minute | ✔ | ✔ | ✔ | ✔ | ❌ | ❌ |
Broker also provides buffered communication, remote start/stop of the license service, and denials monitoring.
OpenLM Broker configuration

How OpenLM interfaces with TASKING
Broker runs on the same machine as TLM and queries the license manager using the licdstat tool, then sends the data to OpenLM SLM.
Automatic configuration
- Open OpenLM Broker on the TLM license server.
- Go to the License Managers tab and click Detect.
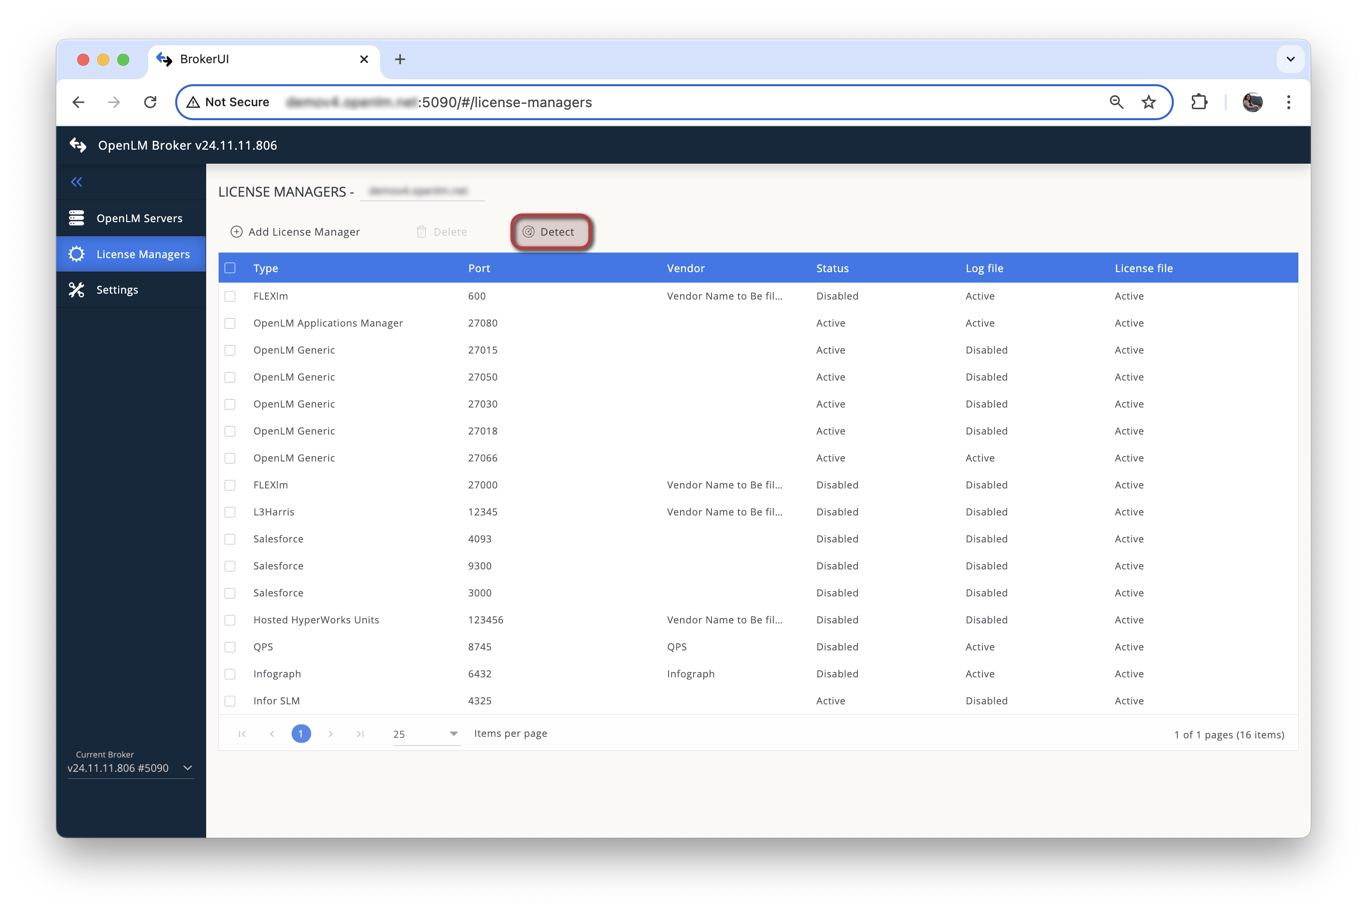
If the TASKING service is running, Broker will detect and configure it automatically.
Manual configuration
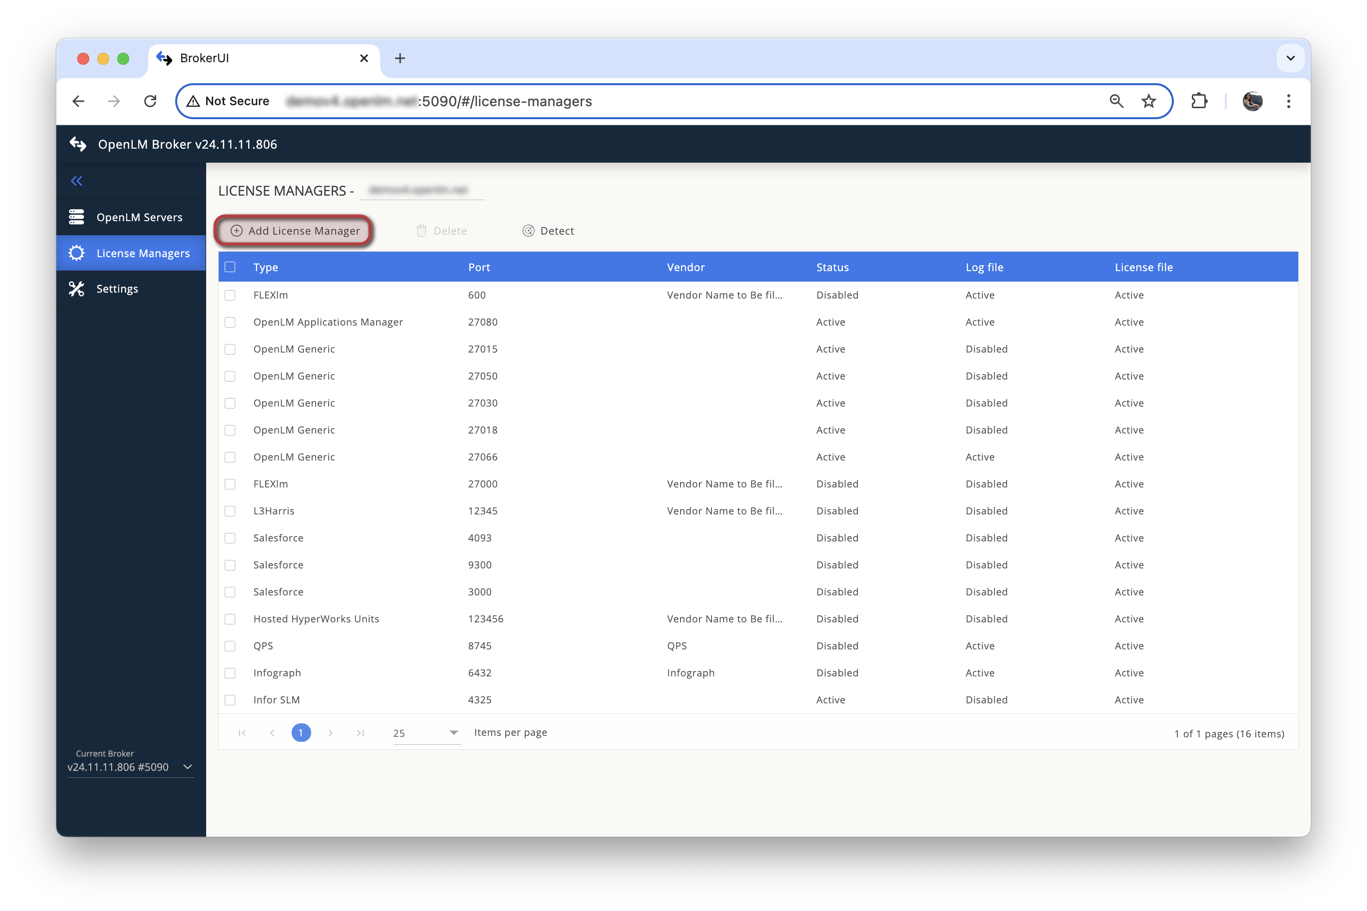
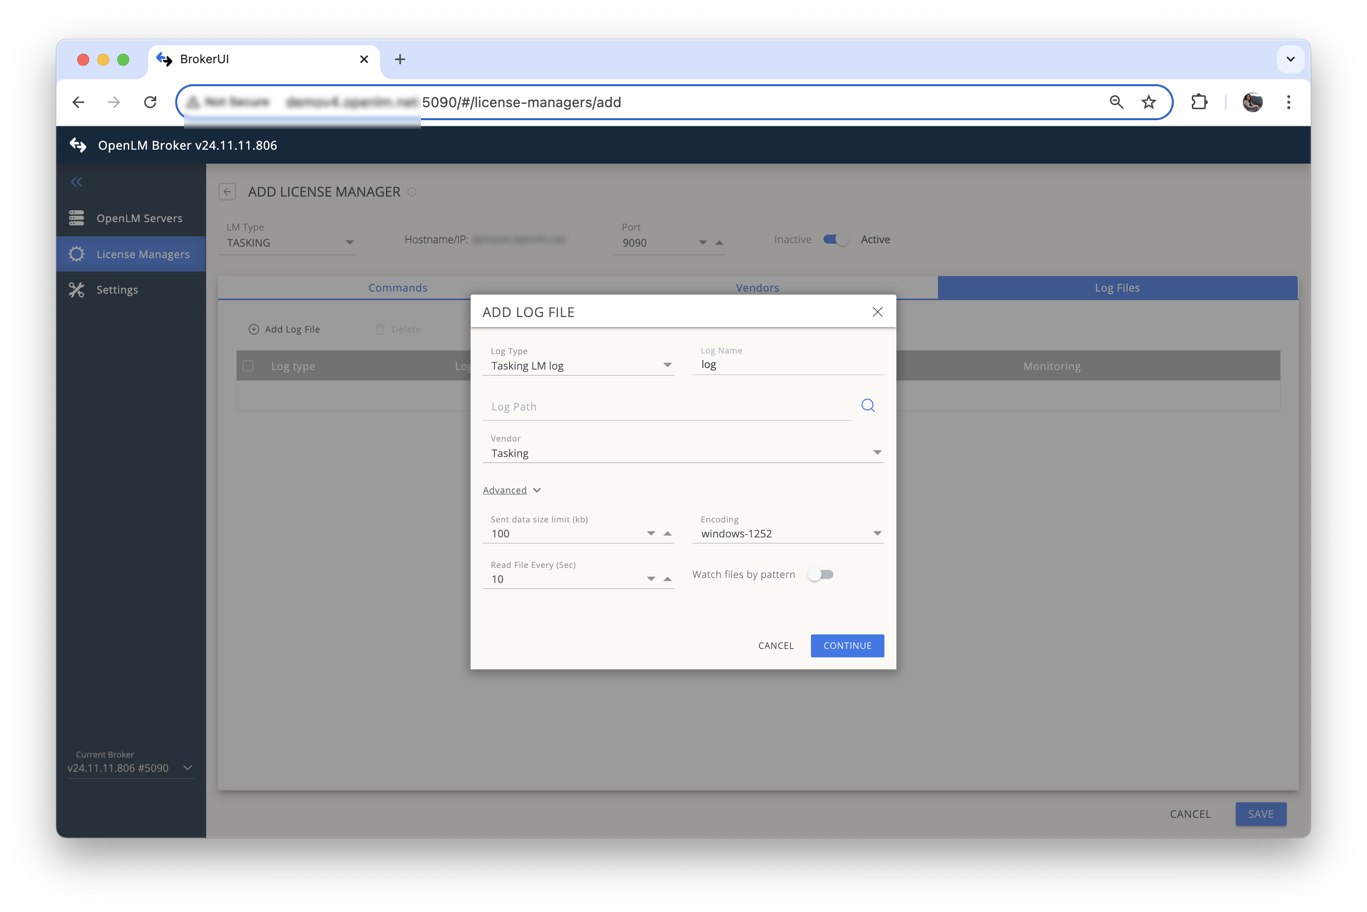
- In License Managers, click Add License Manager.
- Enter the TLM port number (default:
9090). - Select TASKING from the License Manager Type list and click Add.
- In the Commands tab, set the executable path to
licdstat.exe(usually inC:\Program Files (x86)\TASKING\taskinglm) and click Update, then Apply.
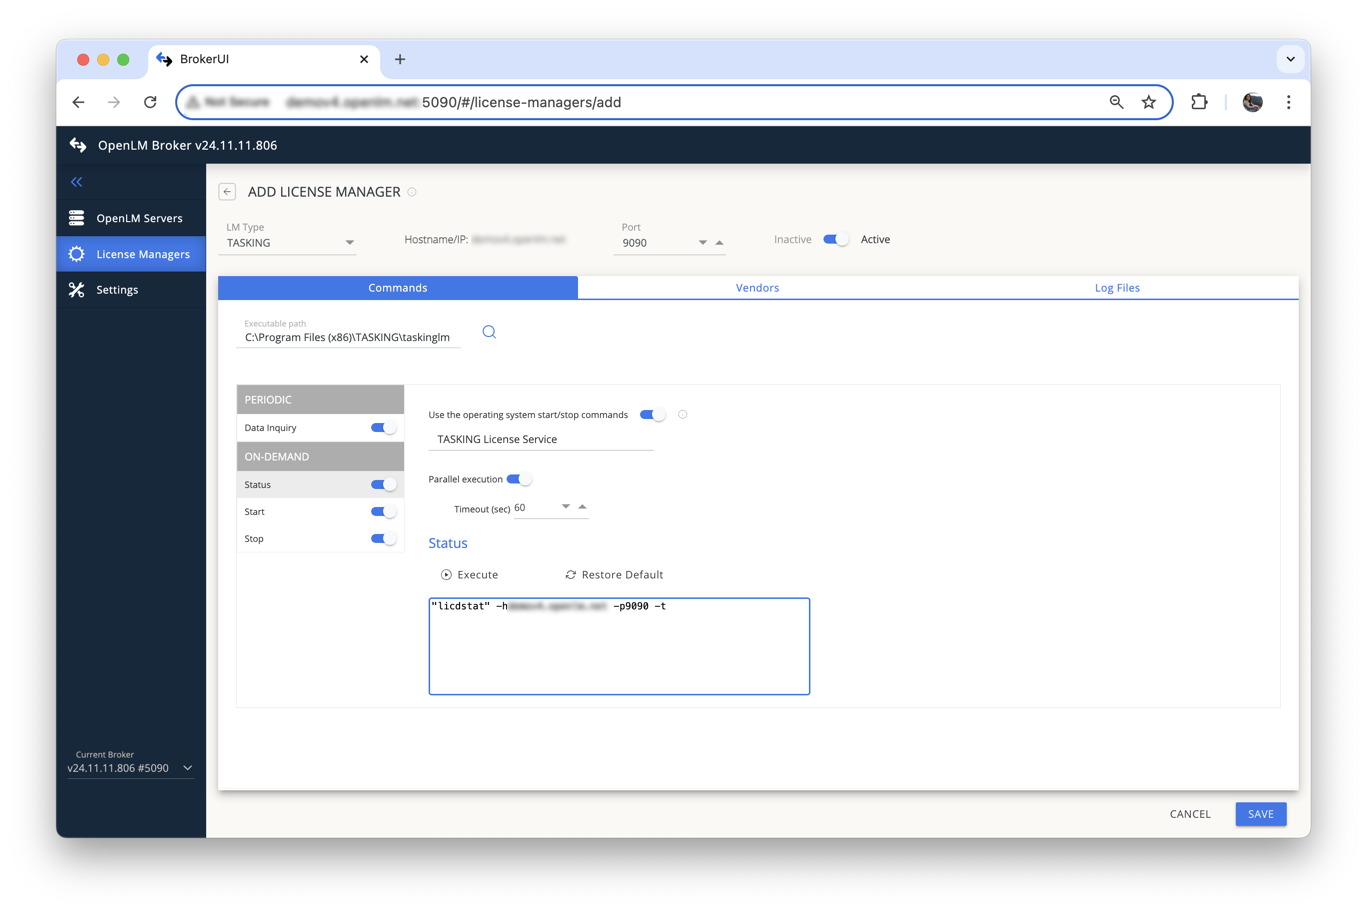
- Click Save, then Execute to verify no errors appear.
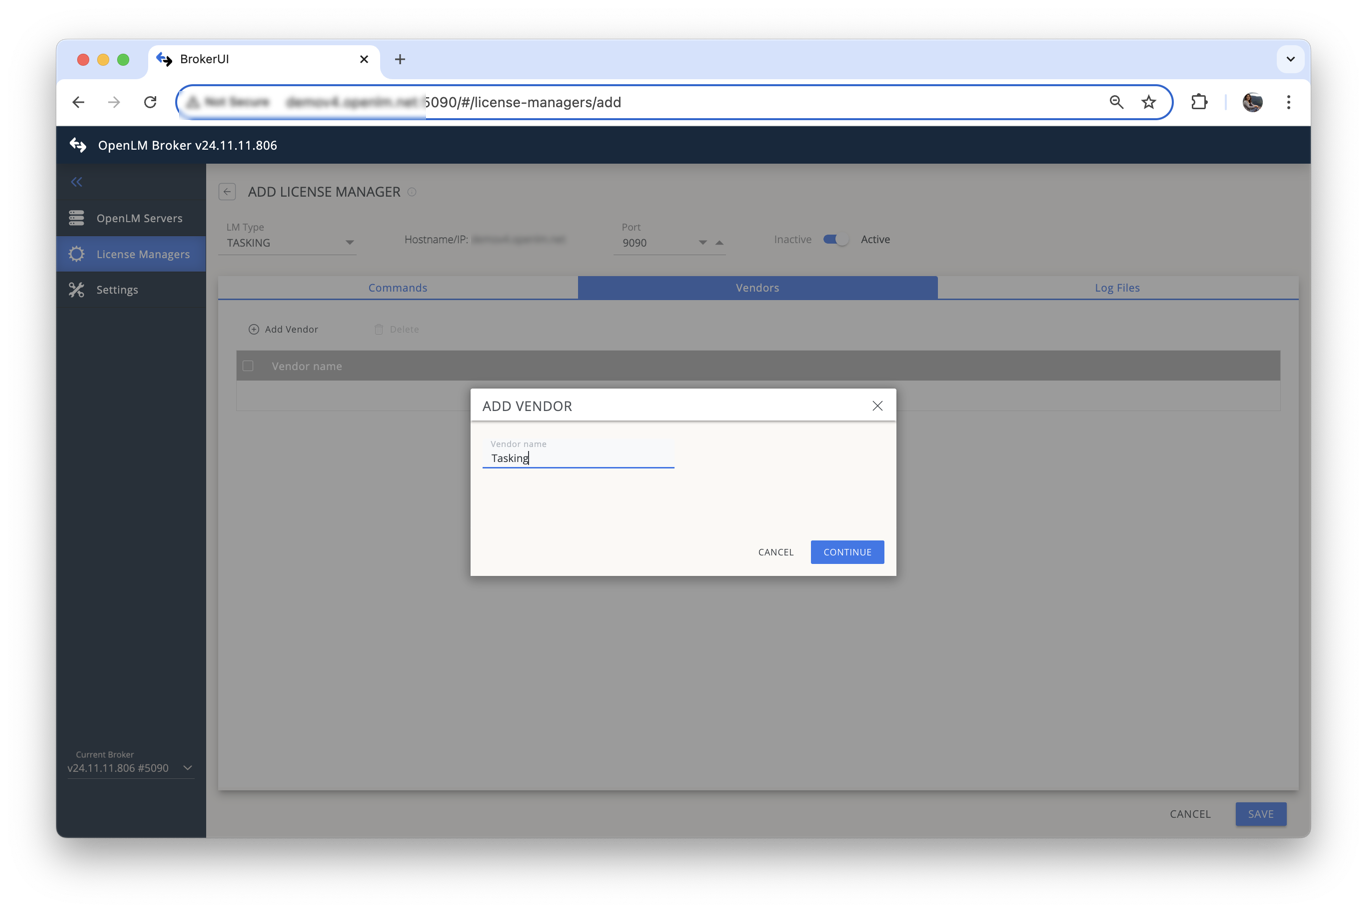
- In the Vendors tab, click Add Vendor, enter the vendor name, and click Continue.
- In Log Files, navigate to the TLM log file to capture denials, then click Continue and Save.
OpenLM SLM configuration
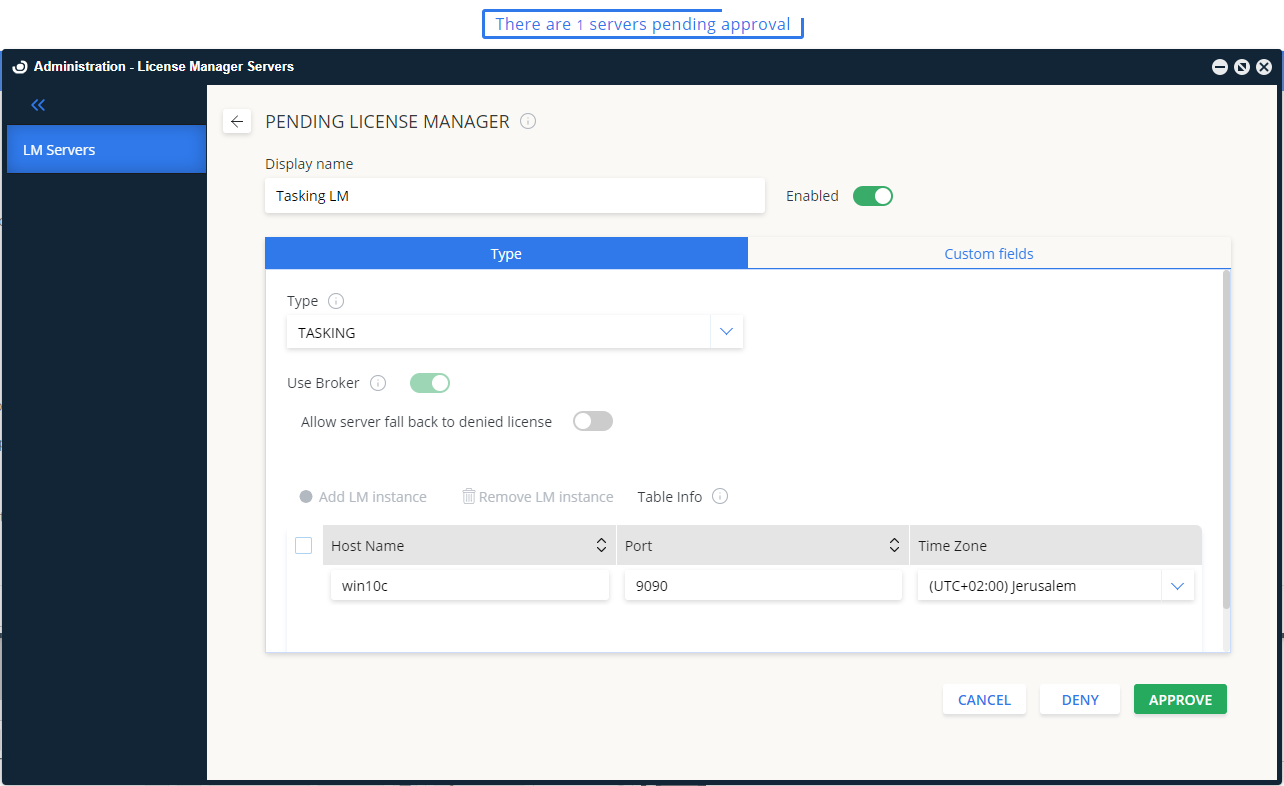
Automatic via EasyAdmin
- Open EasyAdmin (Start → Widgets → License Manager Servers).
- Click the Servers pending approval icon.
- Double-click the TASKING entry and approve it.
Verifying the configuration
- In EasyAdmin, go to Start → Widgets → License Servers.
- Confirm TASKING appears in the list with a green status indicator.
Note: Status updates for new connections may take up to 3 minutes.