Upcoming Webinar: Register now >>

15th

January

2025

Must-attend SAM event of the year

15th

January

2025

Must-attend SAM event of the year

Monitoring the AMP License Manager with OpenLM – KB4001q

Scope

OpenLM supports license monitoring of a wide and ever-growing variety of license managers. This application note elaborates on the steps required to configure OpenLM to interface with the AMP License Manager, and obtain reliable license reports and usage statistics.

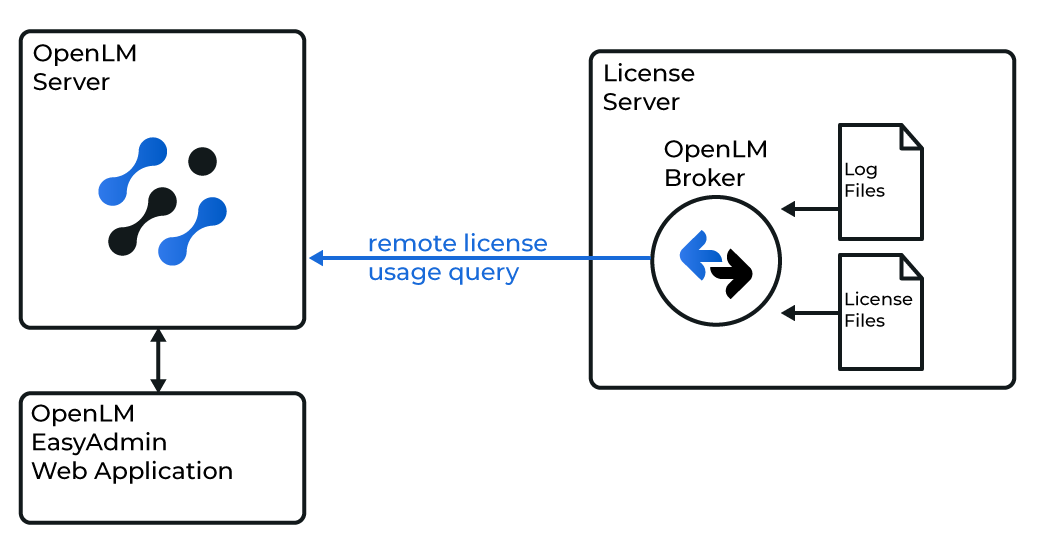
In a nutshell, the AMP license server is configured to provide a periodic XML file OpenLM parses this XML file and presents the usage results in the EasyAdmin web application.


Prerequisites

Monitoring of the AMP license server requires the installation of:

  • OpenLM Broker on the AMP license server machine, and
  • OpenLM Server on any Windows machine on the network (including the AMP license server machine), as elaborated below.

The OpenLM Broker will query the AMP license server locally, and propagate the data to the OpenLM Server.

Broker interface with log and license files


Configuration


Configuration of the OpenLM Broker

  1. Download and install the latest OpenLM Broker version. Follow the installation and configuration instructions on the OpenLM Broker Application Note: OpenLM Broker Download & Document
  2. Select the license manager node then click Add Port in case Auto-Detect couldn’t detect the AMP
  3. Add Port Details:
  4. Click on the amp_server node
  5. Click ‘Add Port’, and click OK.
  6. Type in the port number provided by AMP in the port text box(e.g. 2306)
  7. In the “License Manager Type” drop box, select OpenLM Generic.
  8. Click Apply and then OK.
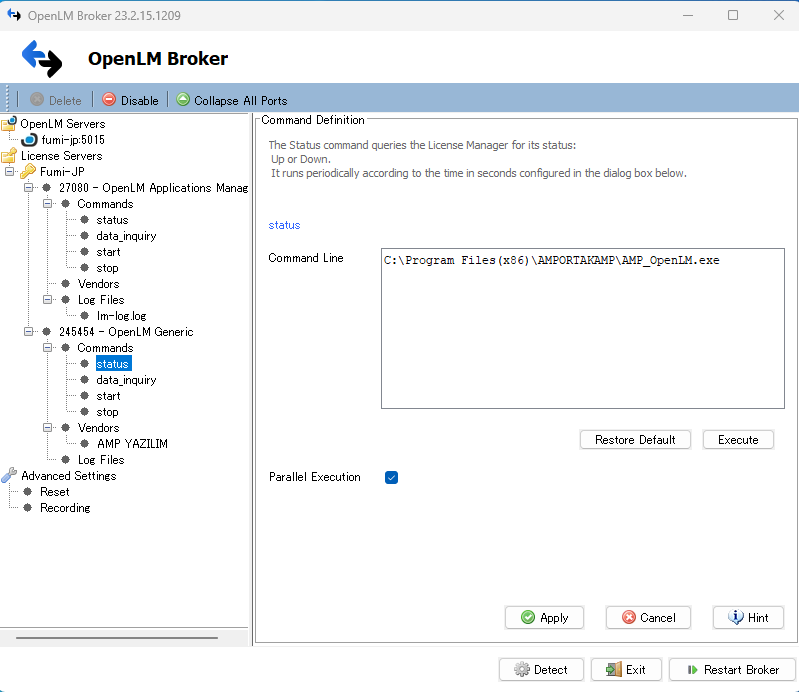
  9. In the ‘‘Commands‘ node, fill in the full path to the ‘AMP_OpenLM.exe’ file, Click Update & Apply. (AMP_OpenLM.exe file is provided by the vendor or installation folder.)
  10. Select data_inquiry and check the path. In this example, the command is:
    “C:\Program Files(x86)\AMPORTAKAMP\AMP_OpenLM.exe”
  11. Click the ‘Execute’ button to check the operation of the Data Inquiry command.
  12. Click the Apply button.
  13. Repeat the stages for the ‘Status’ command.
  14. Expand the Vendors ‘+’ sign and type ‘AMP YAZILIM‘ (case sensitive) in the Vendor text box.
  15. Click ‘Apply’. If prompted by the “Vendor details changed, do you want to update the commands with the new data” – click ‘No‘.
  16. Click the “Restart Broker” button.
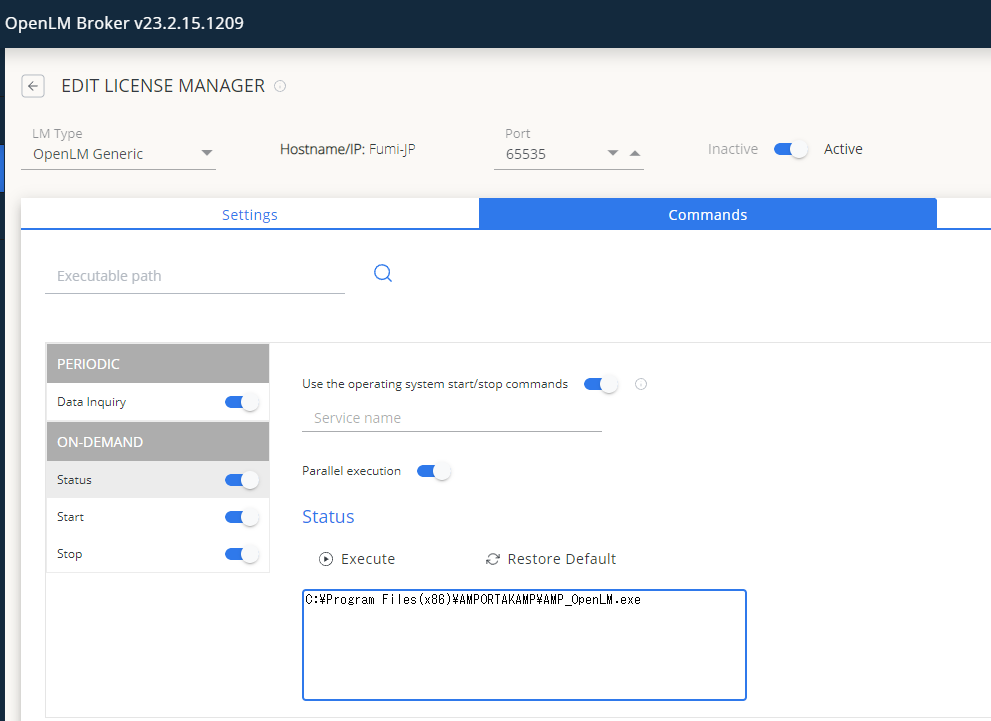
  17. You can also use Broker Browser UI for configuration.
    https://www.openlm.com/knowledge-base/openlm-broker-webui/


Your OpenLM system is configured to present AMP license usage information.

Adding LM Configuration Manually in EasyAdmin

1. Navigate to EasyAdmin→Start → Administration → License Manager Servers.

2. Select LM Servers tab. Add a License Manager.

3. From the Type drop-down menu, select OpenLM_Generic.

4. Type in a descriptive text in the Display Name field (e.g.: “my amp license server”).

5. Set the Time Zone to where the License Server physically resides (e.g.: Pacific time).

6. Submit appropriate Hostname and Port numbers (e.g. amp_license_server and 2306 respectively).

7. Use Broker checked.

8. Click Save. Restart OpenLM Server Service in Windows Service.


Verify the AMP configuration

Verify the OpenLM configuration to monitor the AMP license server via the EasyAdmin User Interface.

  • Open the EasyAdmin User Interface.
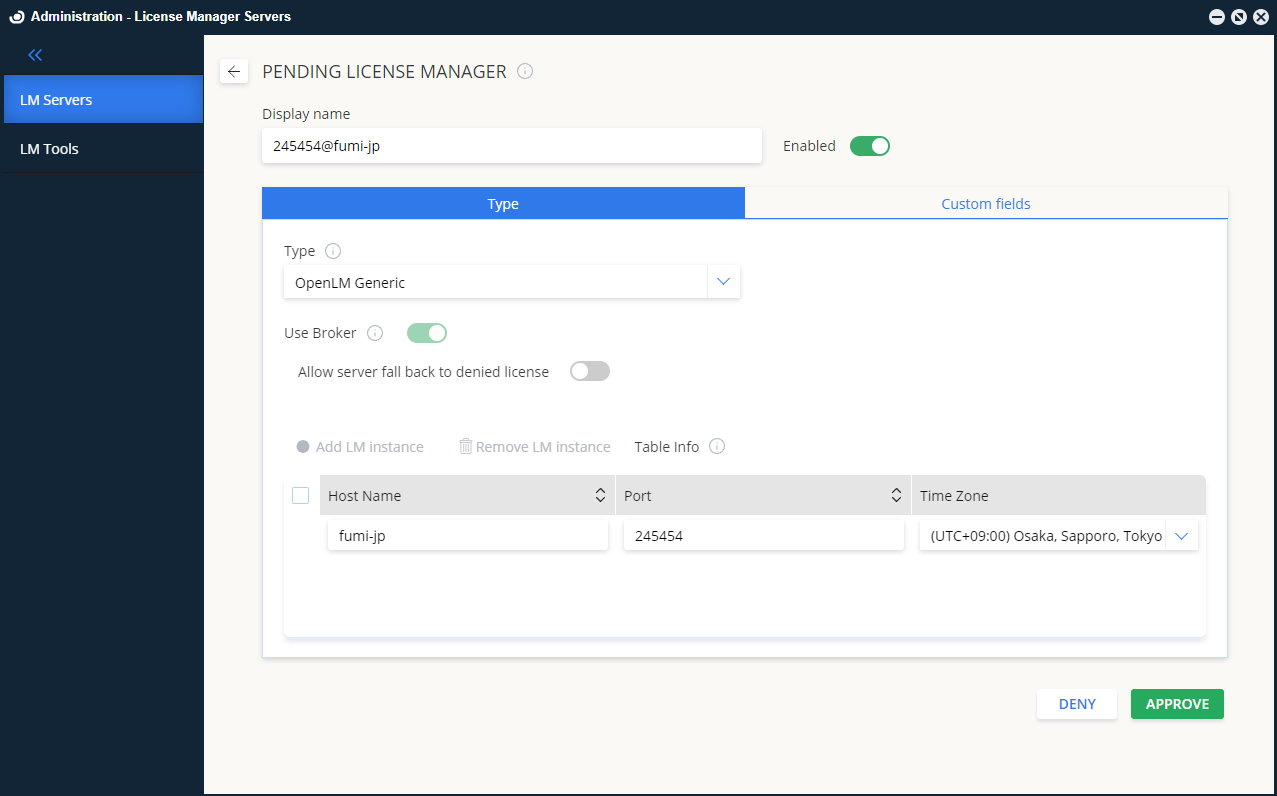
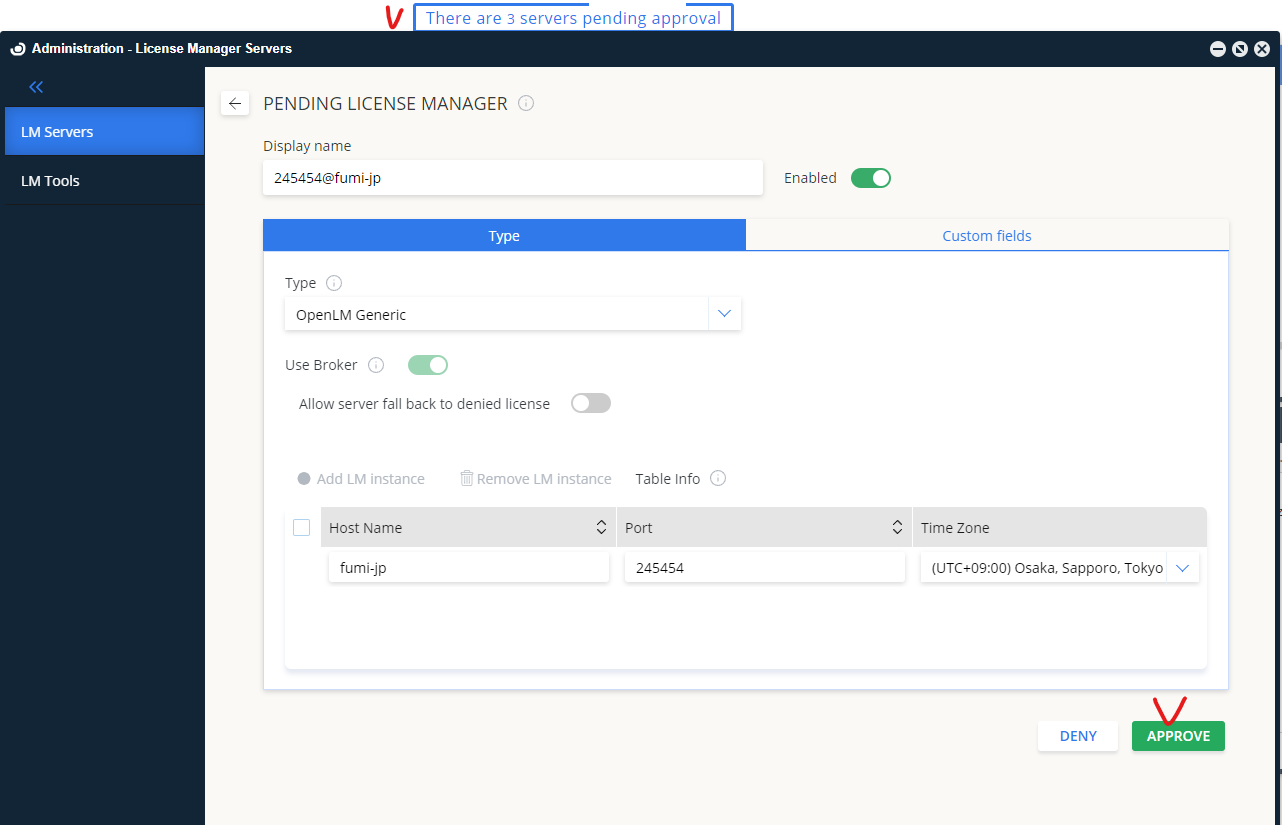
  • Click the link for Pending Approval. Approve the AMP.
  • Verify that the configured license manager appears on the list. A green circle node indicates Up-to-Date connection to a license server.

What are your feelings
Skip to content